Changing Leaves Bundle and Stunning Watercoloring

A Little Note…
For this week’s Marvelous Monday Facebook Live, I played with the lovely 3-piece Changing Leaves Bundle! Every fall, I love creating vibrant fall leaf colors with watercoloring with Stampin’ Up!’s wonderful colors and Fluid 100 Watercolor Paper. This year I am going to scrapbook with the leaves as well.
This amazing Online Exclusive bundle includes the 8-piece Changing Leaves Stamp set, 10-piece Dies and the Hybrid Embossing Folder. The results with this hard working team are wonderful! (Please note, that while the embossing folder shows out of stock, they should have more available starting September 9, 2024.)


I started with the Very Vanilla CS for an A2 base (8-1/2”x5-1/2” scored at 4-1/4”). I then embossed a 4-1/8”x5-3/8” layer of Very Vanilla CS and glued it to the card front.
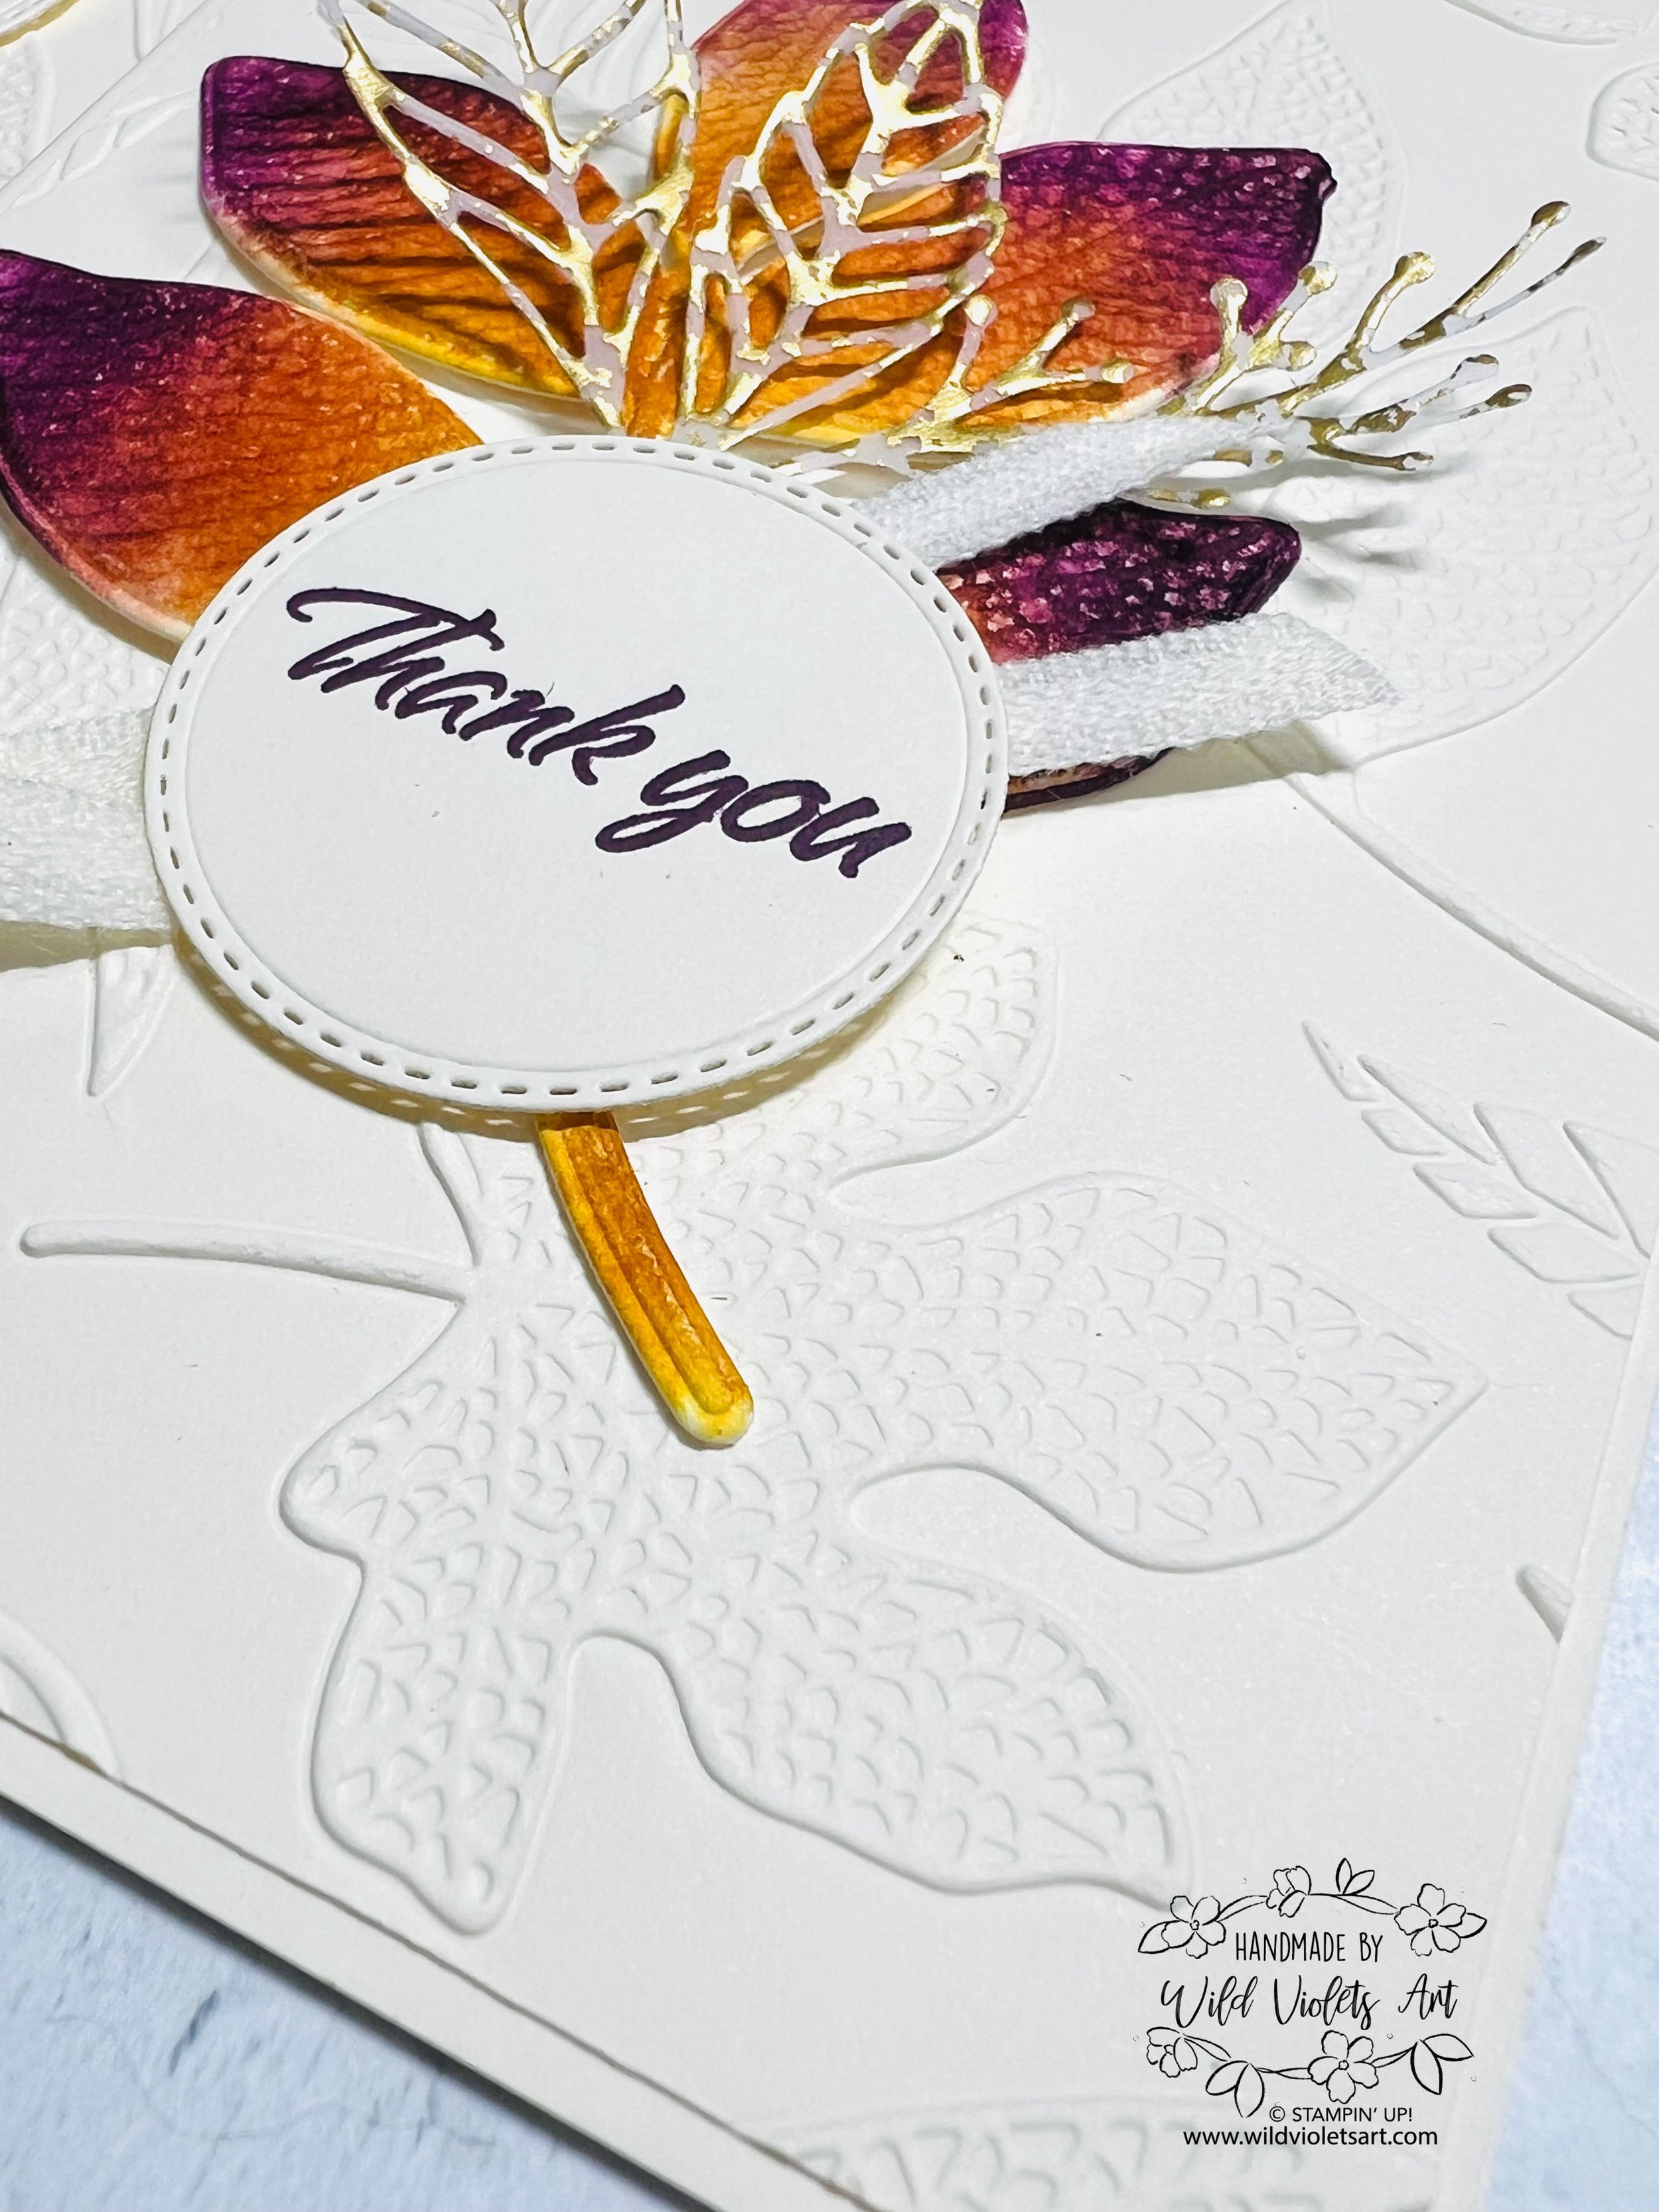
I have created a YouTube video showing how I achieved the vibrant colors using Fluid 100 Watercolor Paper in THIS LINK. I started with a 5”x7” piece of the watercolor paper. In my video, I showed two ways you can achieve the vibrant fall colors. The colors I used for this image was Crushed Curry, Cajun Craze, Mossy Meadow & Blackberry Bliss (for my video, I used Winter Wheat, Copper Clay and Moody Mauve to match my future scrapbook layout). I used Sponge Daubers to apply the color to either a stamped image of the leaves or to the embossed image of the leaves. Both work great.
More photos and my how-to video linked below…

I think the easiest way to get the colors where you want them is to emboss the paper first, then apply your colors using the sponge daubers. Once you have the coverage you want, use water with a Stampin’ Spritzer to let the colors bleed and become vibrant.
Once the paper dries, you can emboss it again with the die inserted in your hybrid embossing folder. So very pretty.
More photos and my how-to video linked below…

I used some extra watercolor paper to die cut the extra leaf pieces and used the gorgeous Gold Mercury Vellum for the remaining pieces.
For my placement, I started with either the largest watercolored and embossed leaf or the two smaller (both work) and added Stampin’ Dimensionals to adhere the leaf to the card front. I then started to add the other leaves under and over in a pleasing order.
More photos and my how-to video linked below…

I stamped my sentiment on Very Vanilla CS and die cut it with one of the Changing Leaves Labels. For my trim, I used the Copper Clay Jute Cord and unwound it so the 3 strands are separated and I used just one third of the Cord and adhered it to the back of my label, then popped it up with Stampin’ Dimensionals as well.
With the Gold Mercury Vellum, I did not add any other embellishments as this card turned out really lovely. I hope you will try the dauber/spritzer technique as well and share with me how it worked for you!