February Stamp Class
I love to watercolor, but nothing like the beautiful backgrounds you will find in the New Horizon Suite Collection.
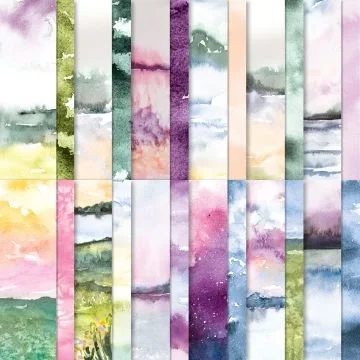
The New Horizons 6" x 6" Designer Series Paper might possibly be the most beautiful patterned paper you’ll ever buy.
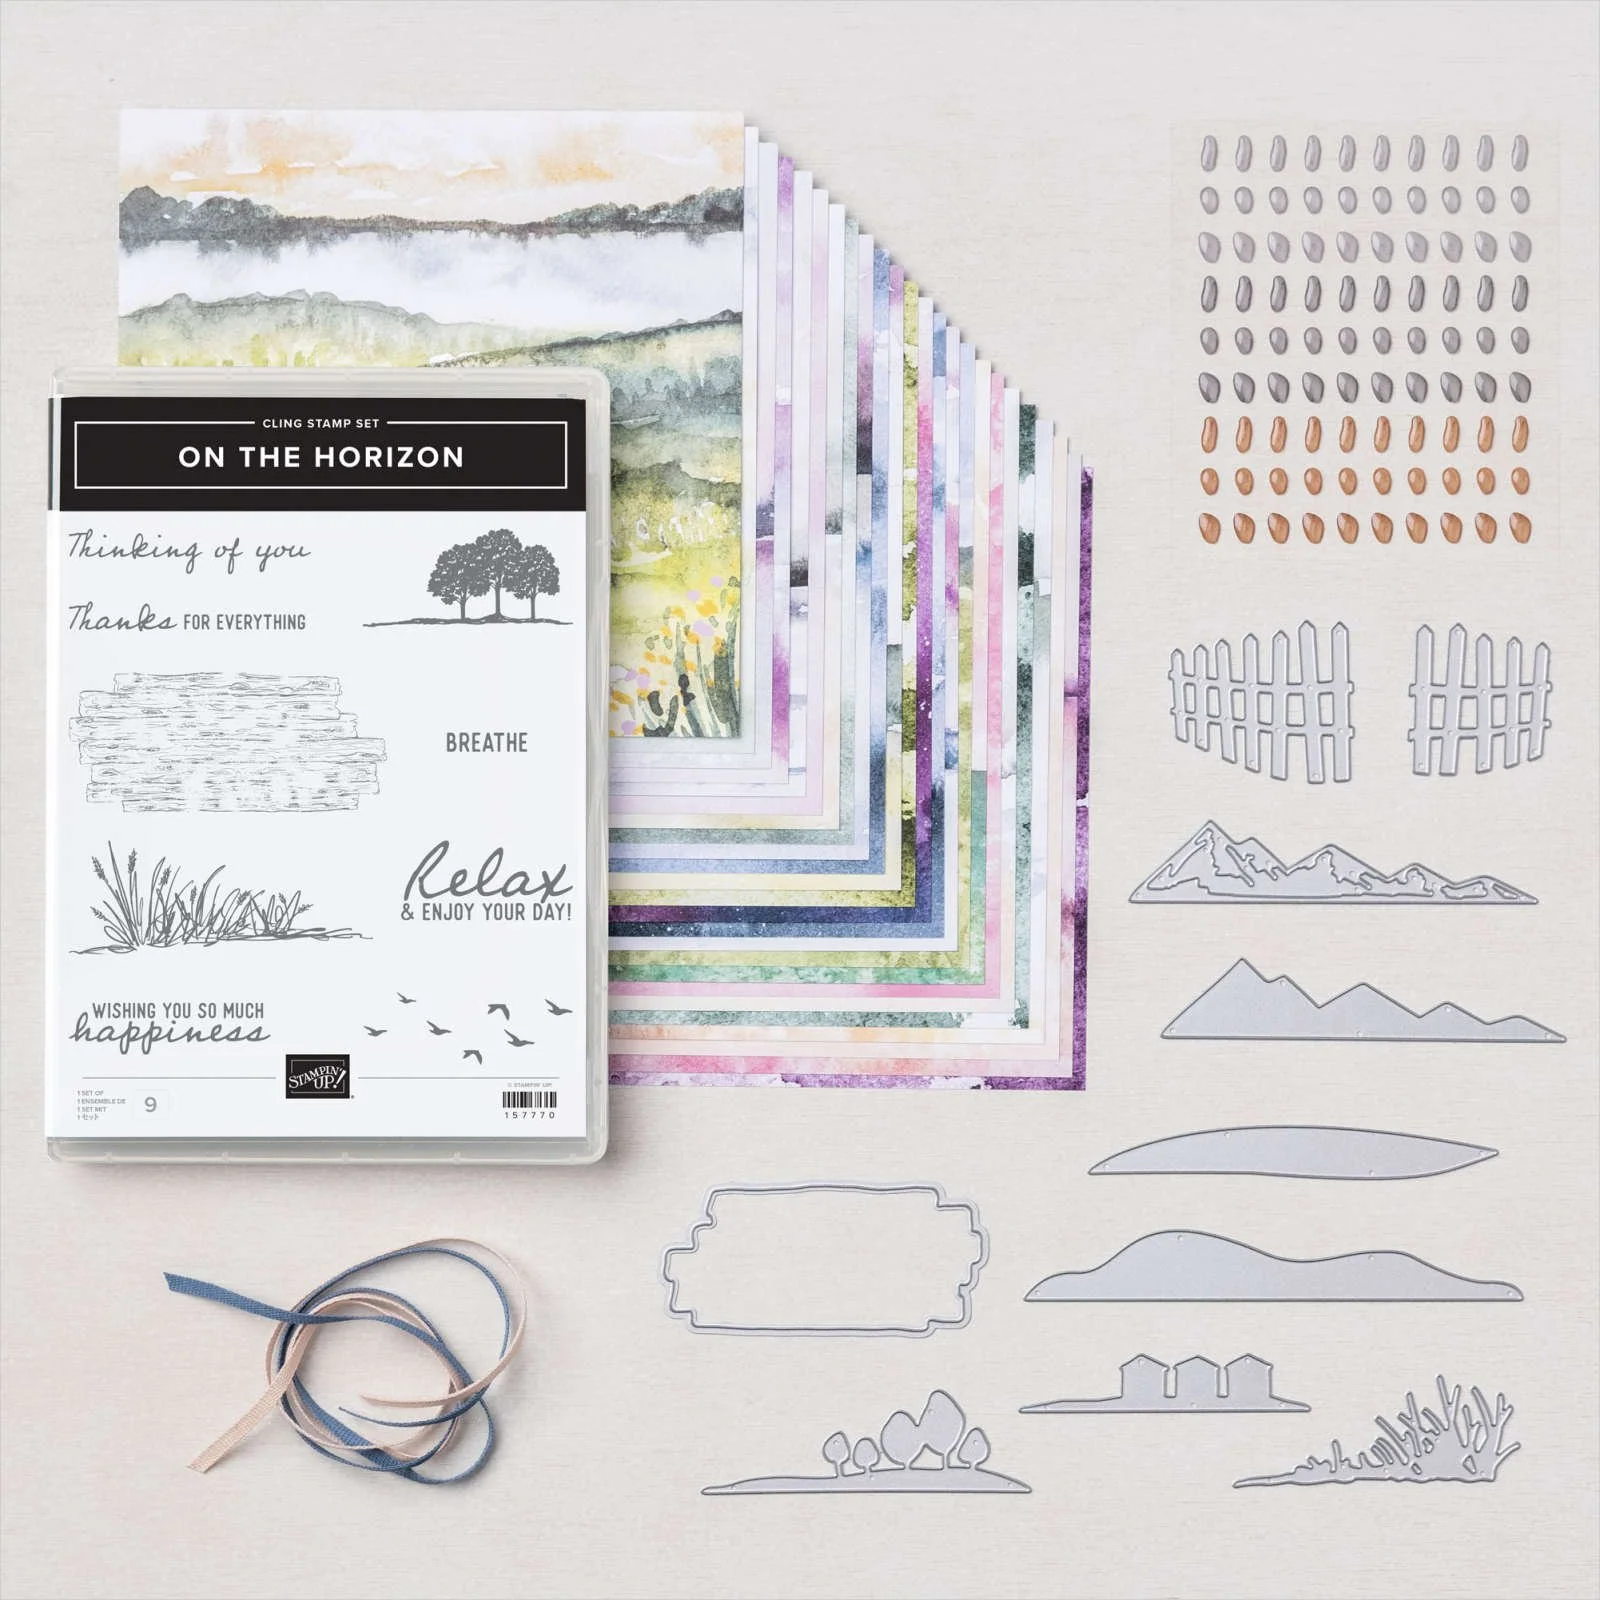
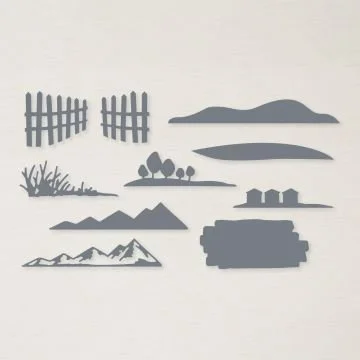
These horizon scenes were handpainted by one of Stampin’ Up’s talented artists. The tranquil watercolor imagery will look beautiful as a background on a card front or on a scrapbook page. It’s versatile, too. Turn the paper upside down to change water to sky or whatever you can imagine. Pair the stunning paper with the stamps and dies, and the creations you can achieve will thrill you! The New Horizon Suite Collections also includes the On The Horizon Bundle, Pebbles Enamel Shapes, and 1/8” Cotton Ribbon Combo Pack.
I enjoyed teaching my class how to make these cards and hope you are willing to join my product based classes in the future! I include all the cardstock, envelopes, boxes, and embellishments necessary to make the 4 (or more) projects, and die cut or dry emboss anything not included in the bundle.
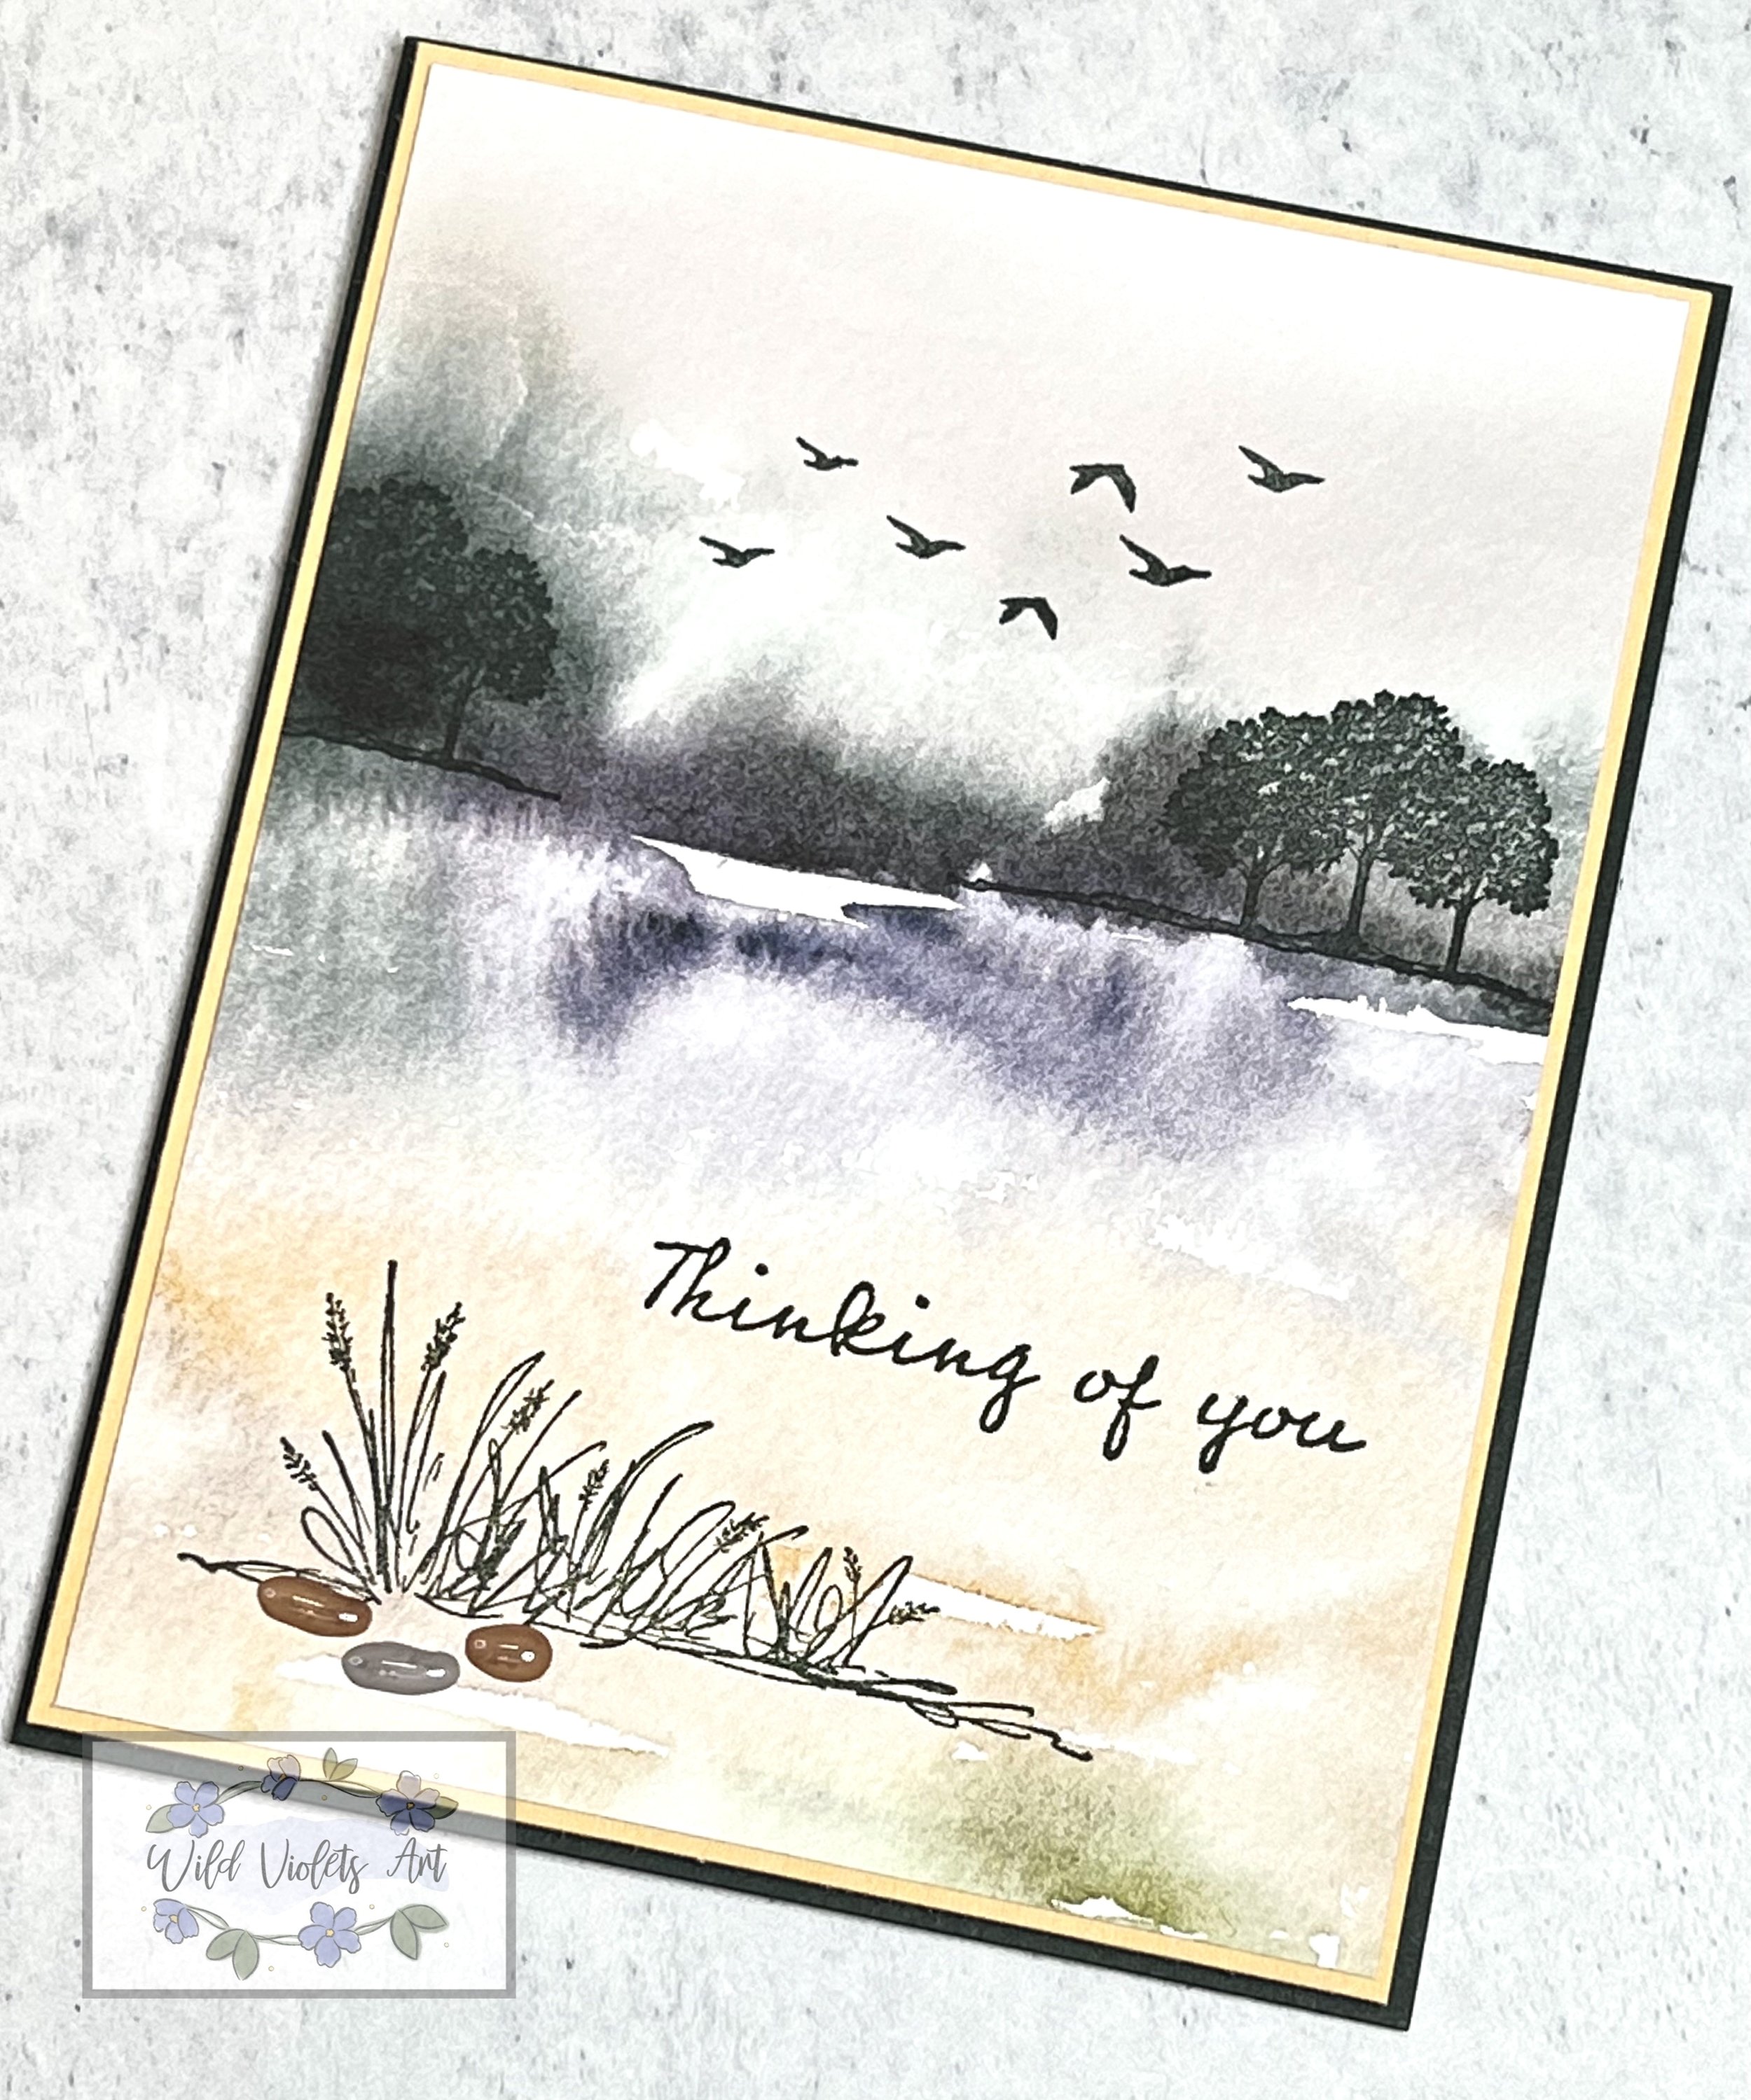
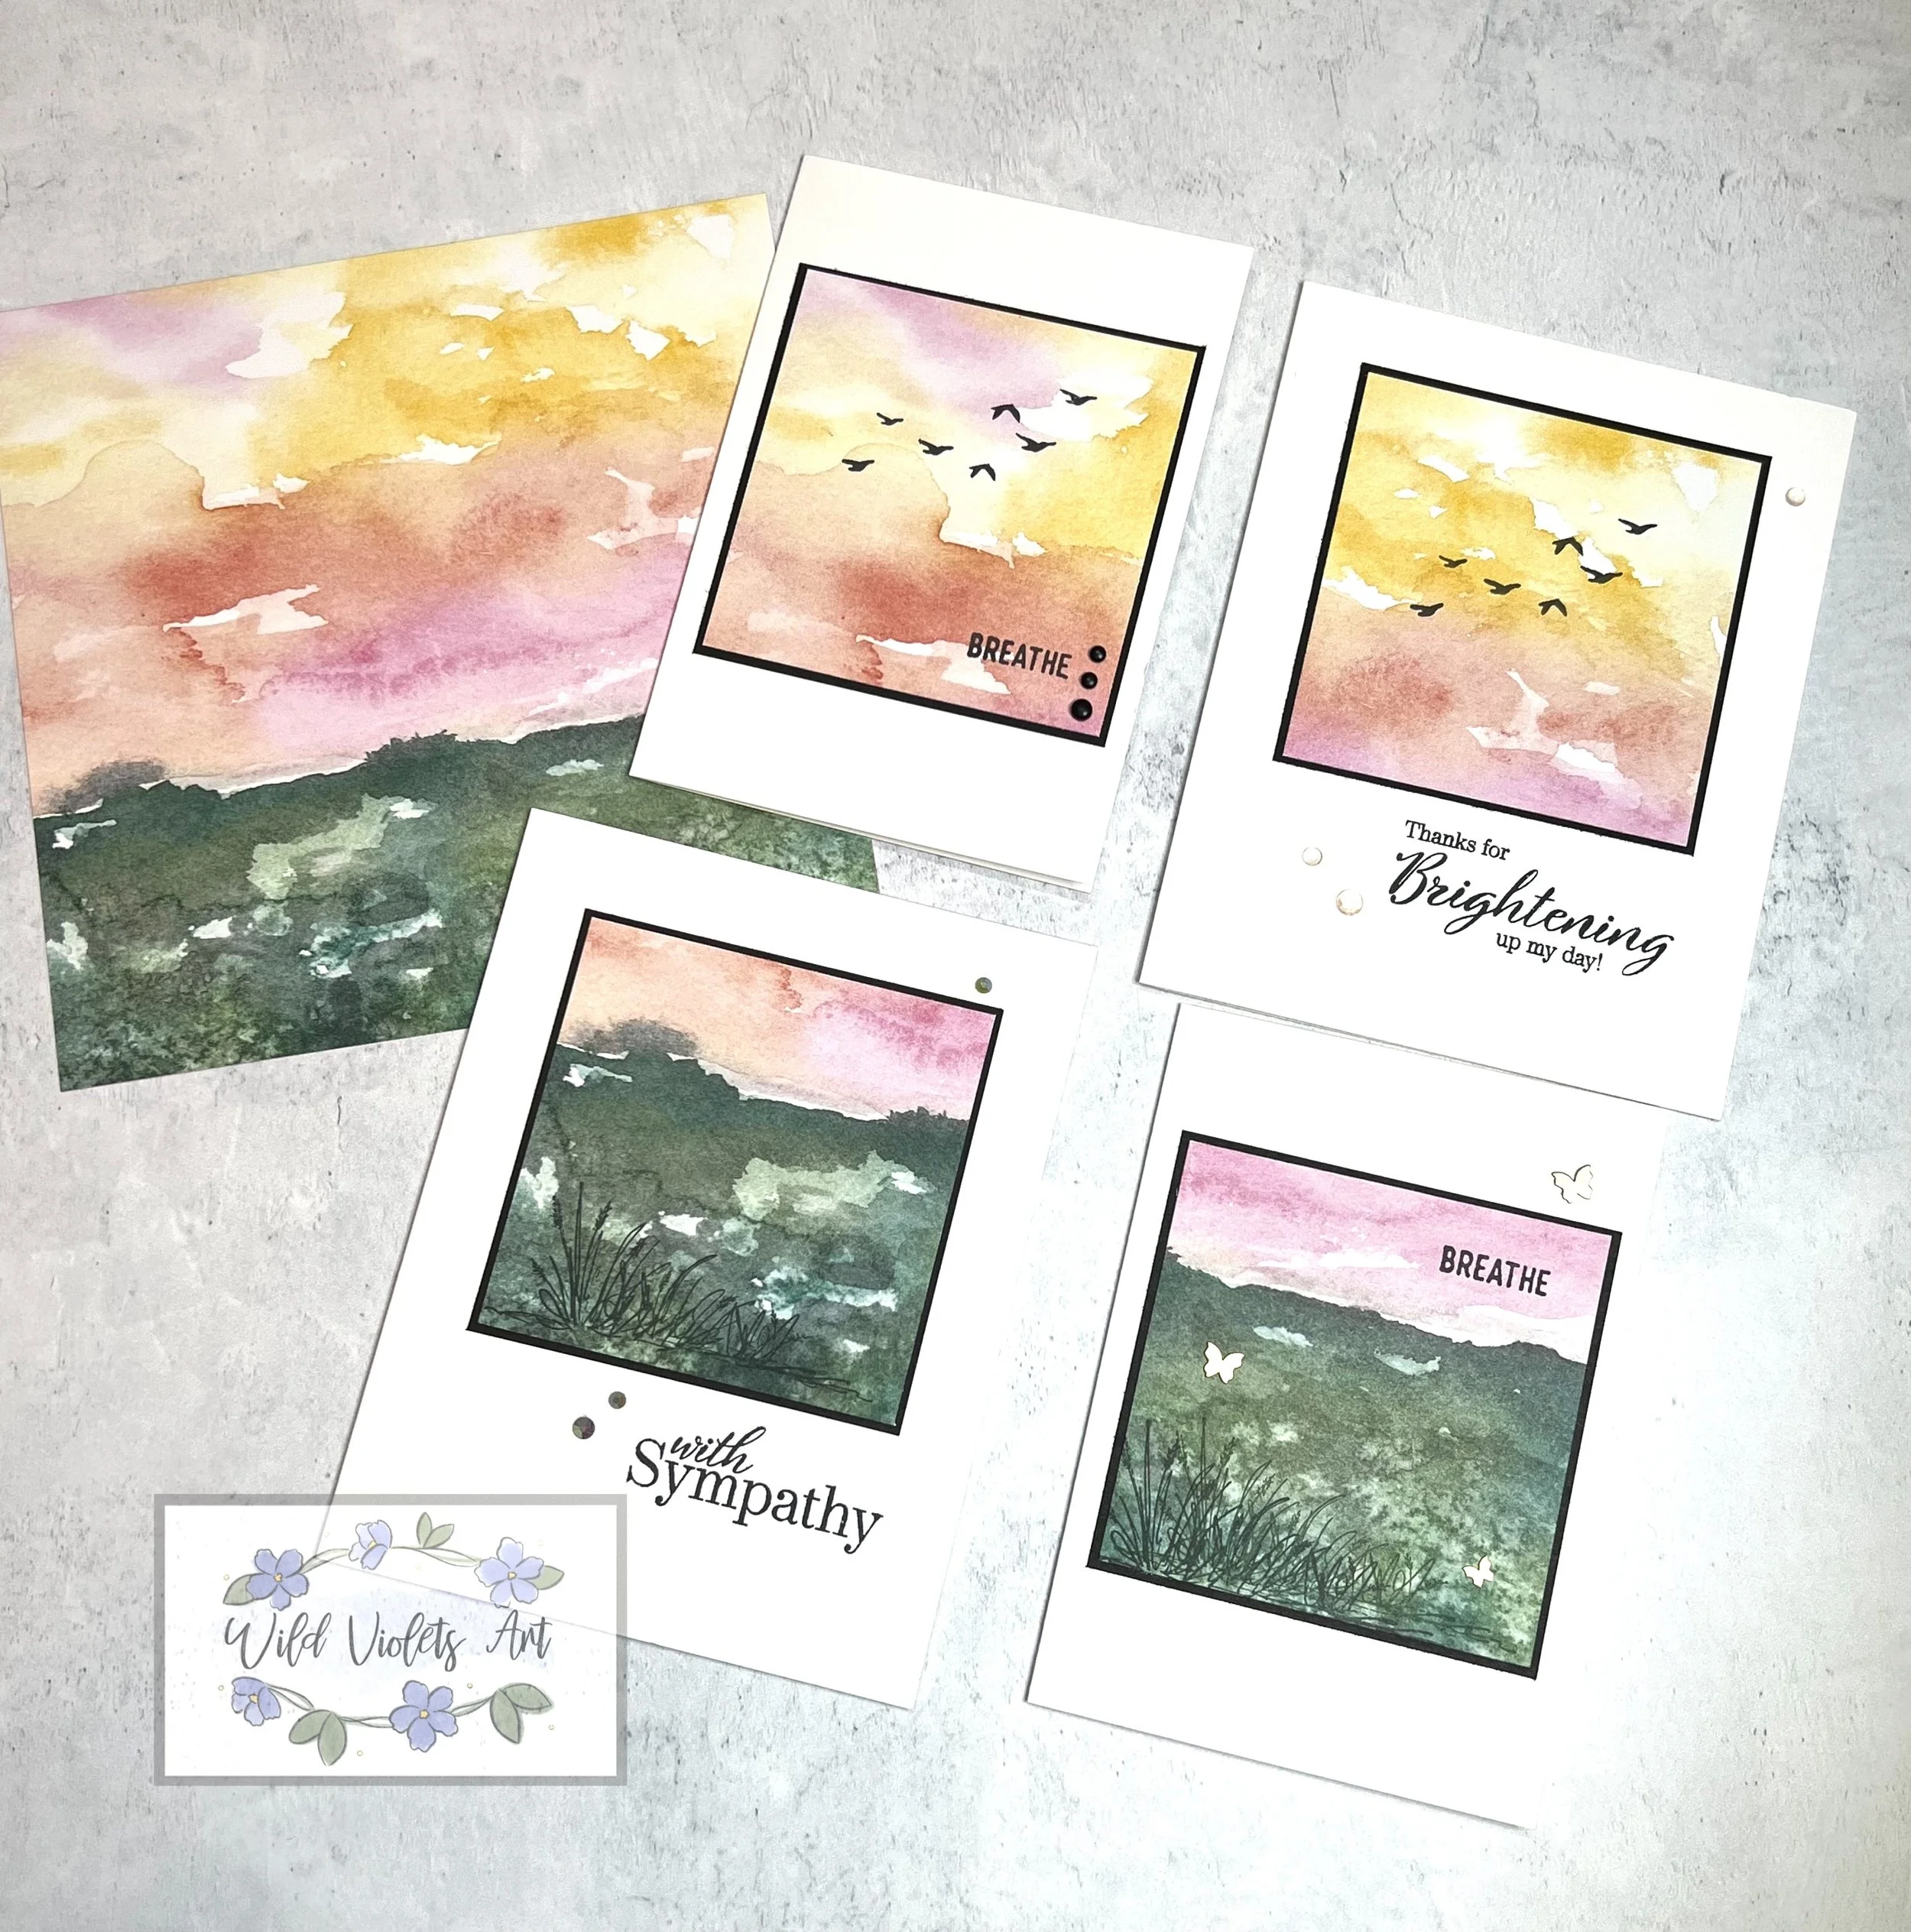
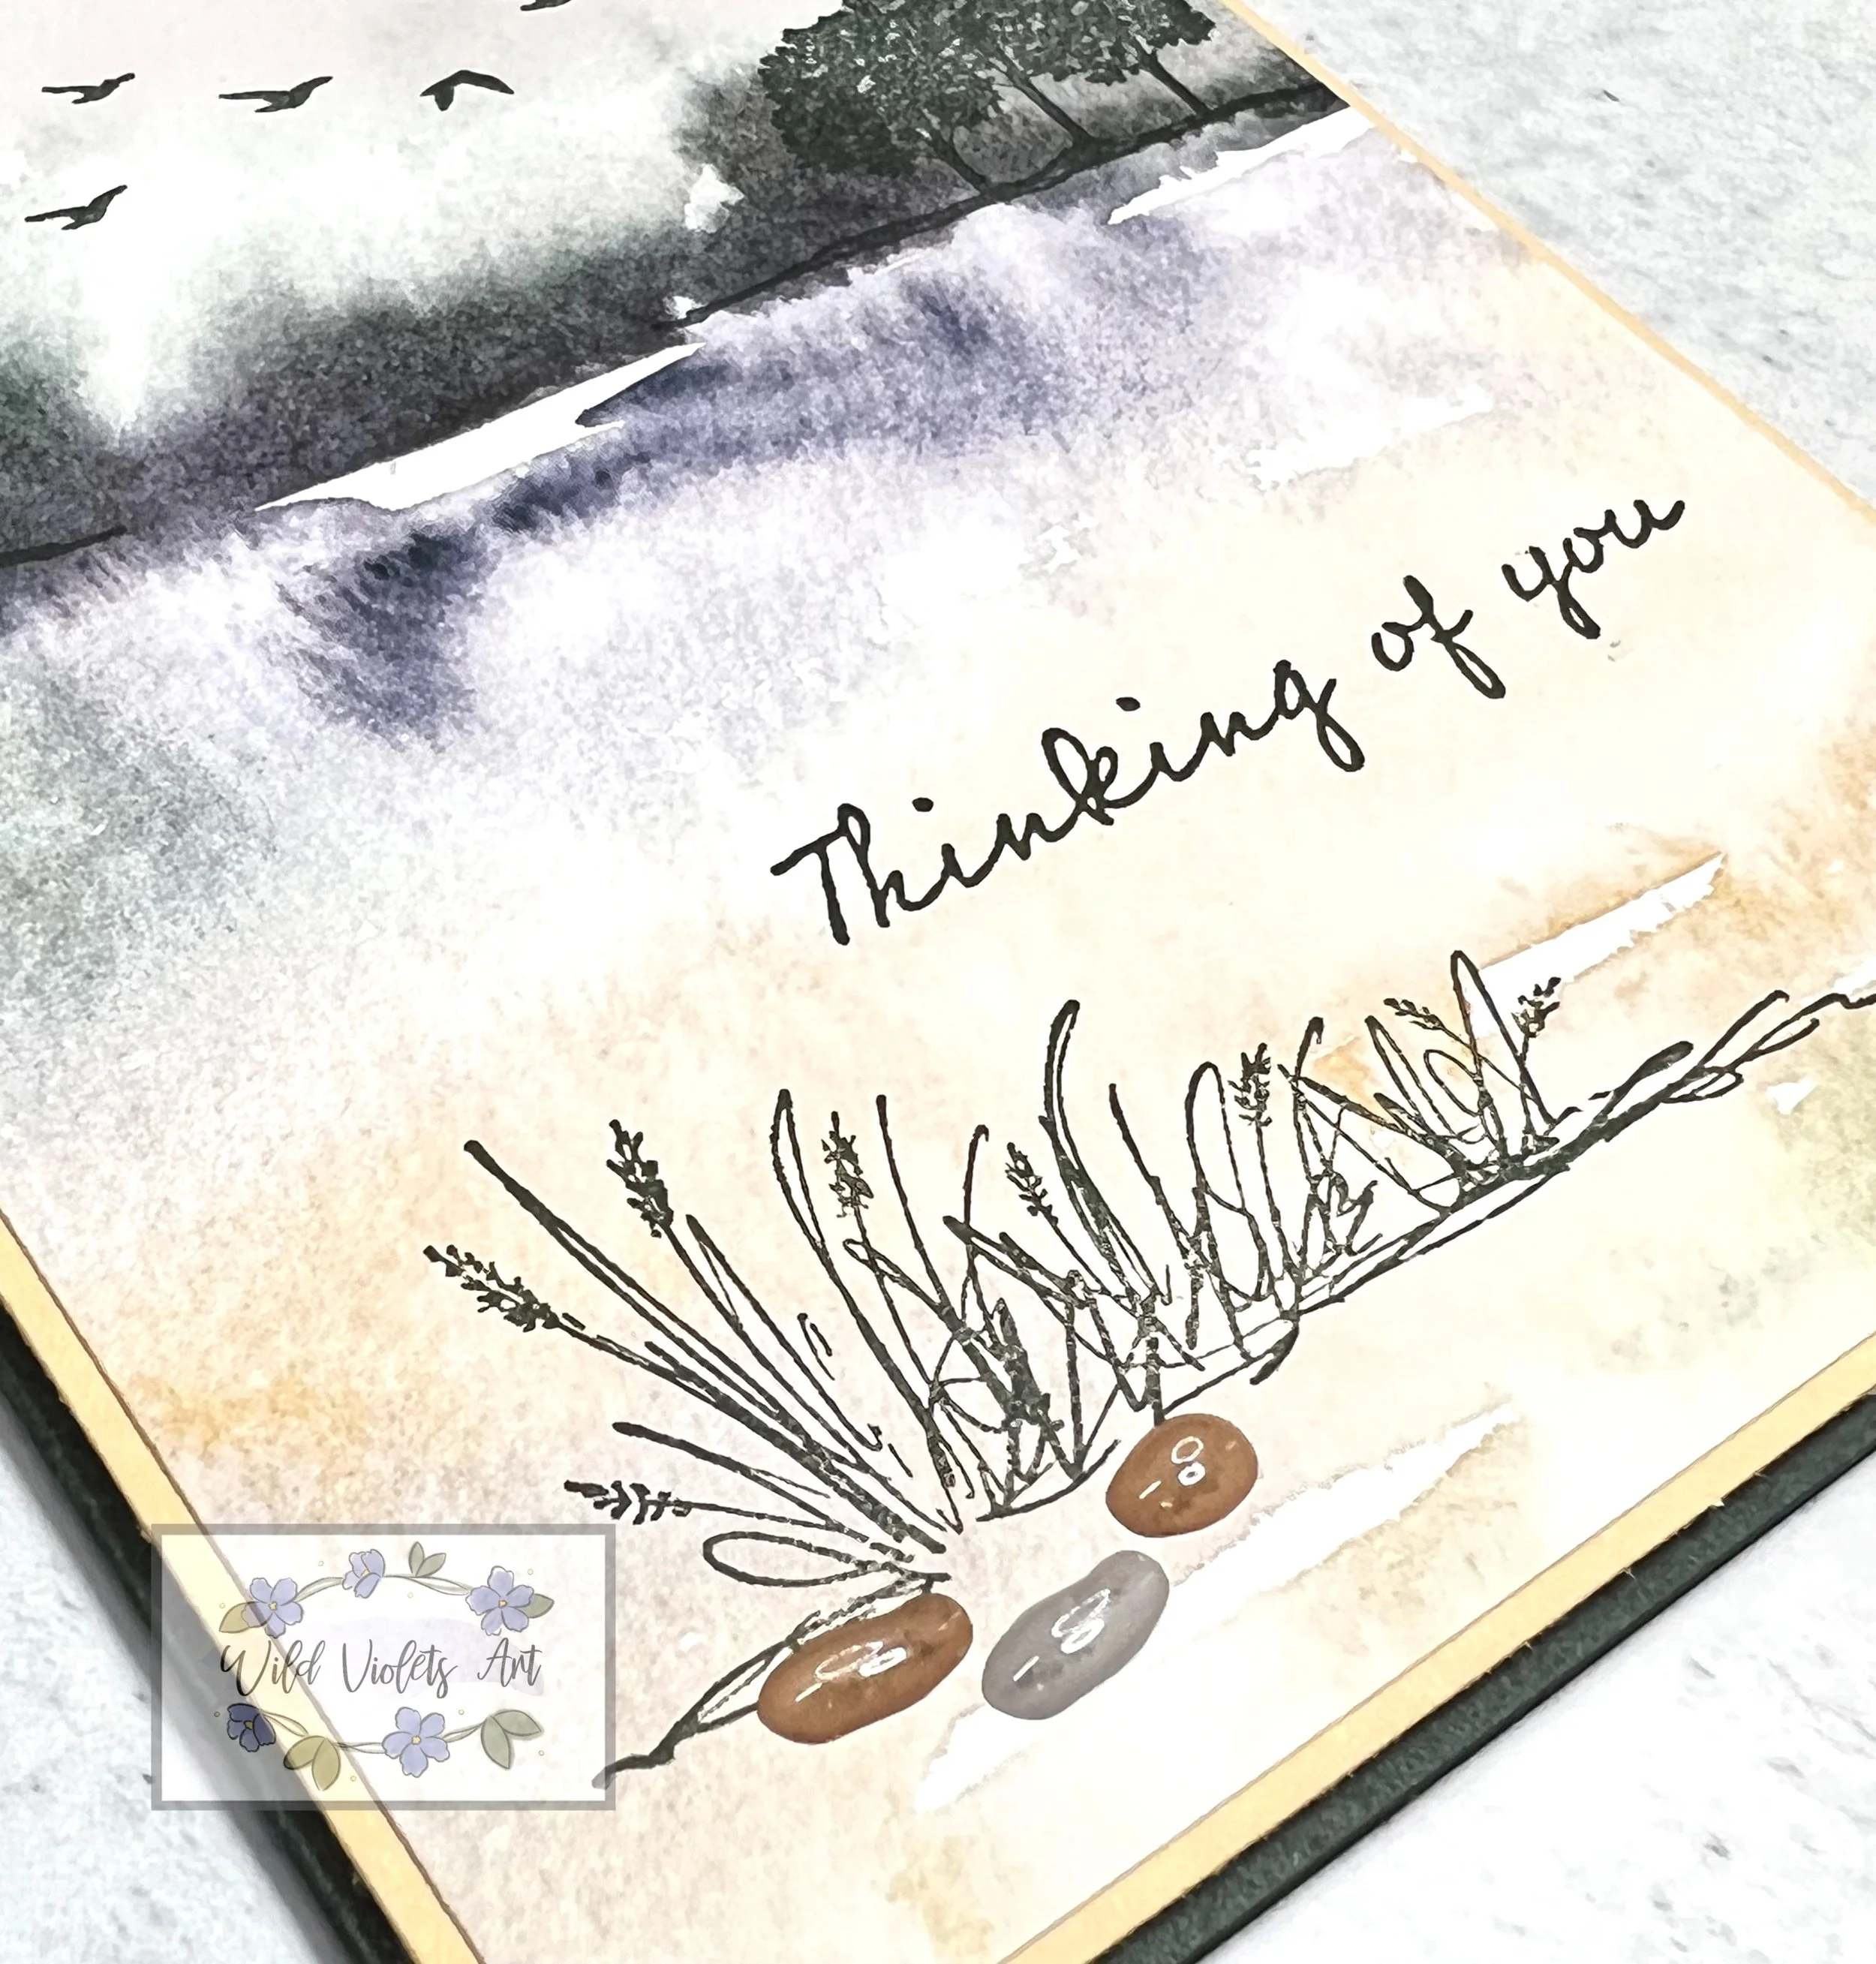
Thinking of you card
ITEMS NEEDED:
On The Horizon Bundle #157779
Evening Evergreen Stamp Pad #155576
Evening Evergreen CS #155574 – 8-1/2”x5-1/2”, scored at 4-1/4 (card base)
Pale Papaya CS #155668 – 4-1/8”x5-3/8”
New Horizons DSP #157768 – 4”x5-1/4” (card front) & scraps for inside of card or another card
Pebbles Enamel Shapes #158141 – 3 ea
White paper for interior – 4”x5-1/4”
Medium Envelopes Basic White #159236
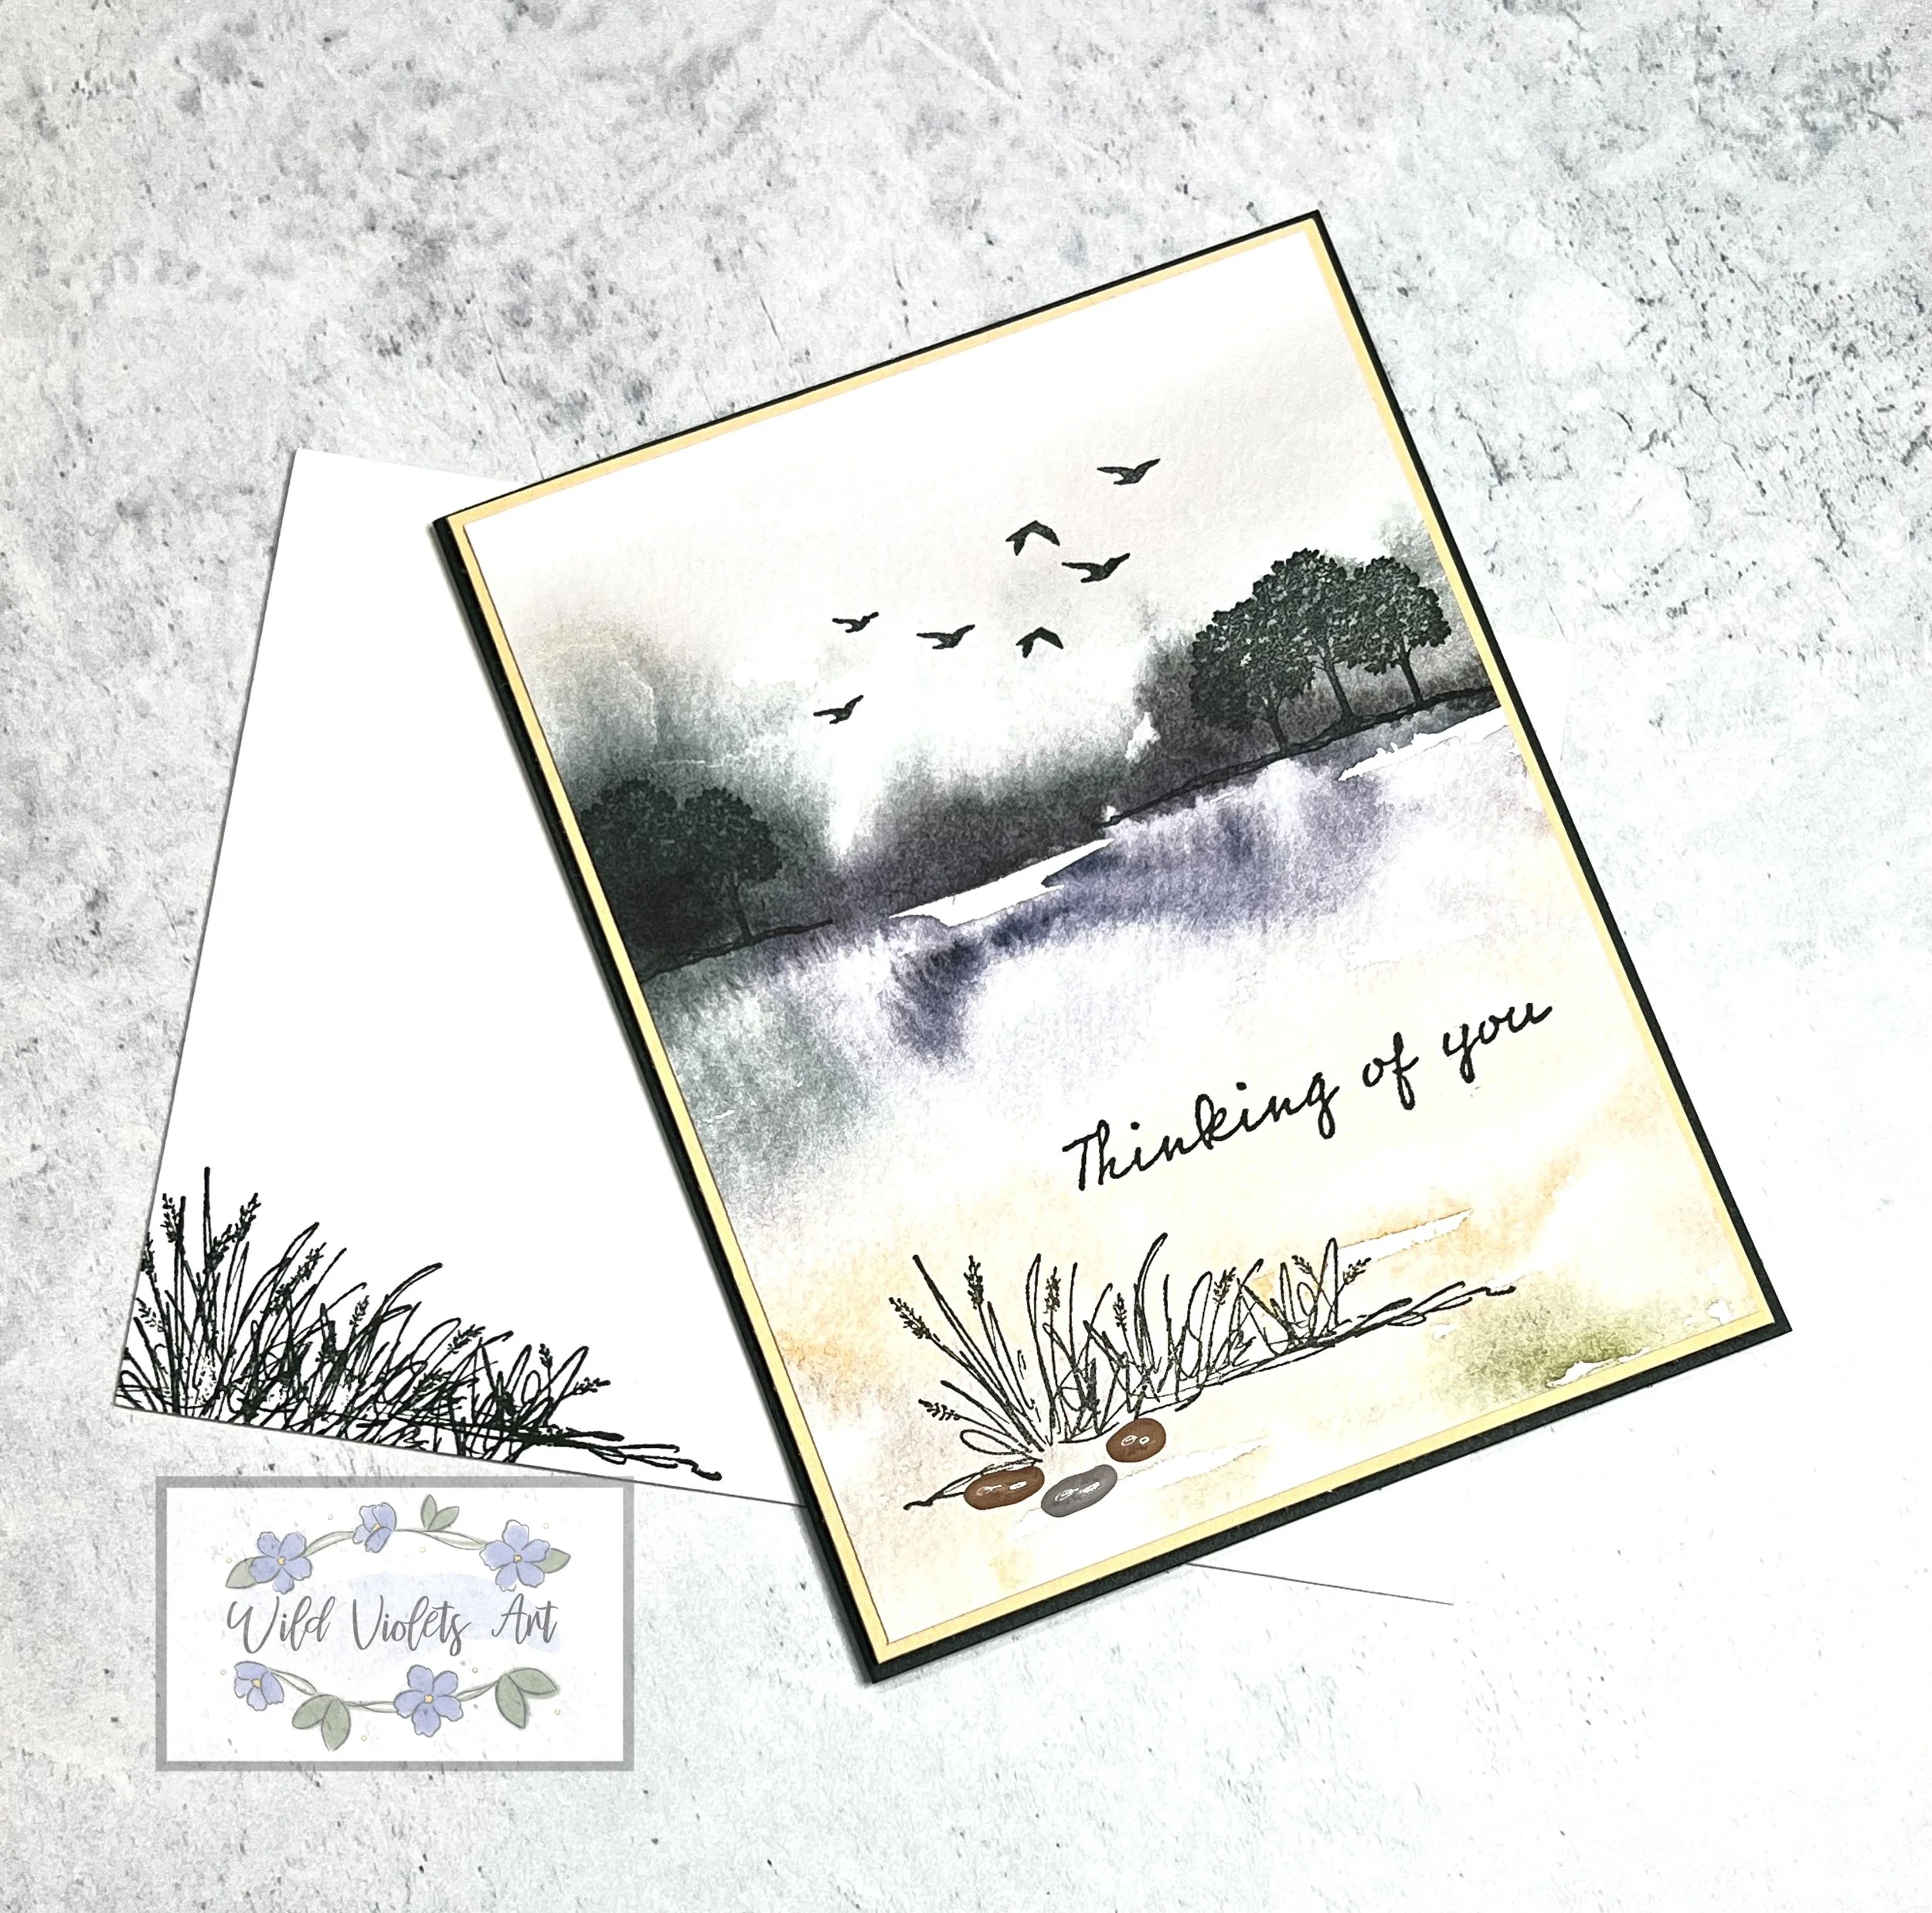
This simple card is a great example of how this gorgeous New Horizon DSP does all the work for you. Start by fold Evening Evergreen card base & braise with bone folder and set aside. Take New Horizons DSP card front and using the Evening Evergreen Stamp Pad, stamp the trees on left and right of horizon line, then stamp birds one time in the middle, and then the grass in the forefront (on bottom left side). Stamp your sentiment just above the grass but to the right side. Glue card front DSP and Pale Papaya together, then adhere to card base with Black Stampin’ Dimensionals.
Finally, add your pebbles just under the grass, on the left side. Glue the white paper on the inside of your card. Add the small scrap into the inside bottom. For your envelope, stamp the grass on the bottom left side or glue your scrap to the front left side… “never a naked envelope”.
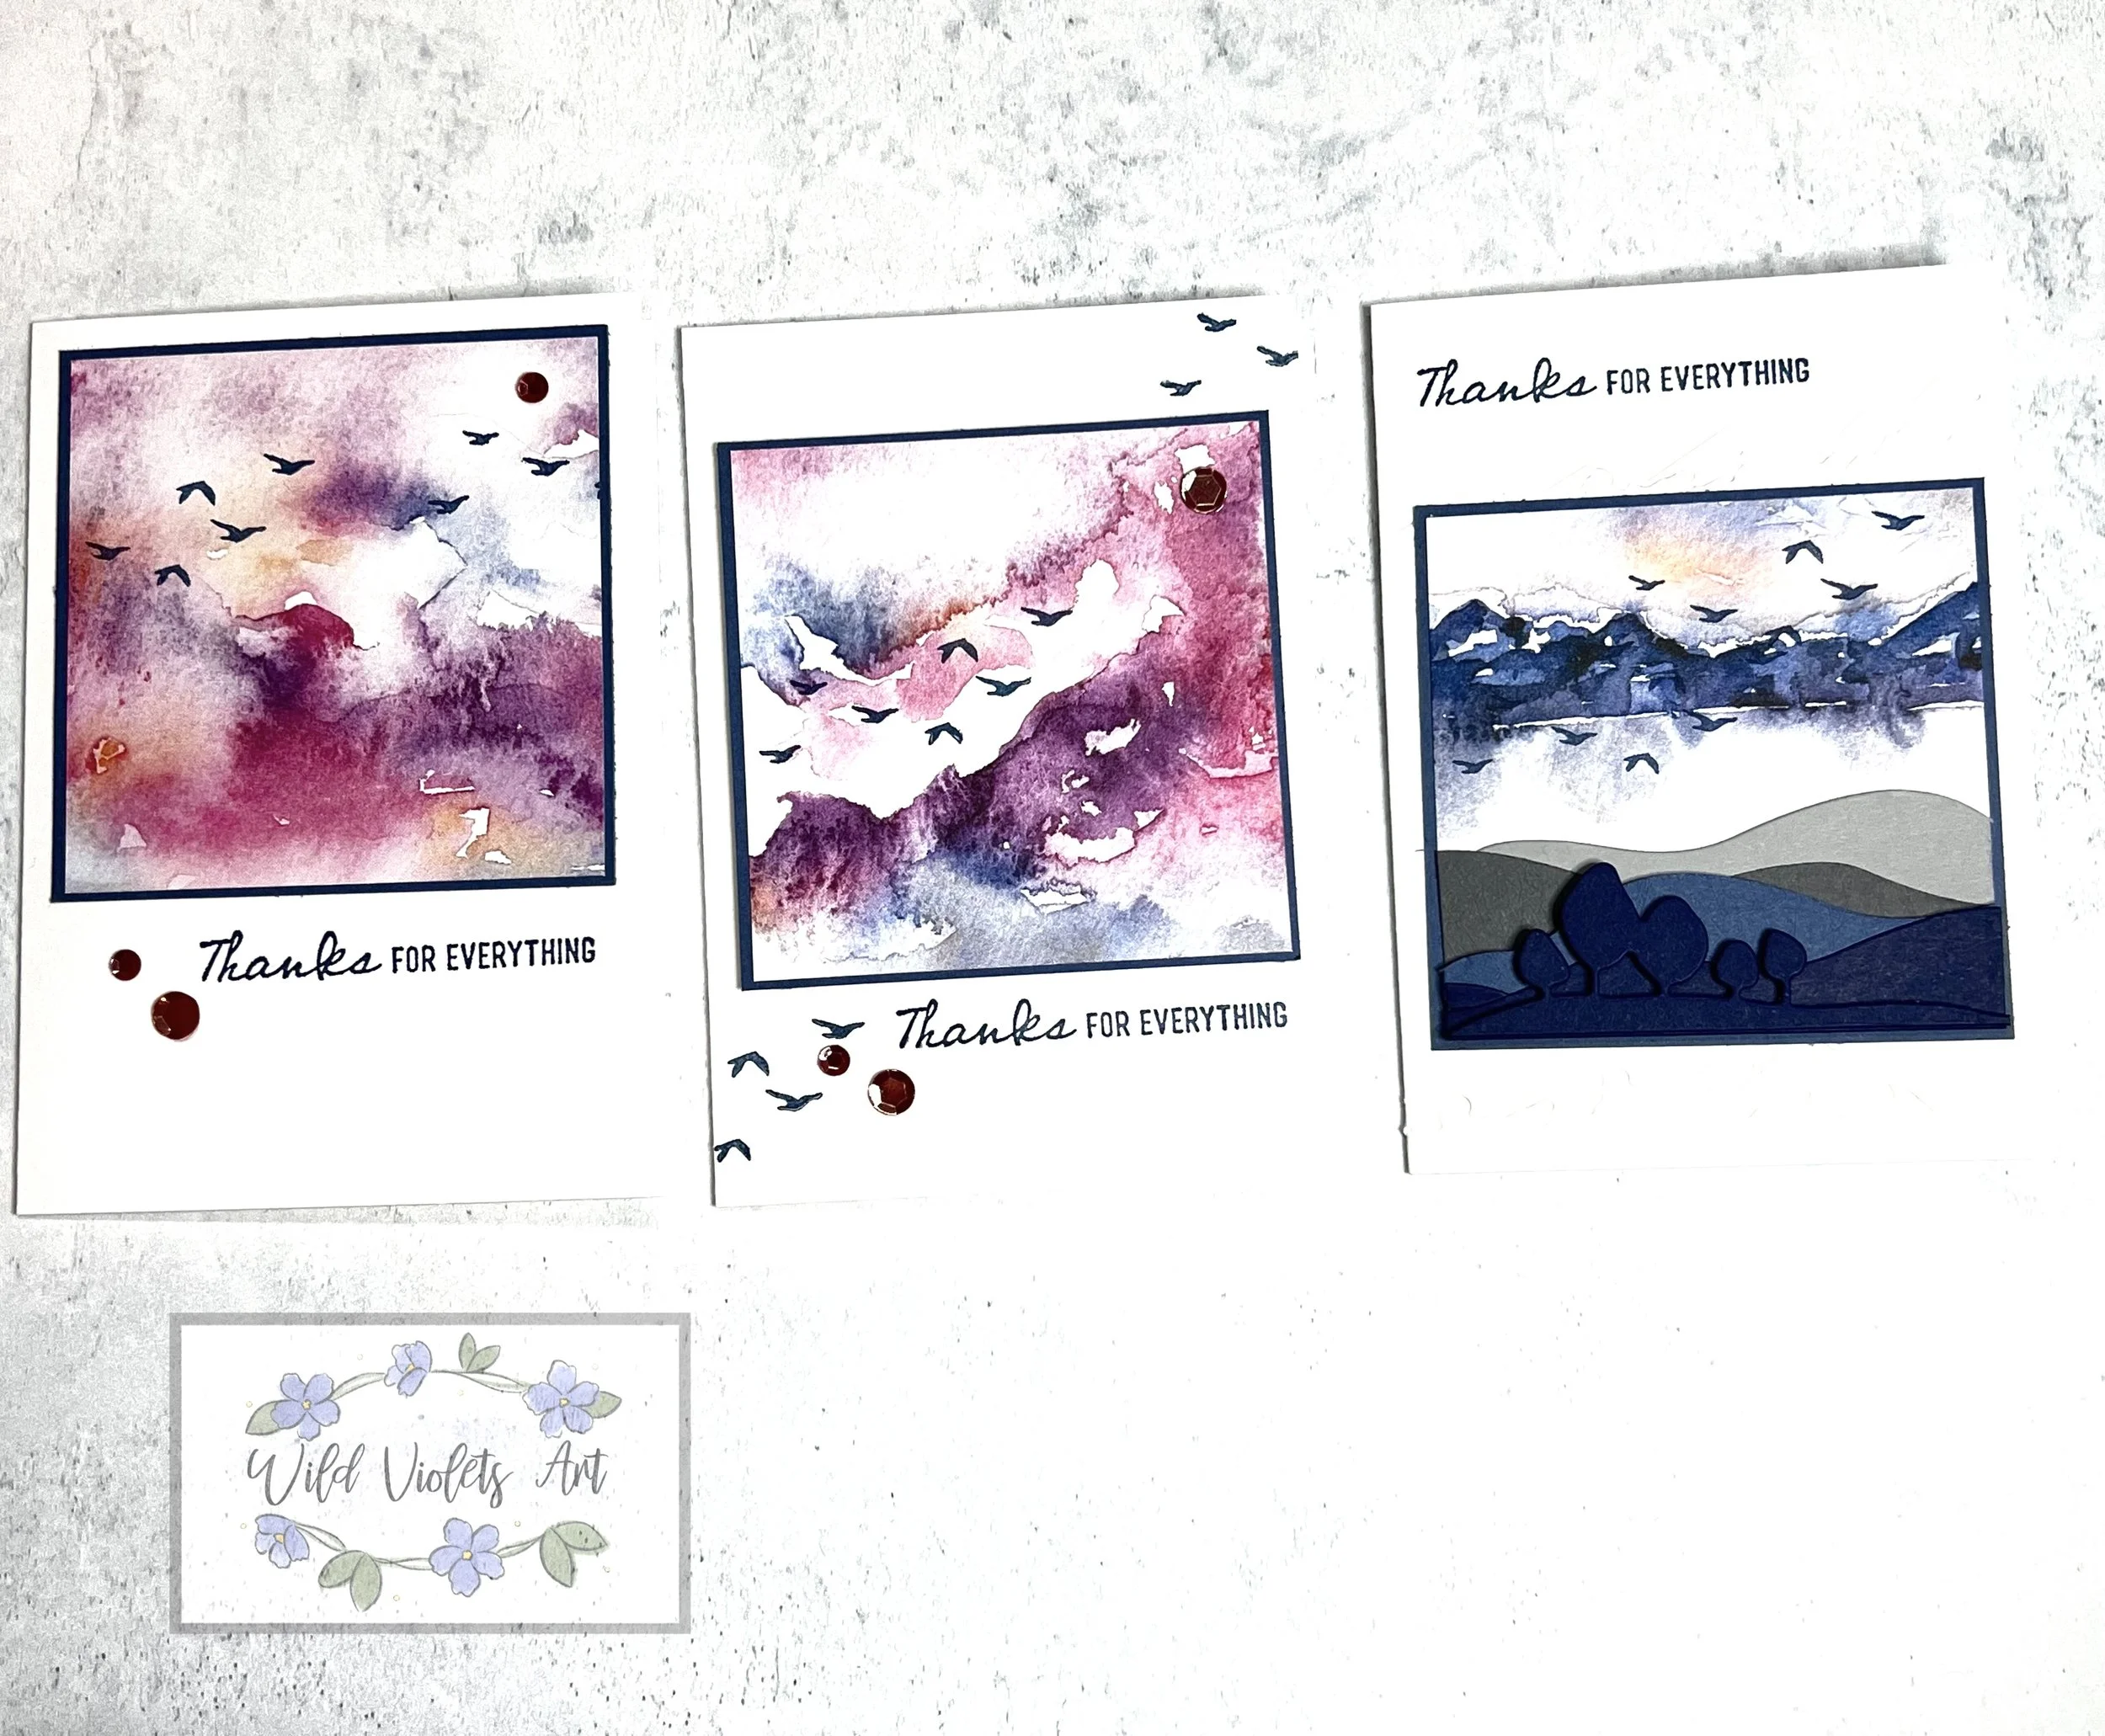
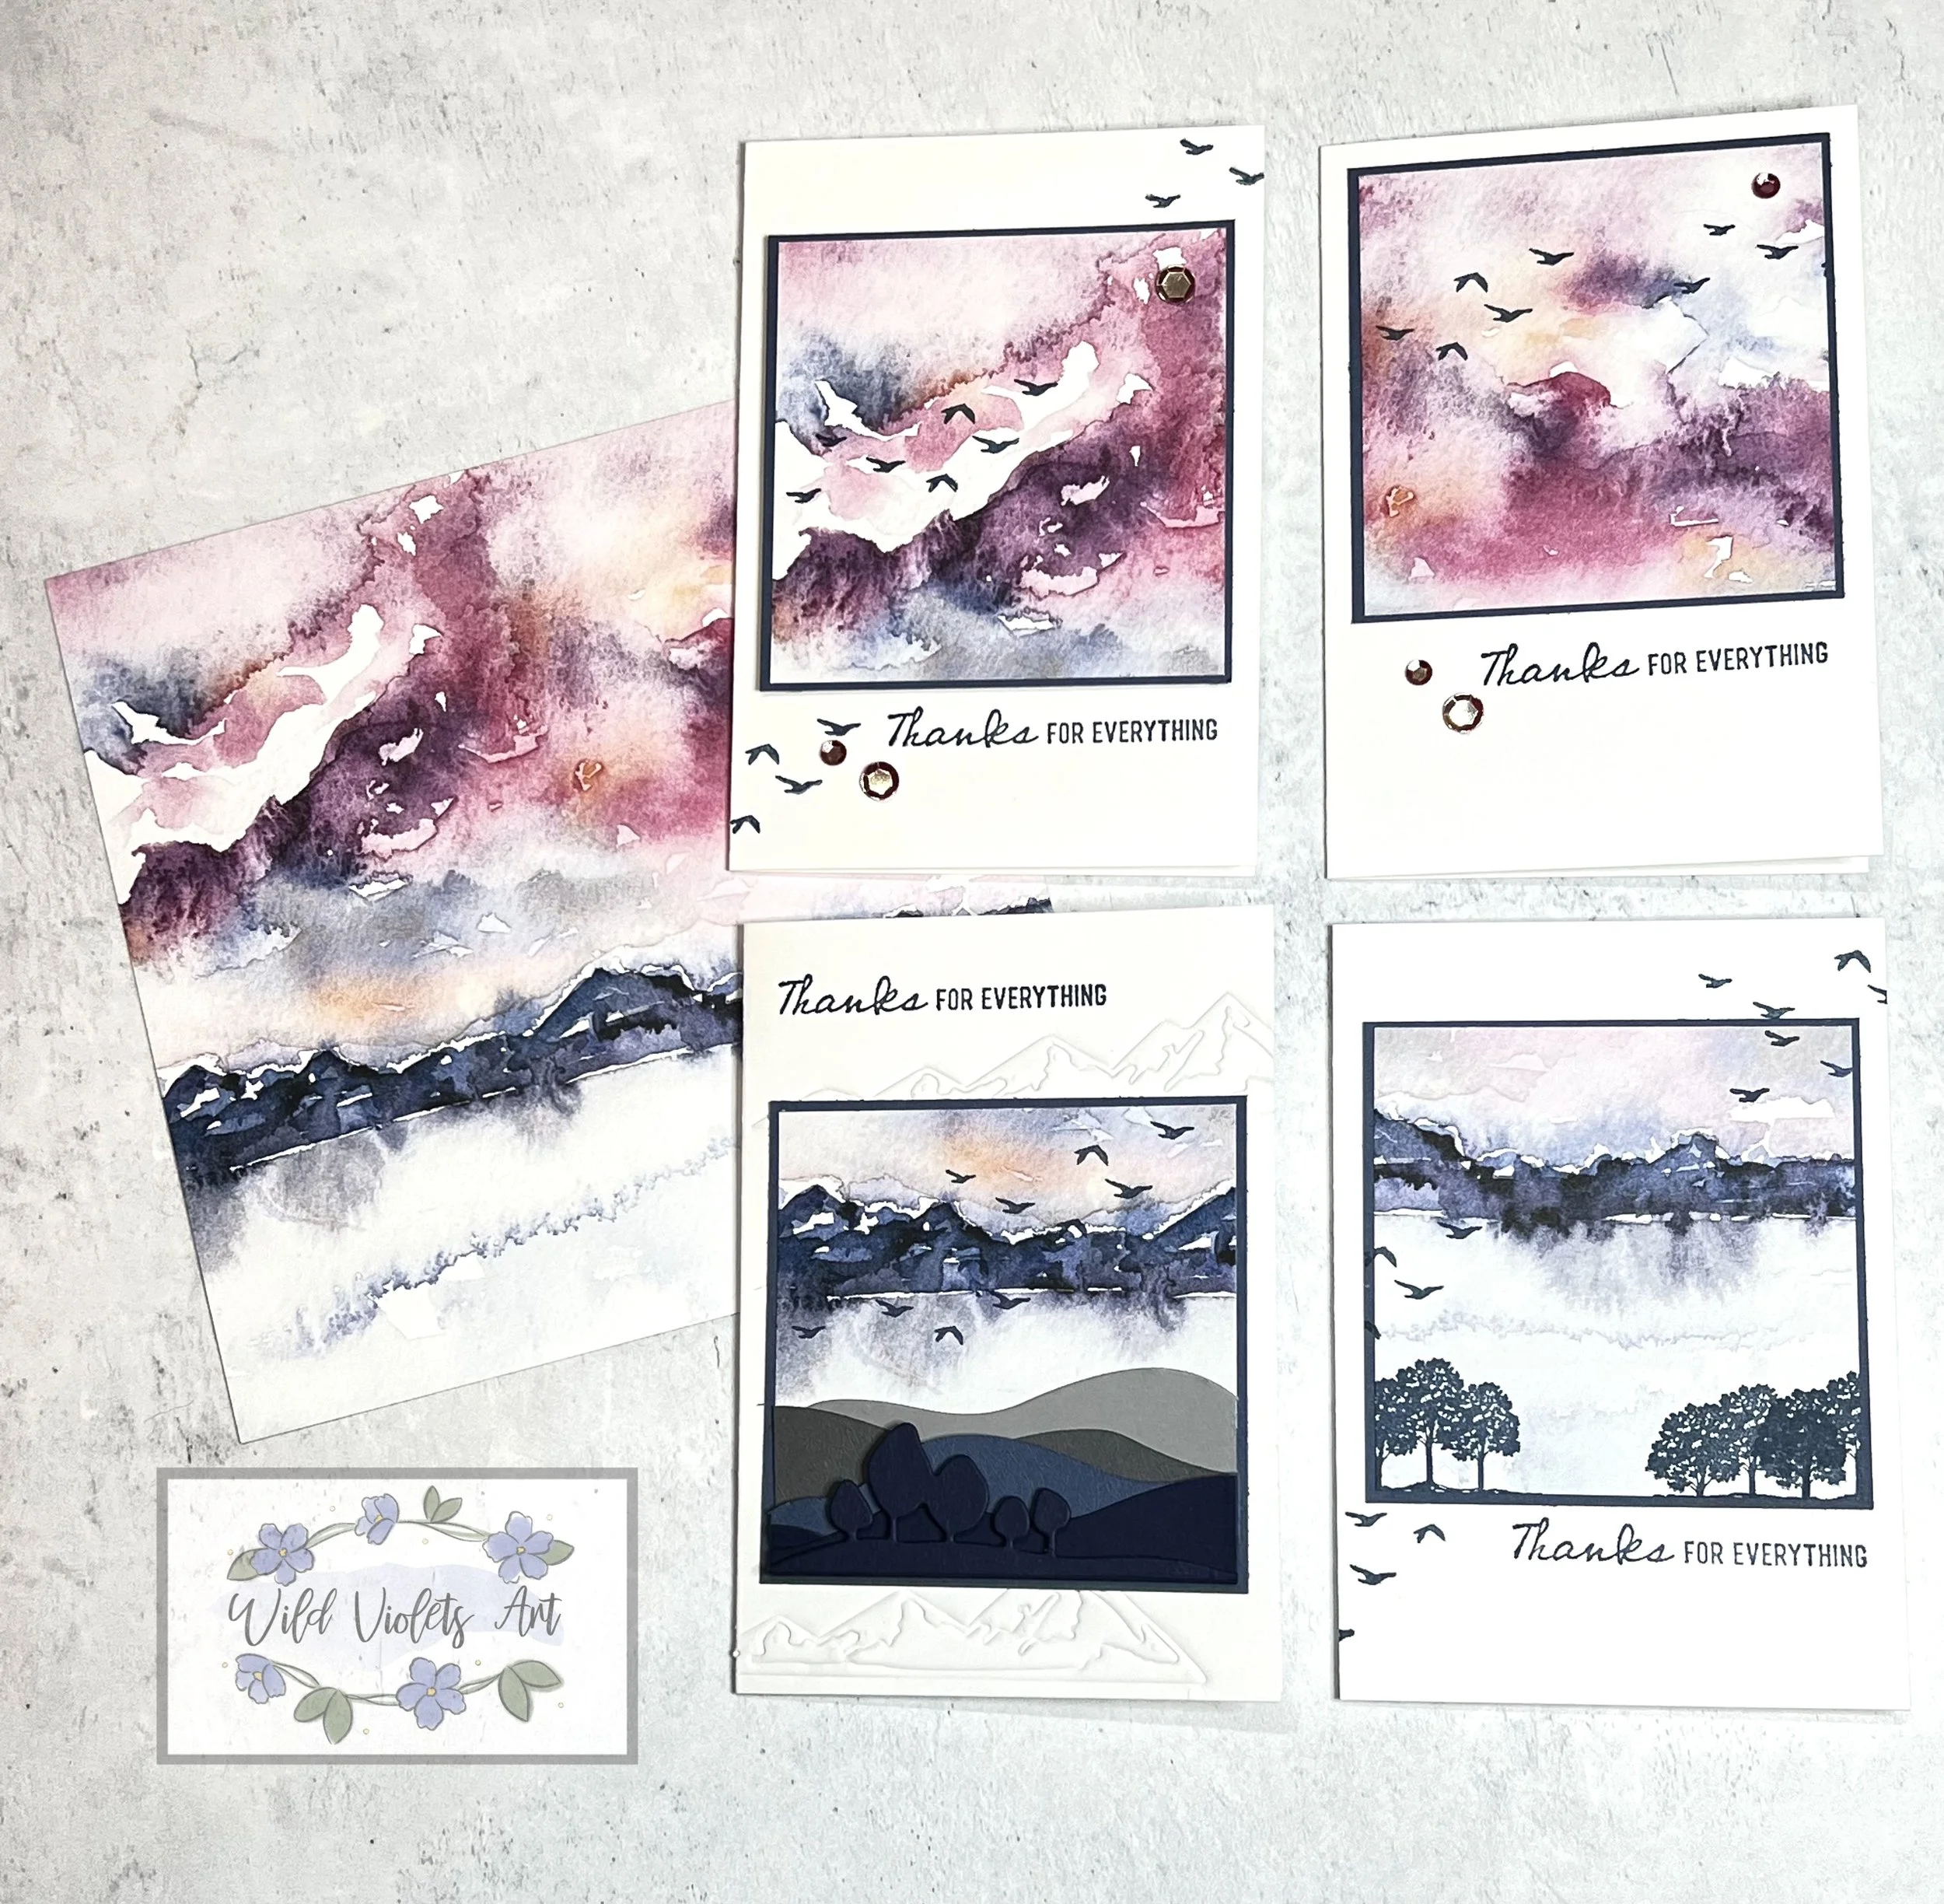
Thanks for Everything cards
Items Needed:
Misty Moonlight Stamp Pad #153118
Note Cards & Envelopes Basic White #159232 – 2 each
Misty Moonlight CS #153081 – 3-1/8”x3-1/8” – 2 each
New Horizons DSP #157768 – 3”x3” – 4 each (take 1-6”x6” and cut into 3” squares)
Artistry Blooms Adhesive-backed Sequins Rich Razzleberry #152477 – 3 each
Classic Matte Dots #158146 – 3 each
1/8” Cotton Ribbon Combo Pack in Misty Moonlight – 2 ea 12” (I do not show ribbons added, but you can tie around Misty Moonlight & DSP layer & tie in a knot if desired).
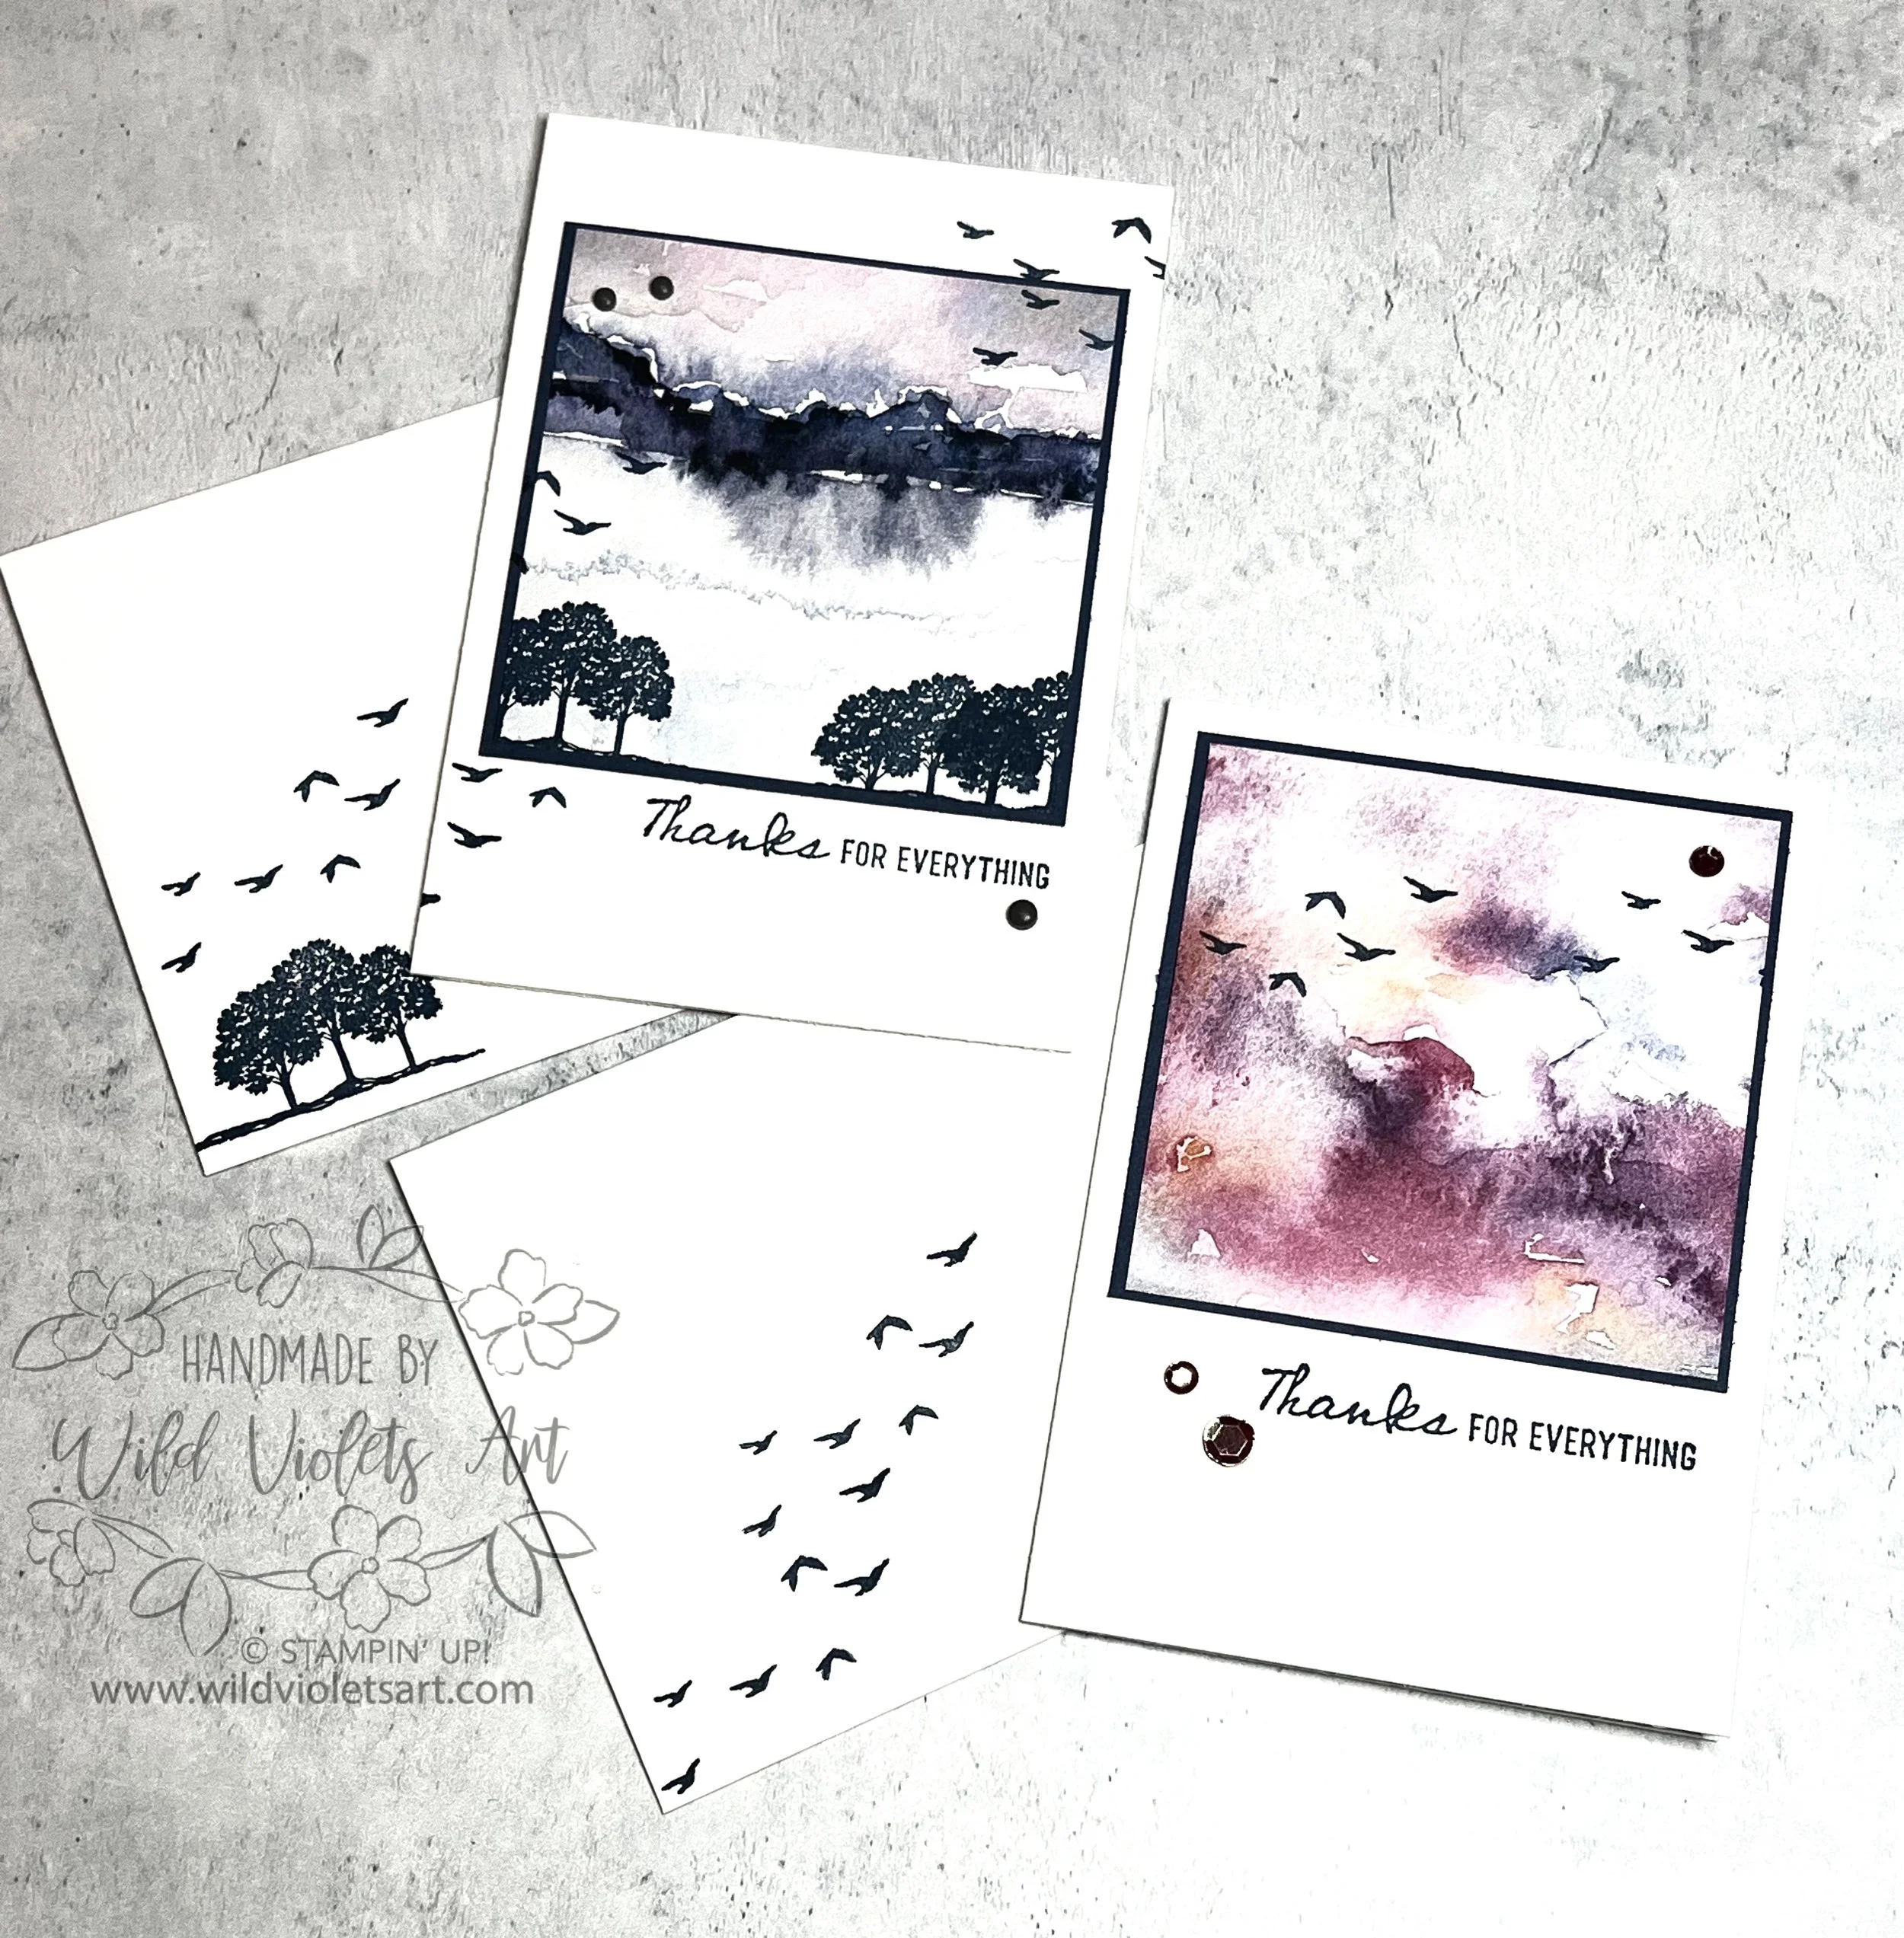
The second project for my class was simple cards using the Note Cards & Envelopes.
Before you fold Note Card Basic White CS card base, stamp birds at lower left and upper right (stamping some off the edge), then fold at score line and use Bone Folder to flatten. Take your DSP 3” square and stamp either birds or trees as you want. Glue to Misty Moonlight CS square. Pop up with Stampin’ Dimensionals or glue to card base. Add embellishments as desired. Stamp your envelope how you like. I did them differently or you can do them the same. Super easy peasy cards!!

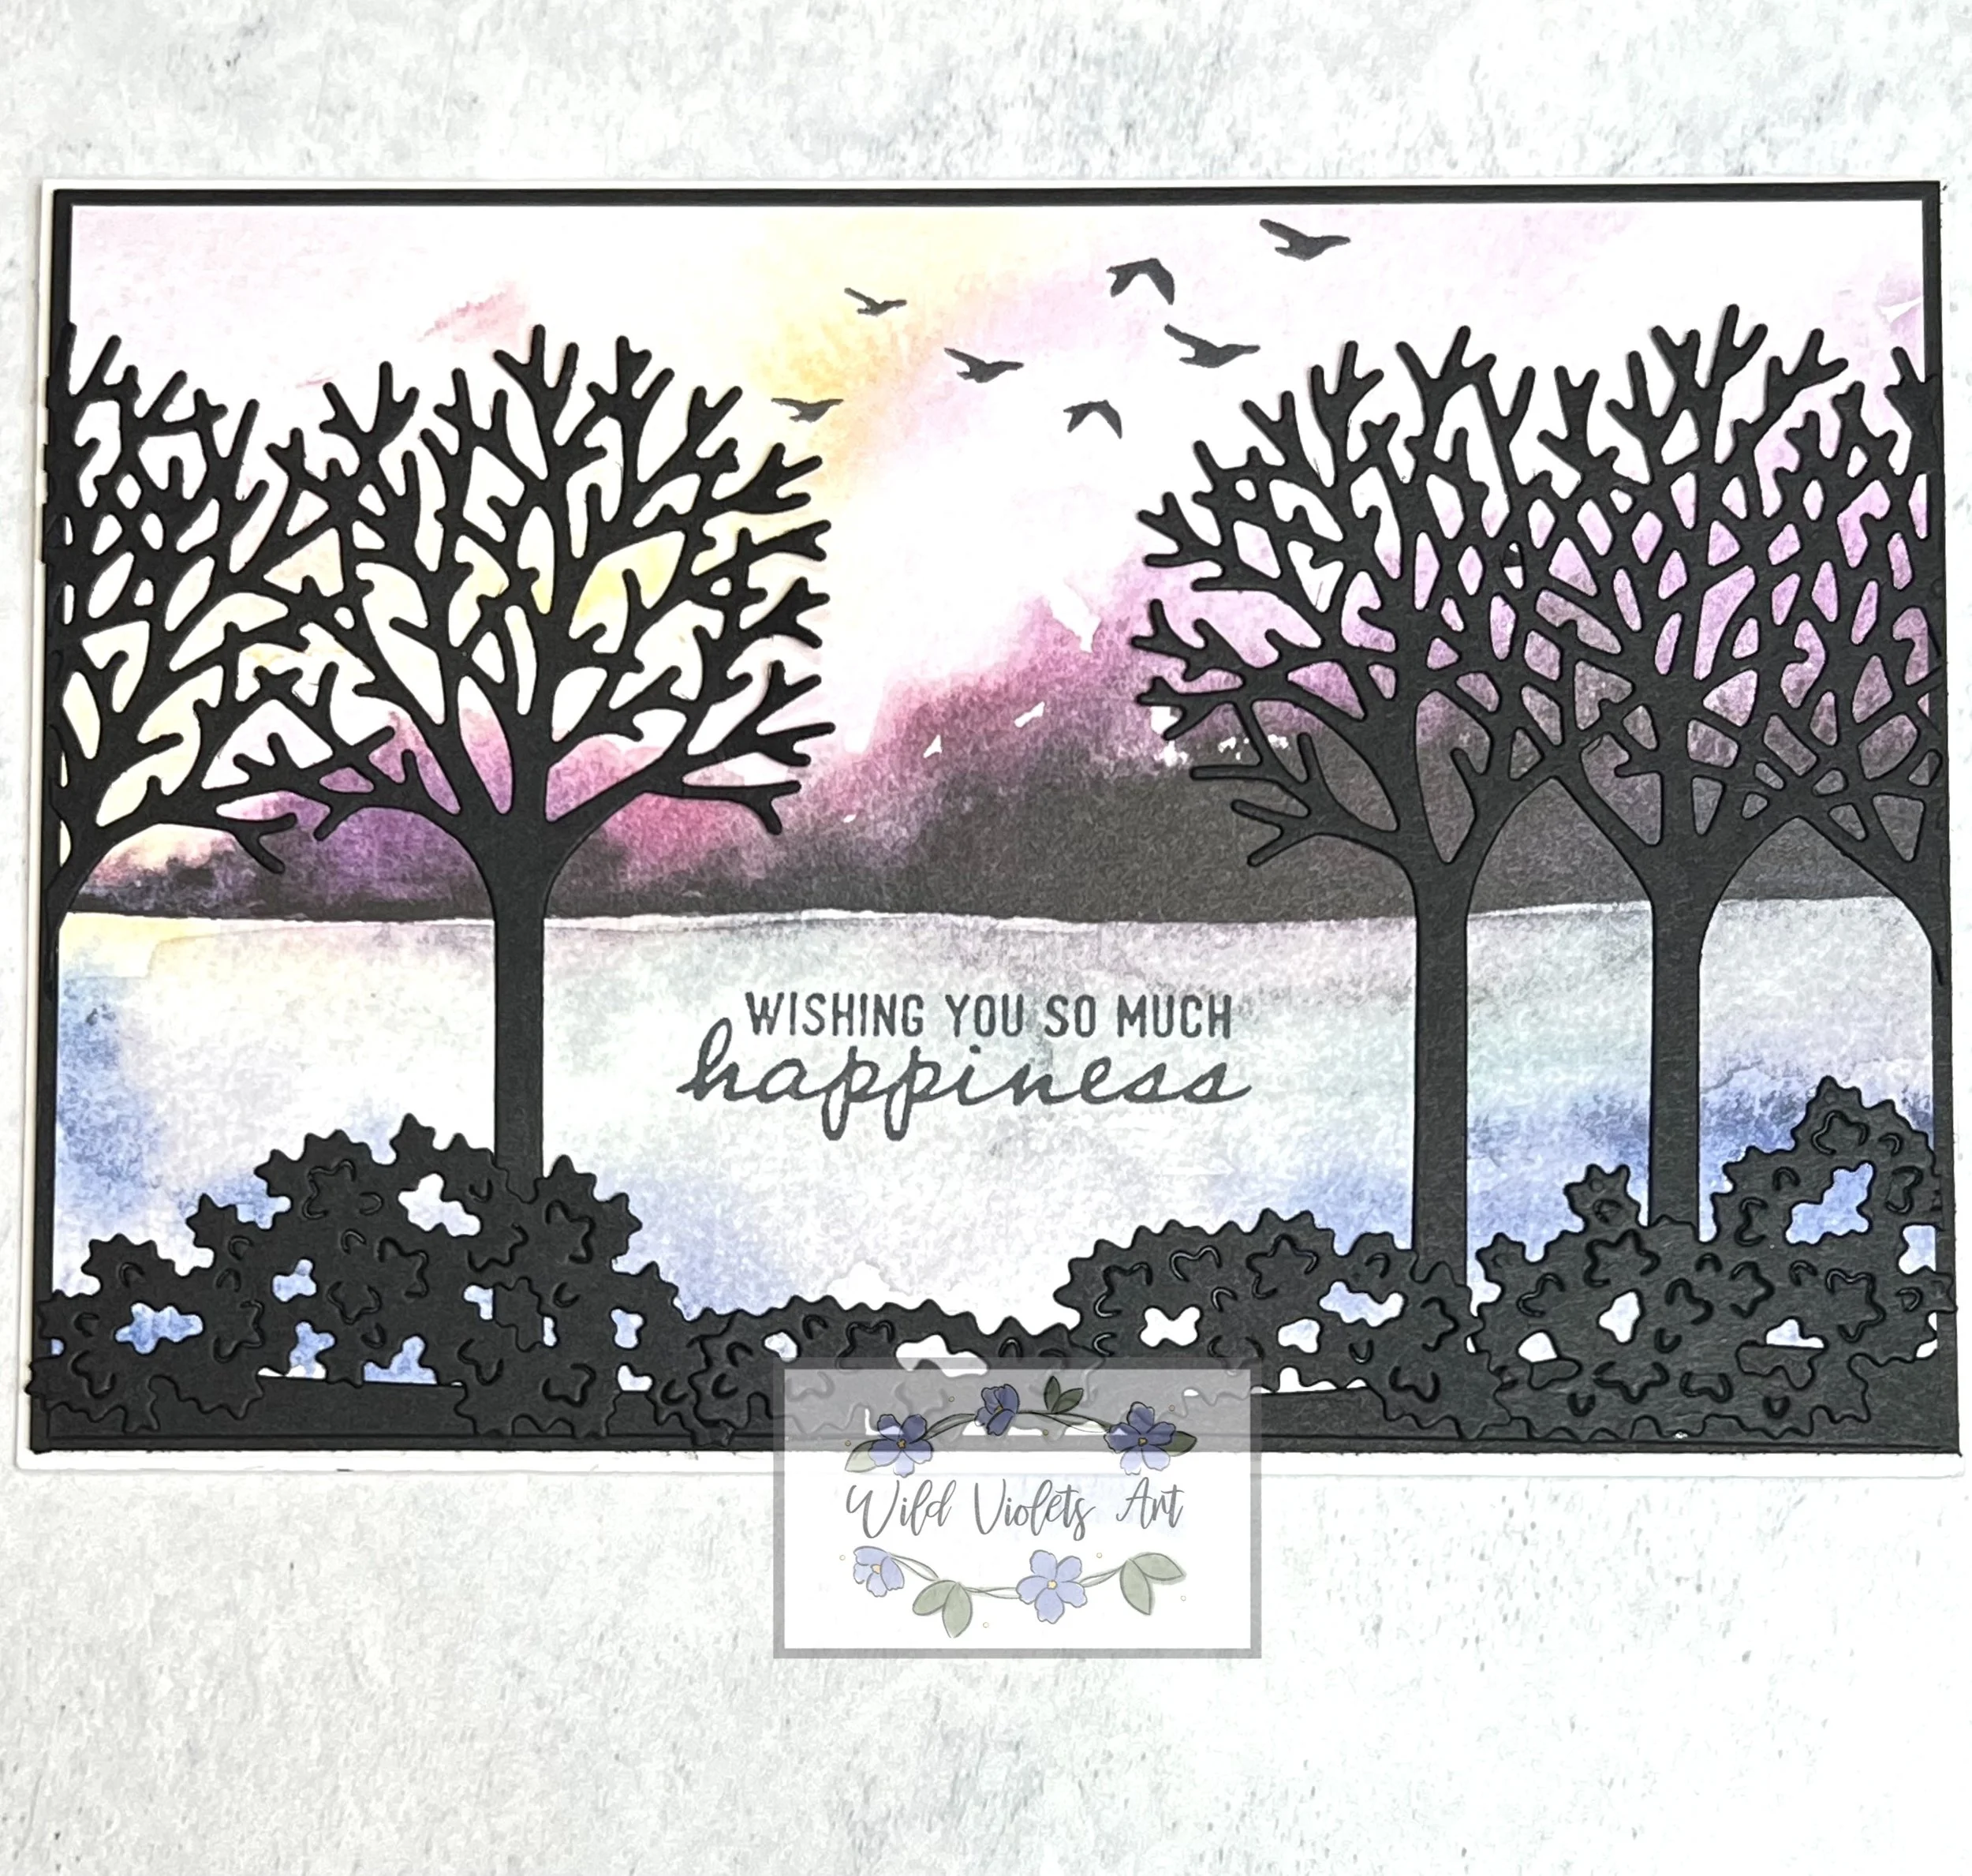
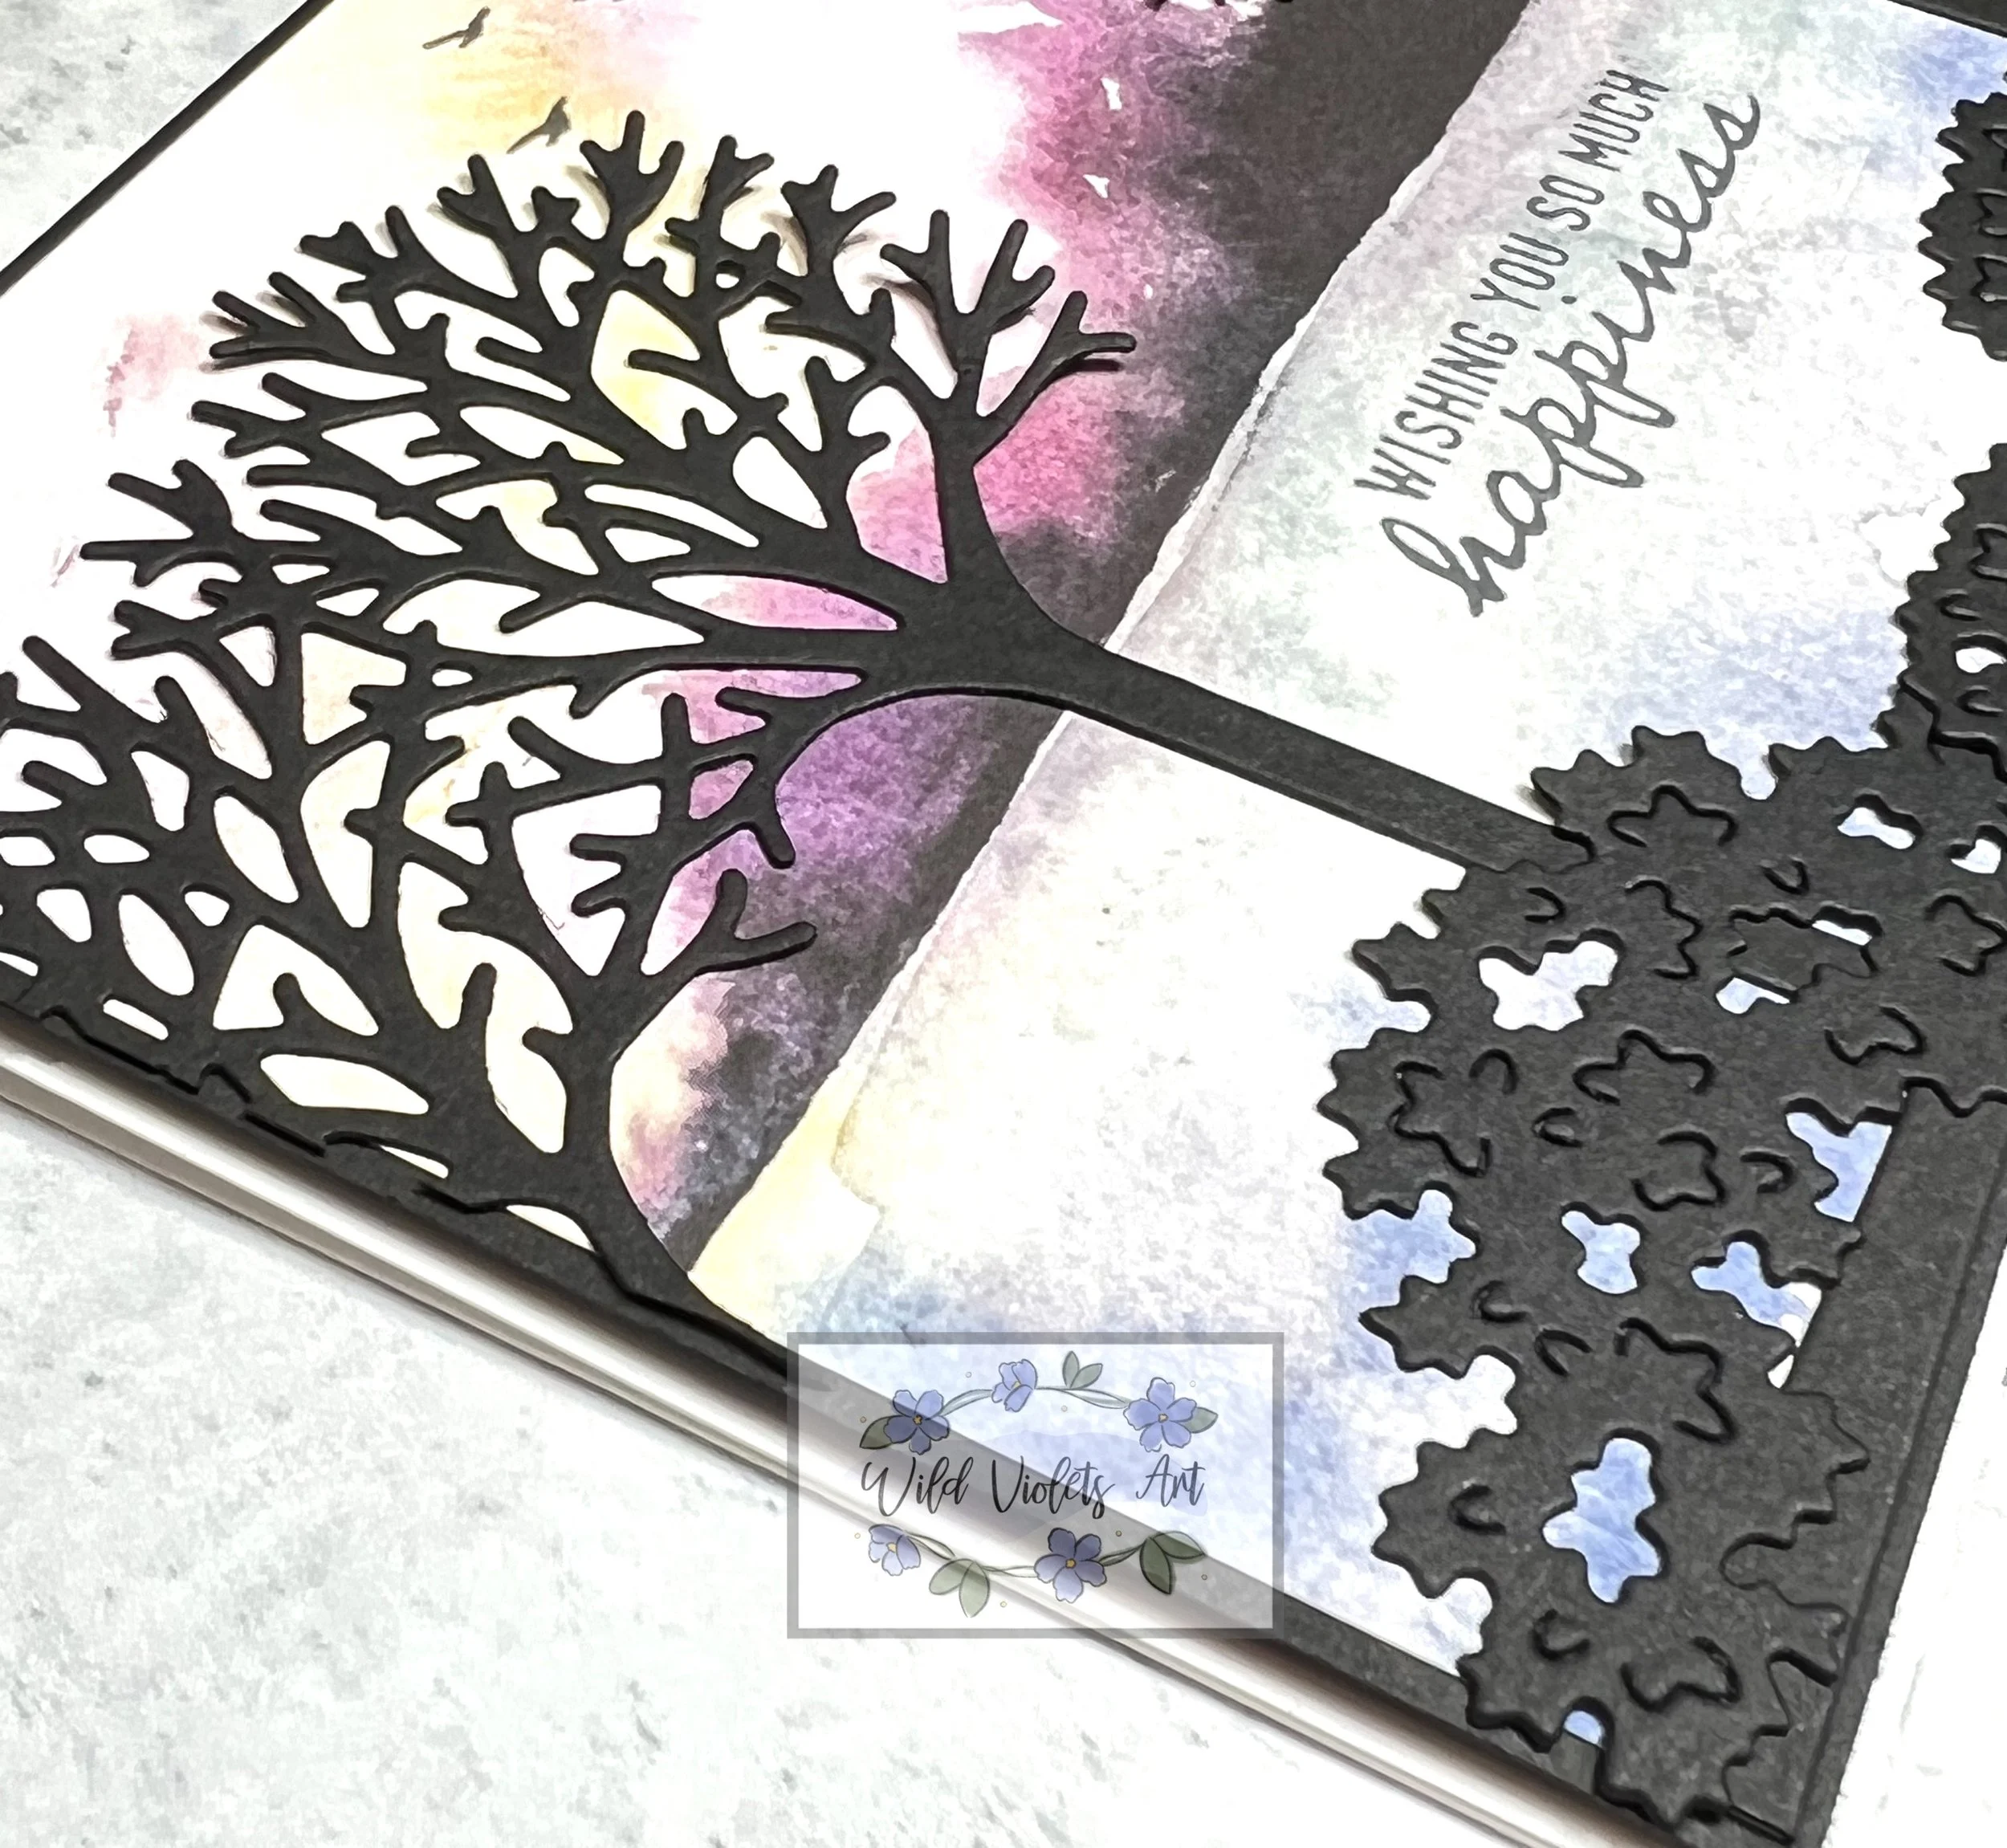
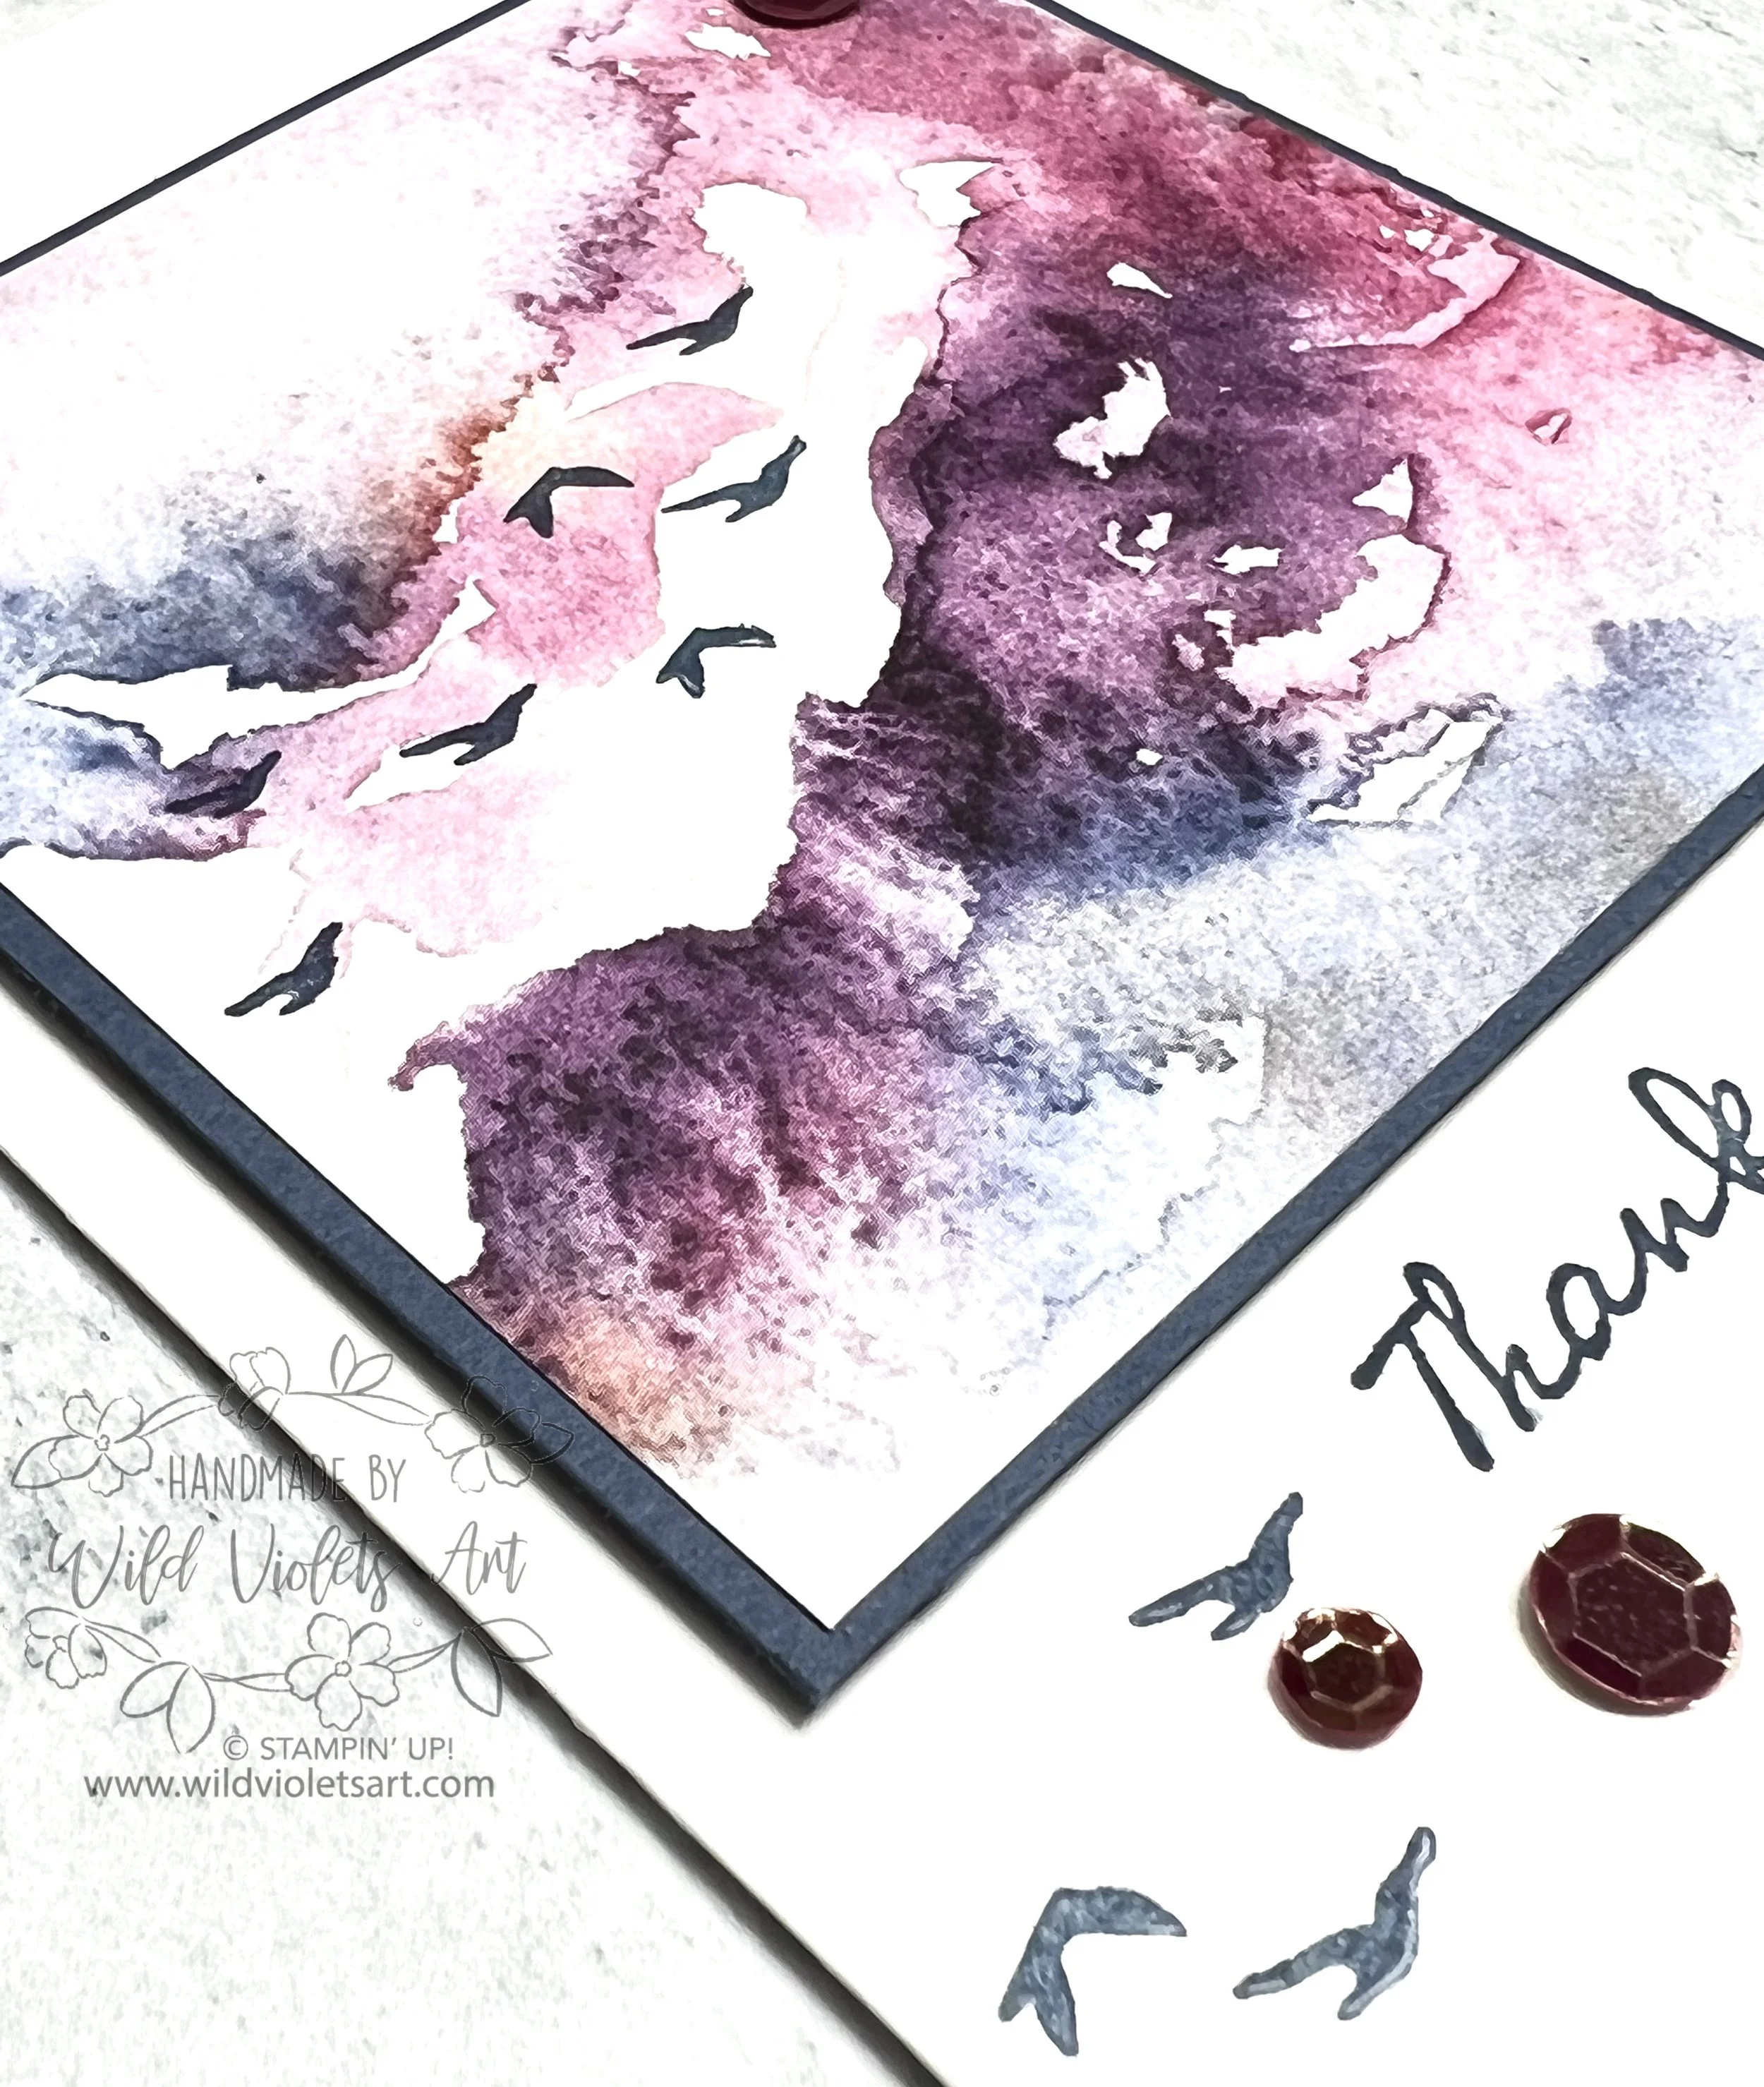
Wishing You So Much Happiness card
Items Needed:
Memento Tuxedo Black Ink Pad #132708
Blackberry Bliss Stamp Pad #147092
Inspiring Canopy Dies #155963 (already die cut for you)
Assorted Memories & More Cards and Envelopes (larger) #159234
Basic Black CS #121045 – 4-1/8”x6-1/8”, 3-1/4”x4” & 2-3/4”x4” (both for trees) & scraps for foliage
New Horizons DSP #157768 – 4”x6” (for card front) & scrap for another card
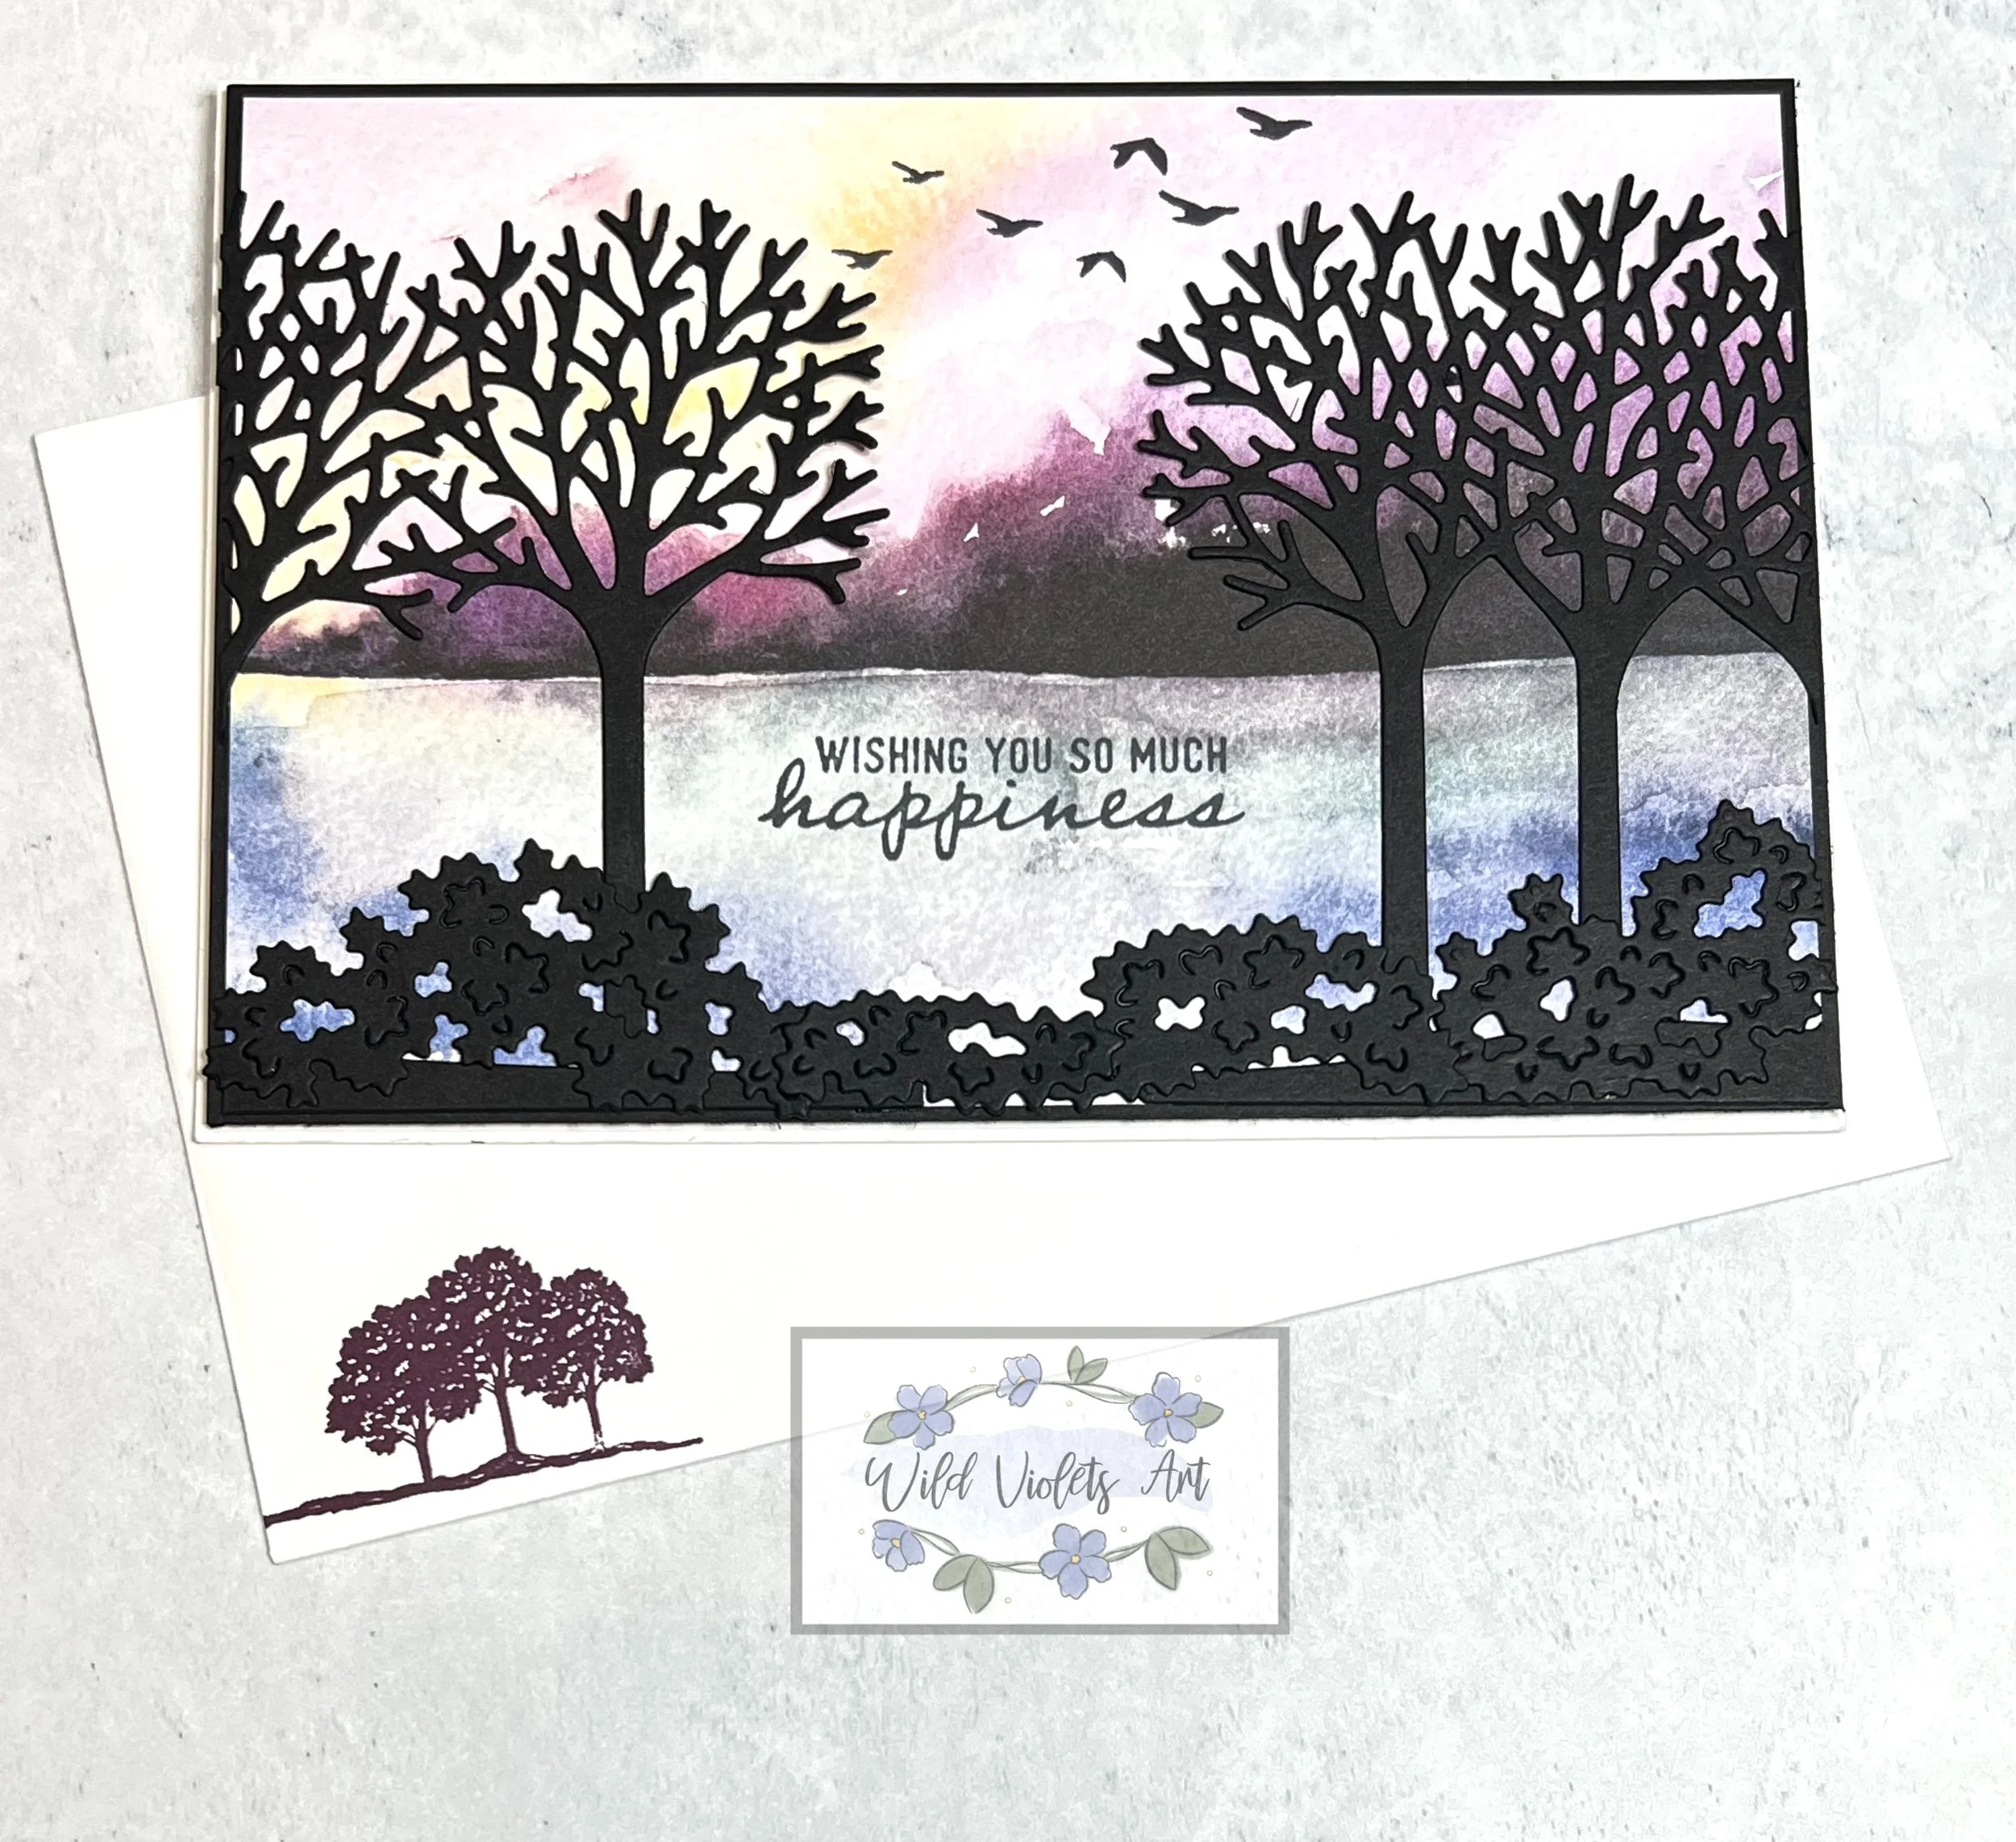
This card is just stunning. Fold Assorted Memories & More in Basic White card base & braise with bone folder and set aside. Take 4”x6” DSP and stamp birds in the middle and the sentiment in the middle in the water area. I took the Inspiring Canopy dies, and cut the trees in two parts so they can be separated for a lovely silhouette image. Glue trees to each side and then glue the foliage pieces as desired. Glue card front DSP to Basic Black layer, then pop up on card base with Stampin’ Dimensionals in Black.
Using the Blackberry Bliss Stamp Pad, stamp the trees on the envelope. The birds would look great as well. I did not add embellishments to this card because I believe it is lovely just as it is. There is so much to look at and is just lovely.
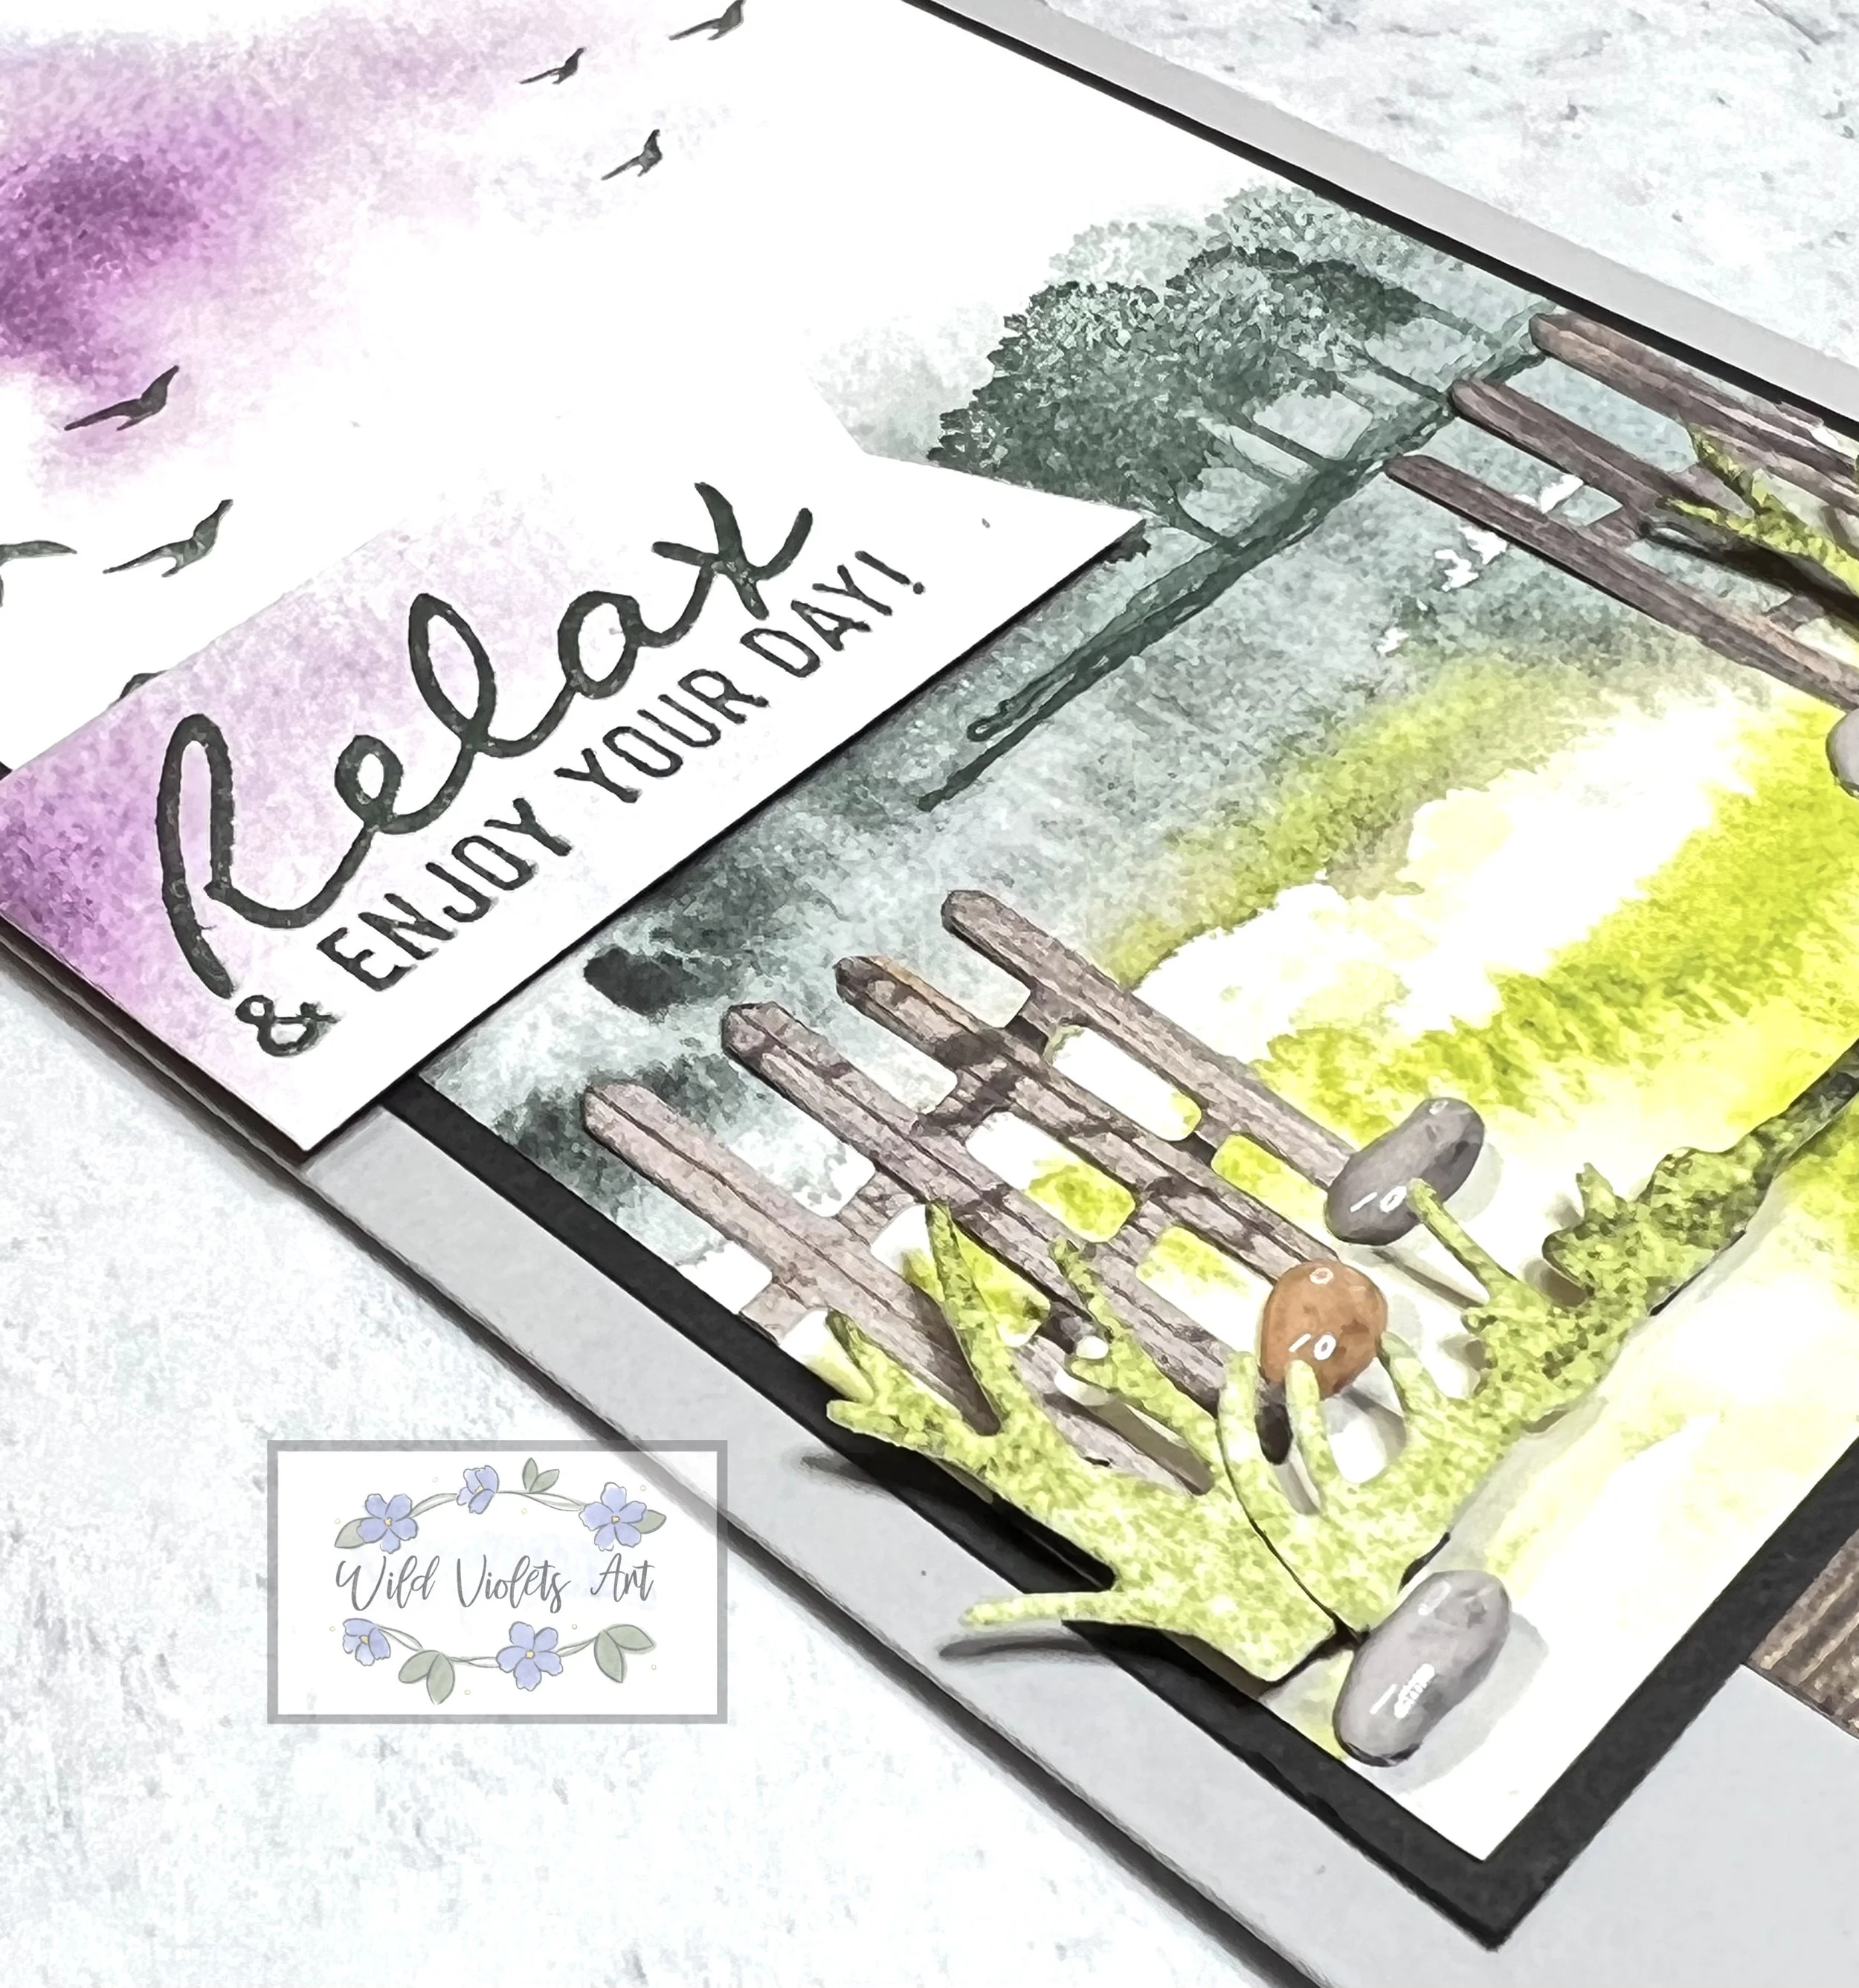
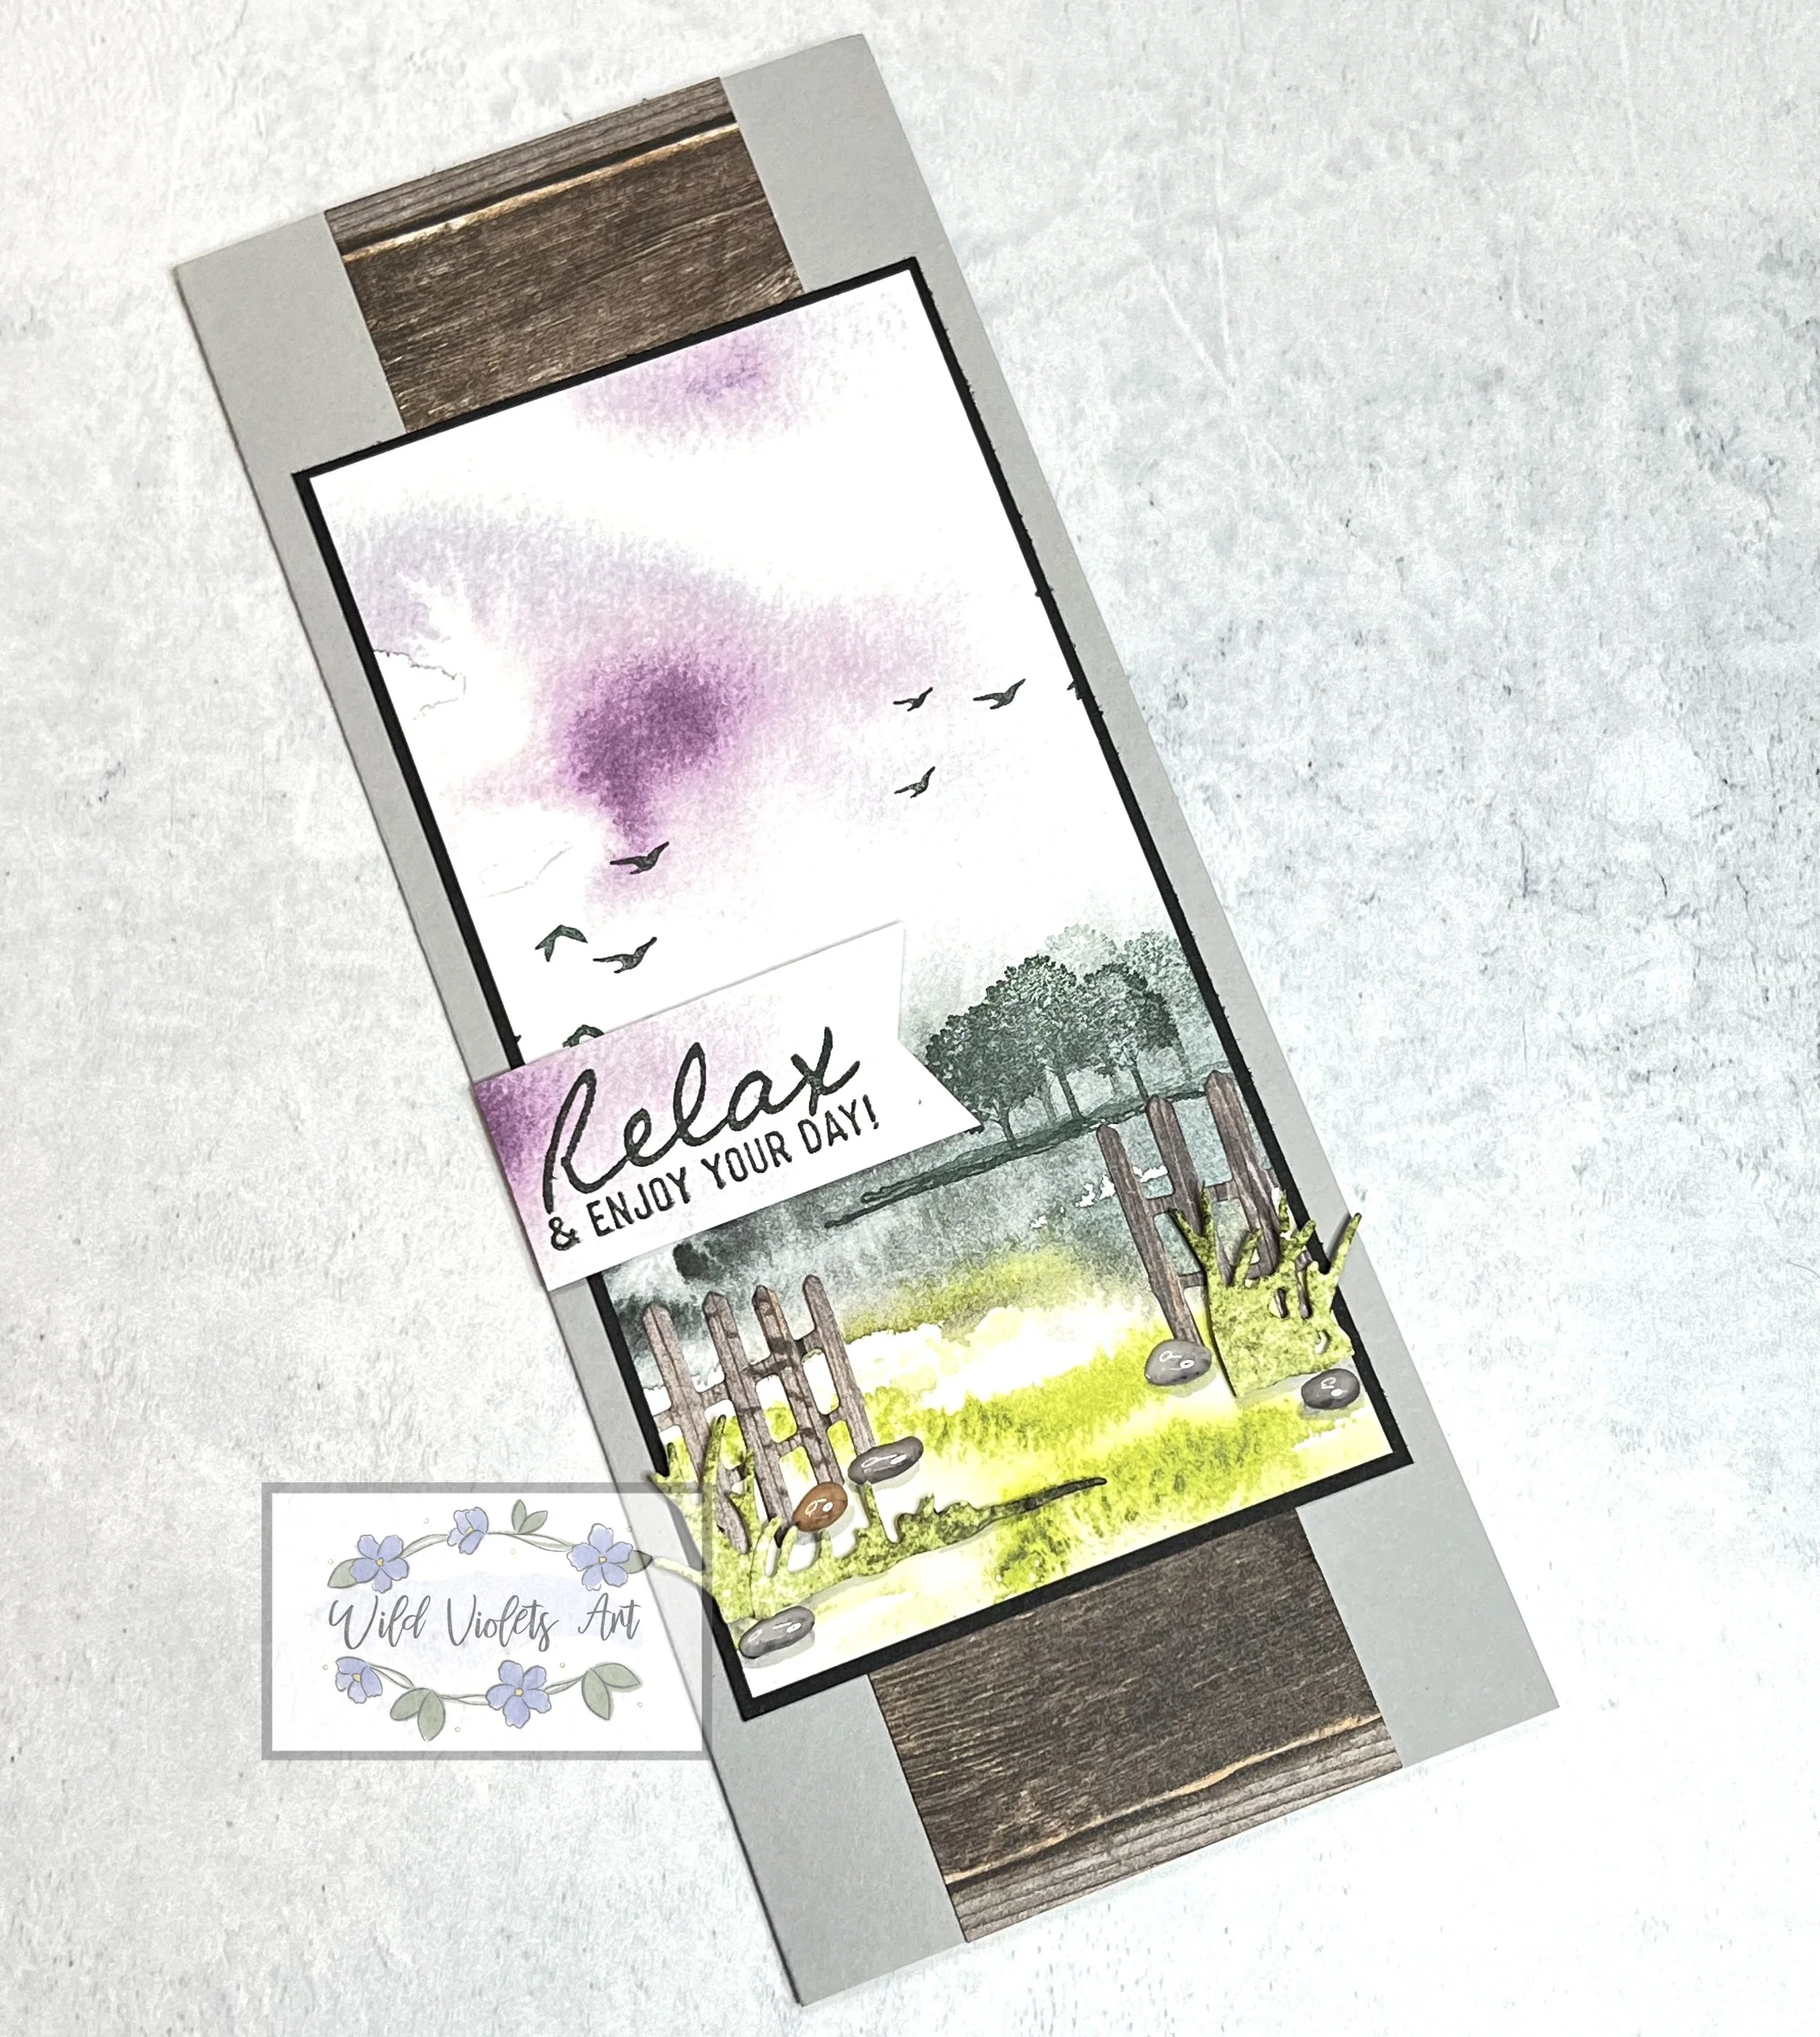
Relax & Enjoy Your Day card
Items Needed:
Evening Evergreen Stamp Pad #155576
Banners Pick A Punch #153608
Smokey Slate Stampin’ Blend #154904
Smokey Slate CS #131202 – 8-1/2”x7” slimline card base
Basic Black CS #121045 – 3-1/8”x6-1/8”
New Horizons DSP #157768 – 3”x6” & scraps for verse and grass
In Good Taste 12”x12” DSP (Rustic Barn Board sheet) – 1-1/2”x2” (2 ea for top & bottom of card) & scrap (fence dies)
Pebbles Enamel Shapes #158141 – 5 ea
Slimline Envelopes #157981 in Smokey Slate
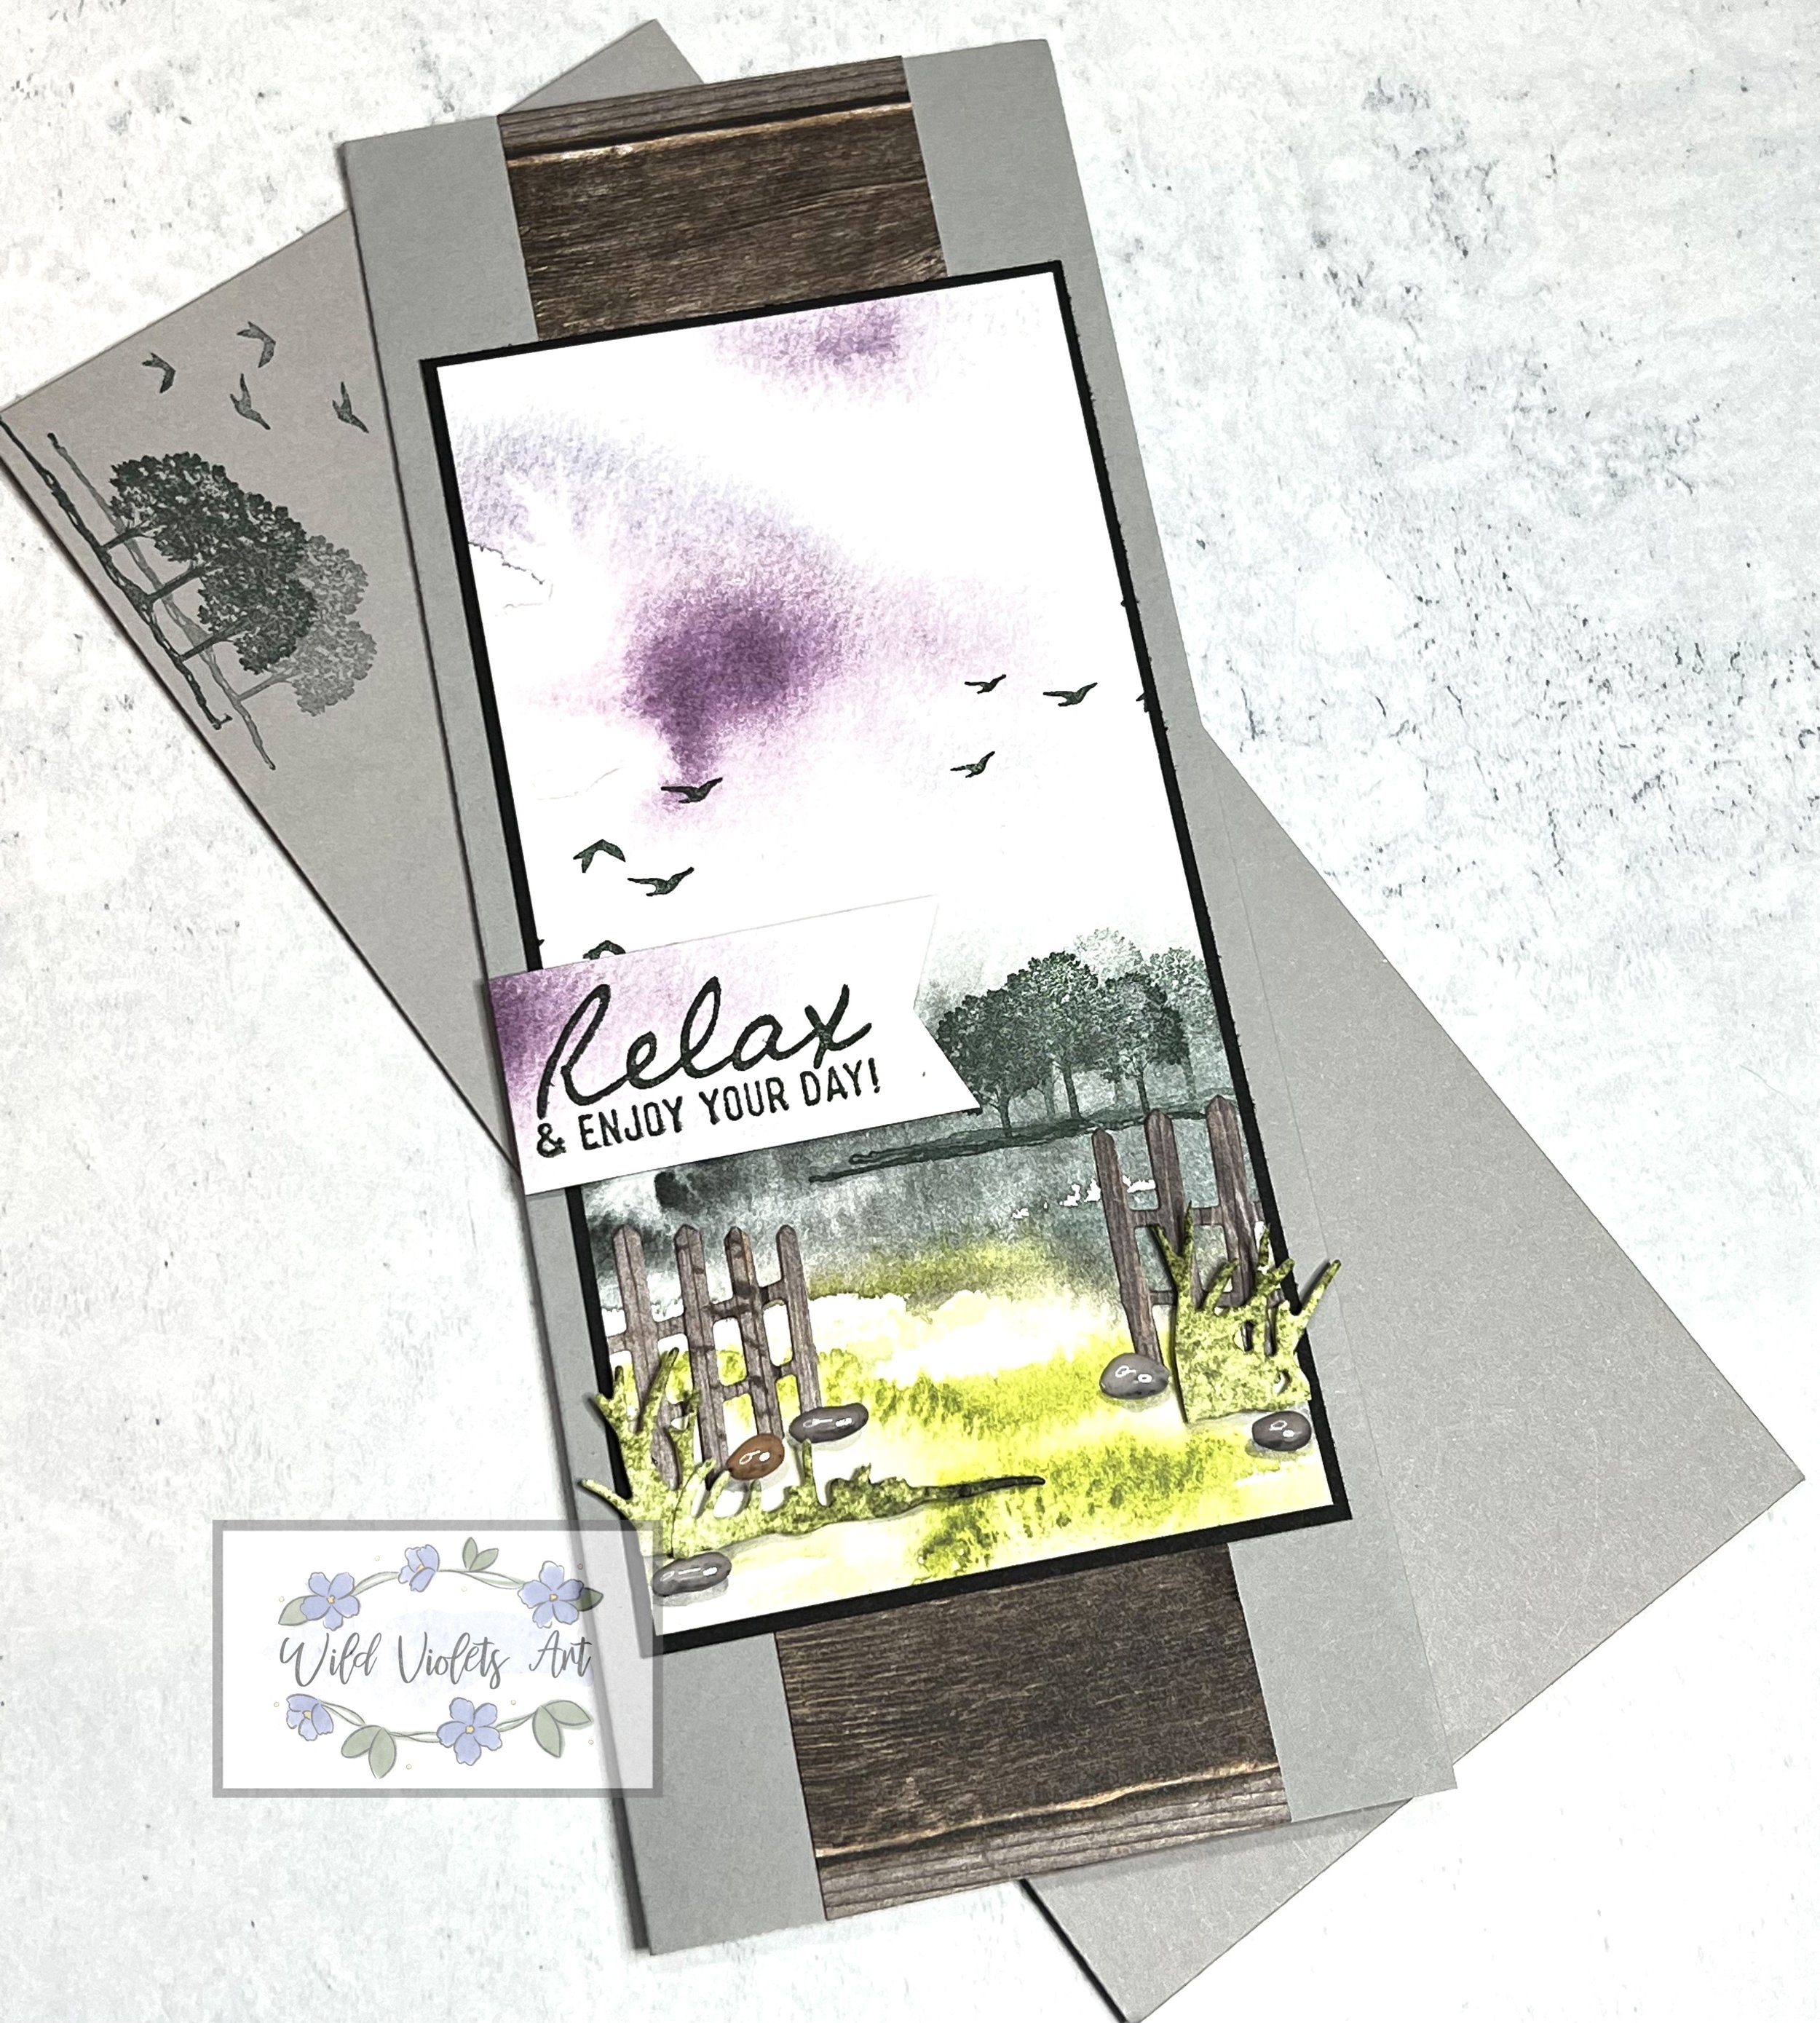
This was the last card for the class and is a variation on the card I made earlier in the month (see blog). Fold your Smokey Slate CS card base, braise with bone folder and set aside. Take your In Good Taste DSP, and set aside the two (2) 1-1/2”x2” pieces for later, but take the other scrap for your fence dies. You should have a piece of DSP for your grass die, cut both out using your Stampin’ Cut & Emboss Machine, then set aside. Take your card front DSP and using your Evening Evergreen ink, stamp the birds on left and right of sky portion, the trees in background/horizon line, and your sentiment on the 1”x3” scrap. I stamped the trees twice, once full-strength ink, and one stamped off for a shadowed look.
Glue your 1-1/2”x2” barn board pieces and glue in the middle of the top and bottom of your card front. Stamp your envelope using the birds and trees or grass, then set aside. Glue your card front to the Basic Black CS, and then glue the layers to your Smokey Slate card base.
Your fence die pieces will be a little too wide for your card, so lay them on each side, making an opening, and snip off what you don’t need. While I cut them off at the edge, they could easily hang over the card front for a cool look (mine were scraps originally). Glue fences down as desired. Take your die cut grass, and cut into three pieces carefully so you can combine the tallest and shortest for the left side, and the middle part of the grass on the right. I cut them from the top down to follow the grass fronds. Pop grass up using Stampin’ Dimensionals as shown in image. Before you add Pebble Enamel Shapes, I used the Smokey Slate blend to shadow the bottom of the pebble, then place on card front under the fences and grass. I then used the blend again to add a shadow under the pebbles on card front. Use the Banners Pick A Punch or your Snip Scissors and make a banner (about 2-1/4” in length) of your sentiment, then add to card using Stampin’ Dimensionals. Be sure to decorate your envelope!