

Ranunculus Romance Bundle
RANUNCULUS ROMANCE
There is something so special about Ranunculus, their perfect petals, colors, and delicate stems that just speak to my gardeners heart.
Though I have never been able to grow them, having lived most of my life in sunny (hot) SoCal, they are one of my cutting garden loves, right up there with foxglove, delphinium, and hollyhocks! The perfect cutting flowers. So, I was pretty excited to see the lovely Ranunculus Romance Bundle with both Ranunculus and Delphinium flowers in this bundle in the new Jan-June 2022 Mini Catalog.
Before I start working with a floral stamp set, I will review images on the internet to make sure I understand what it should look like. I had a swap with my upline, and I like to get out one of my new stamp sets and play around until I find the one I want to do for the swap. I enjoy coming up with ideas to show my team and customers, so experiments never go to waste. more pics below…

Just Because
I made this card for the swap, and because the shabby chic or vintage style is a fun favorite, I thought the Ranunculus Romance Bundle would be a great vintage card. I used the Very Vanilla Thick CS for my card base (8-1/2”x5-1/2”, scored at 4-1/4”). Over that, I used a piece of Sahara Sand CS (4-1/8”x5-3/8”), stamped with Sahara Sand ink. For the envelope, I made a mask of the filigree die by using a piece of the acetate Window Sheets. I put the die through 3 different times on one 4”x5” piece of acetate. This allowed me to get three filigrees onto my card front and envelop and not have to move it around too much to ink using a blending brush.
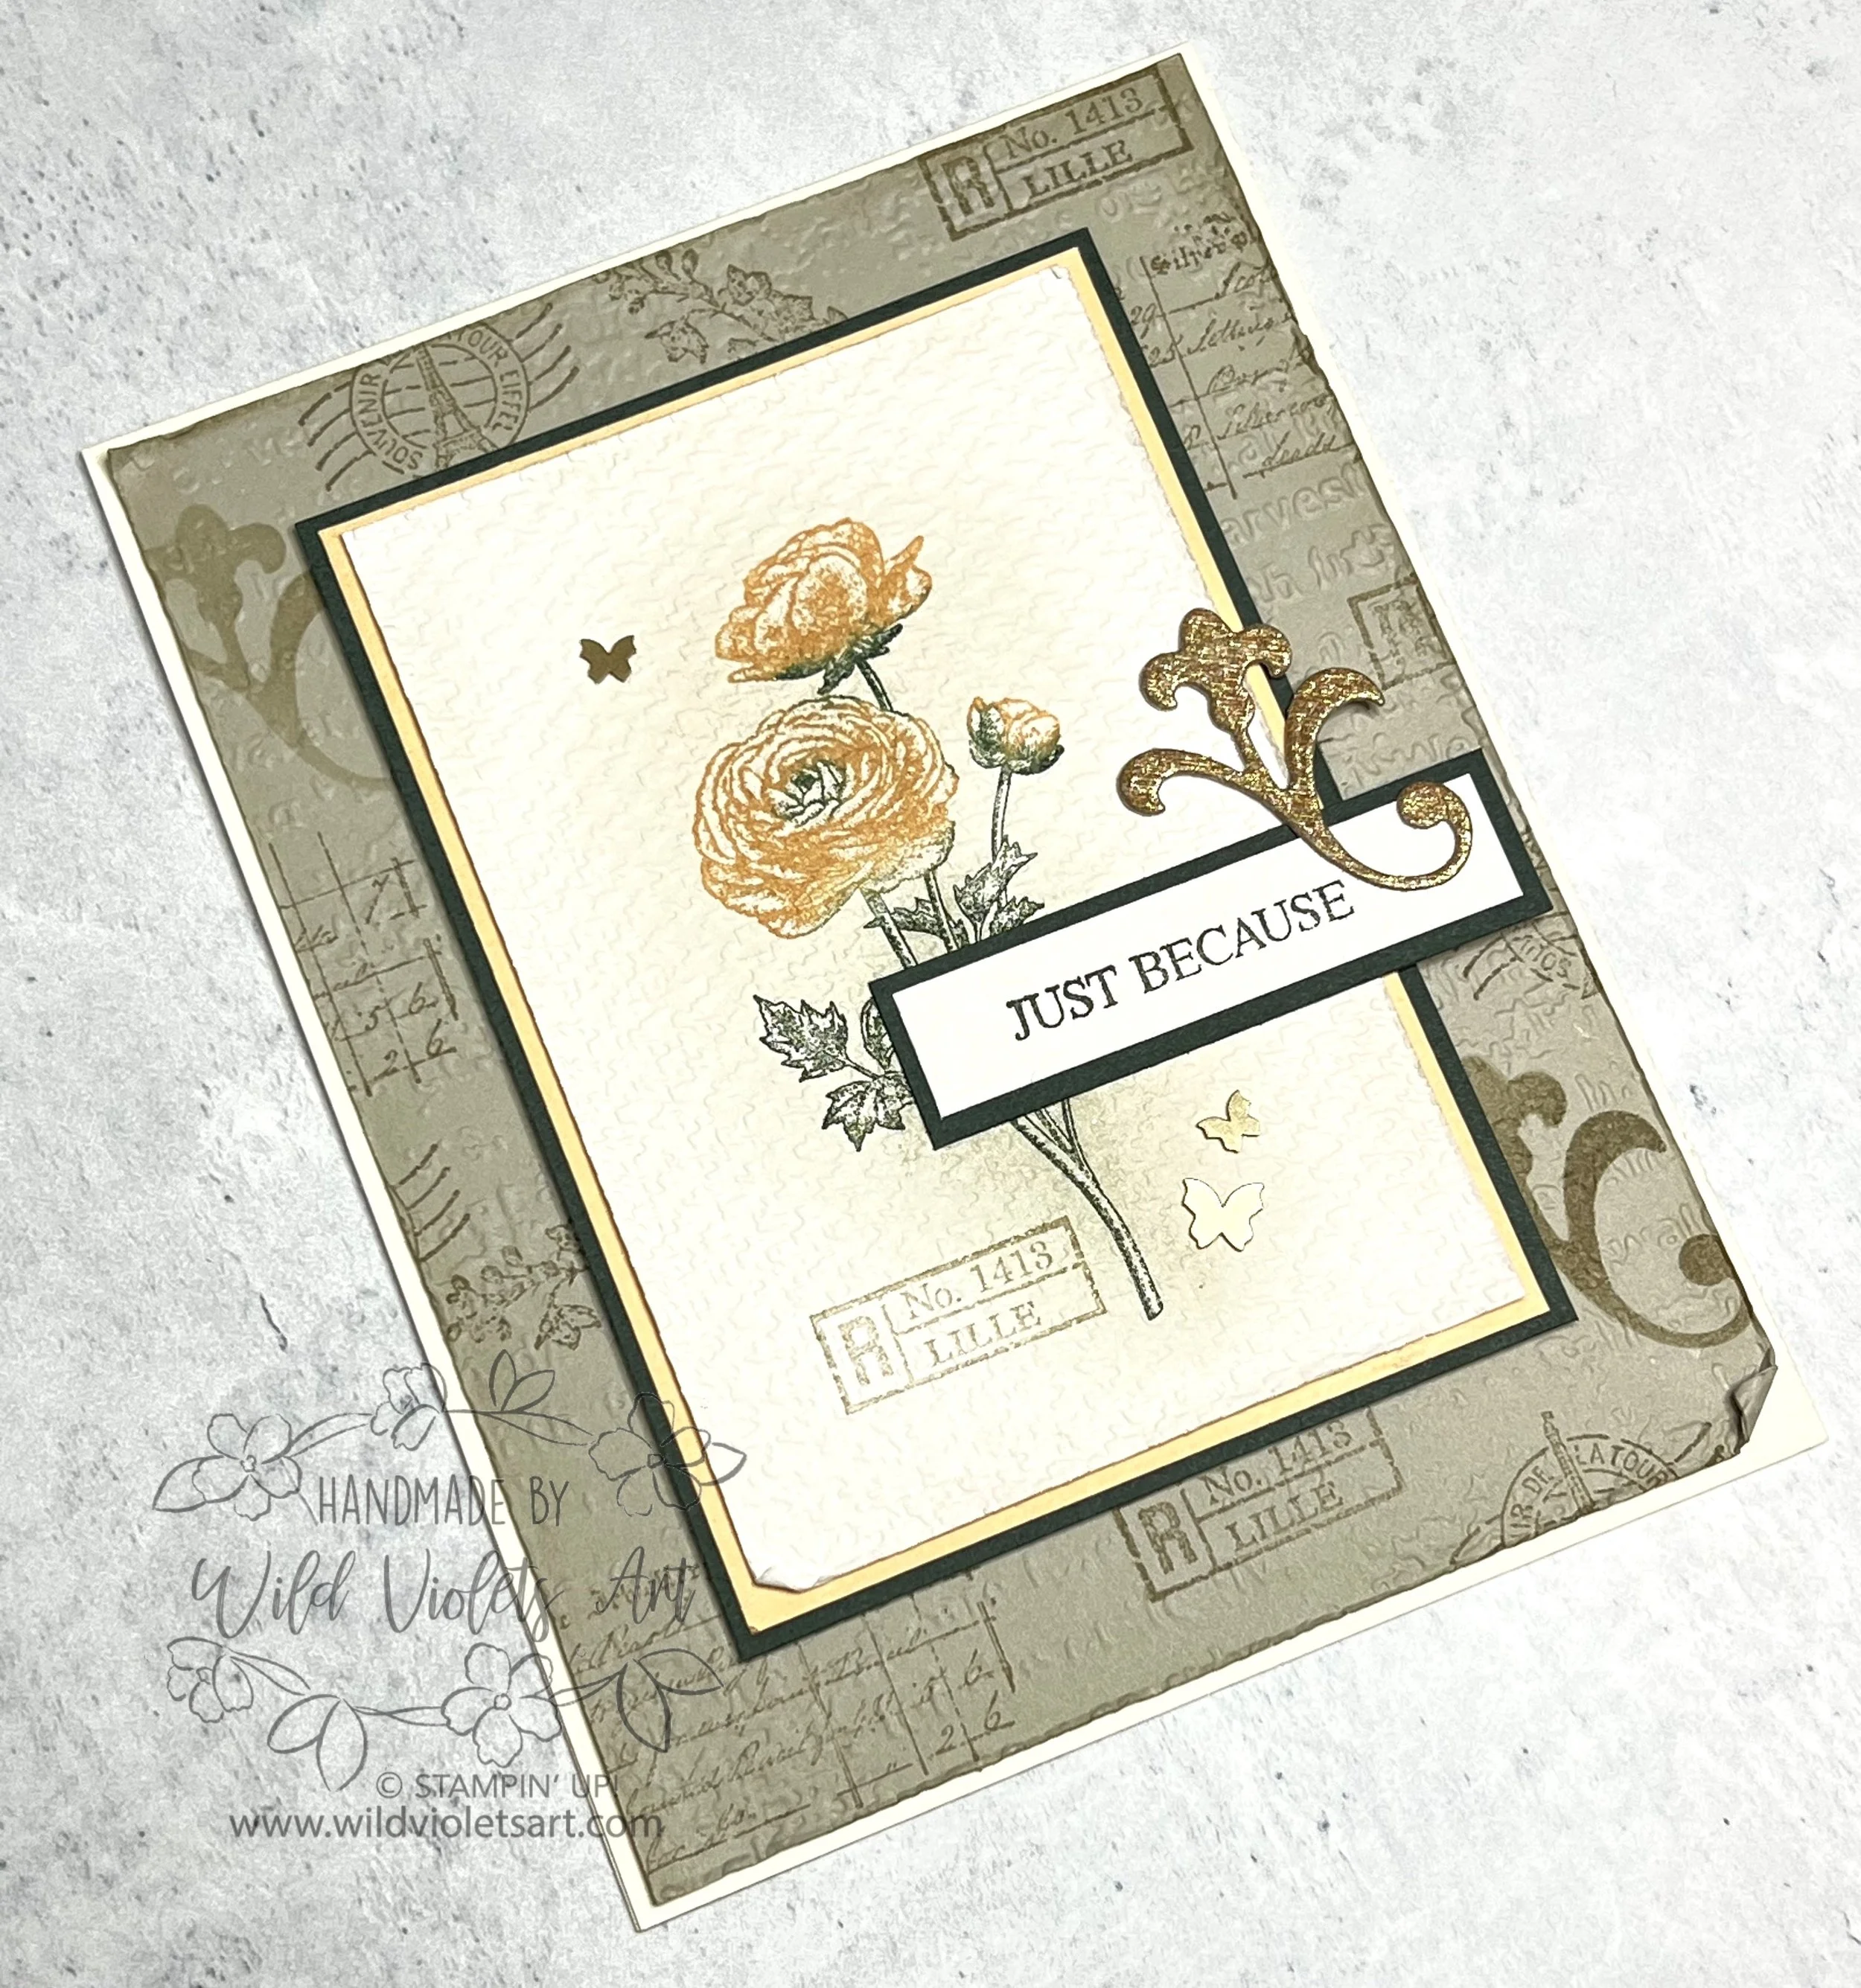
All the images from the Sahara Sand CS piece are from this beautiful stamp set, and after I had stamped it and, I ran it through my Stampin’ Cut & Emboss Machine with the Timeworn Type 3D embossing folder (from the Jul-Dec 2021 Mini Catalog and still available for purchase). I distressed the edges by running my nails along each edge (or you can use scissors) and using my blending brush for just a hint of color for that vintage aged look.
For the next layer, I used a 4-1/4x3” piece of Evening Evergreen CS popped up using, then a 4-1/8”x2-7/8” piece of Pale Papaya CS, and a piece of Shimmery White CS for the top layer (4”x2-3/4”).
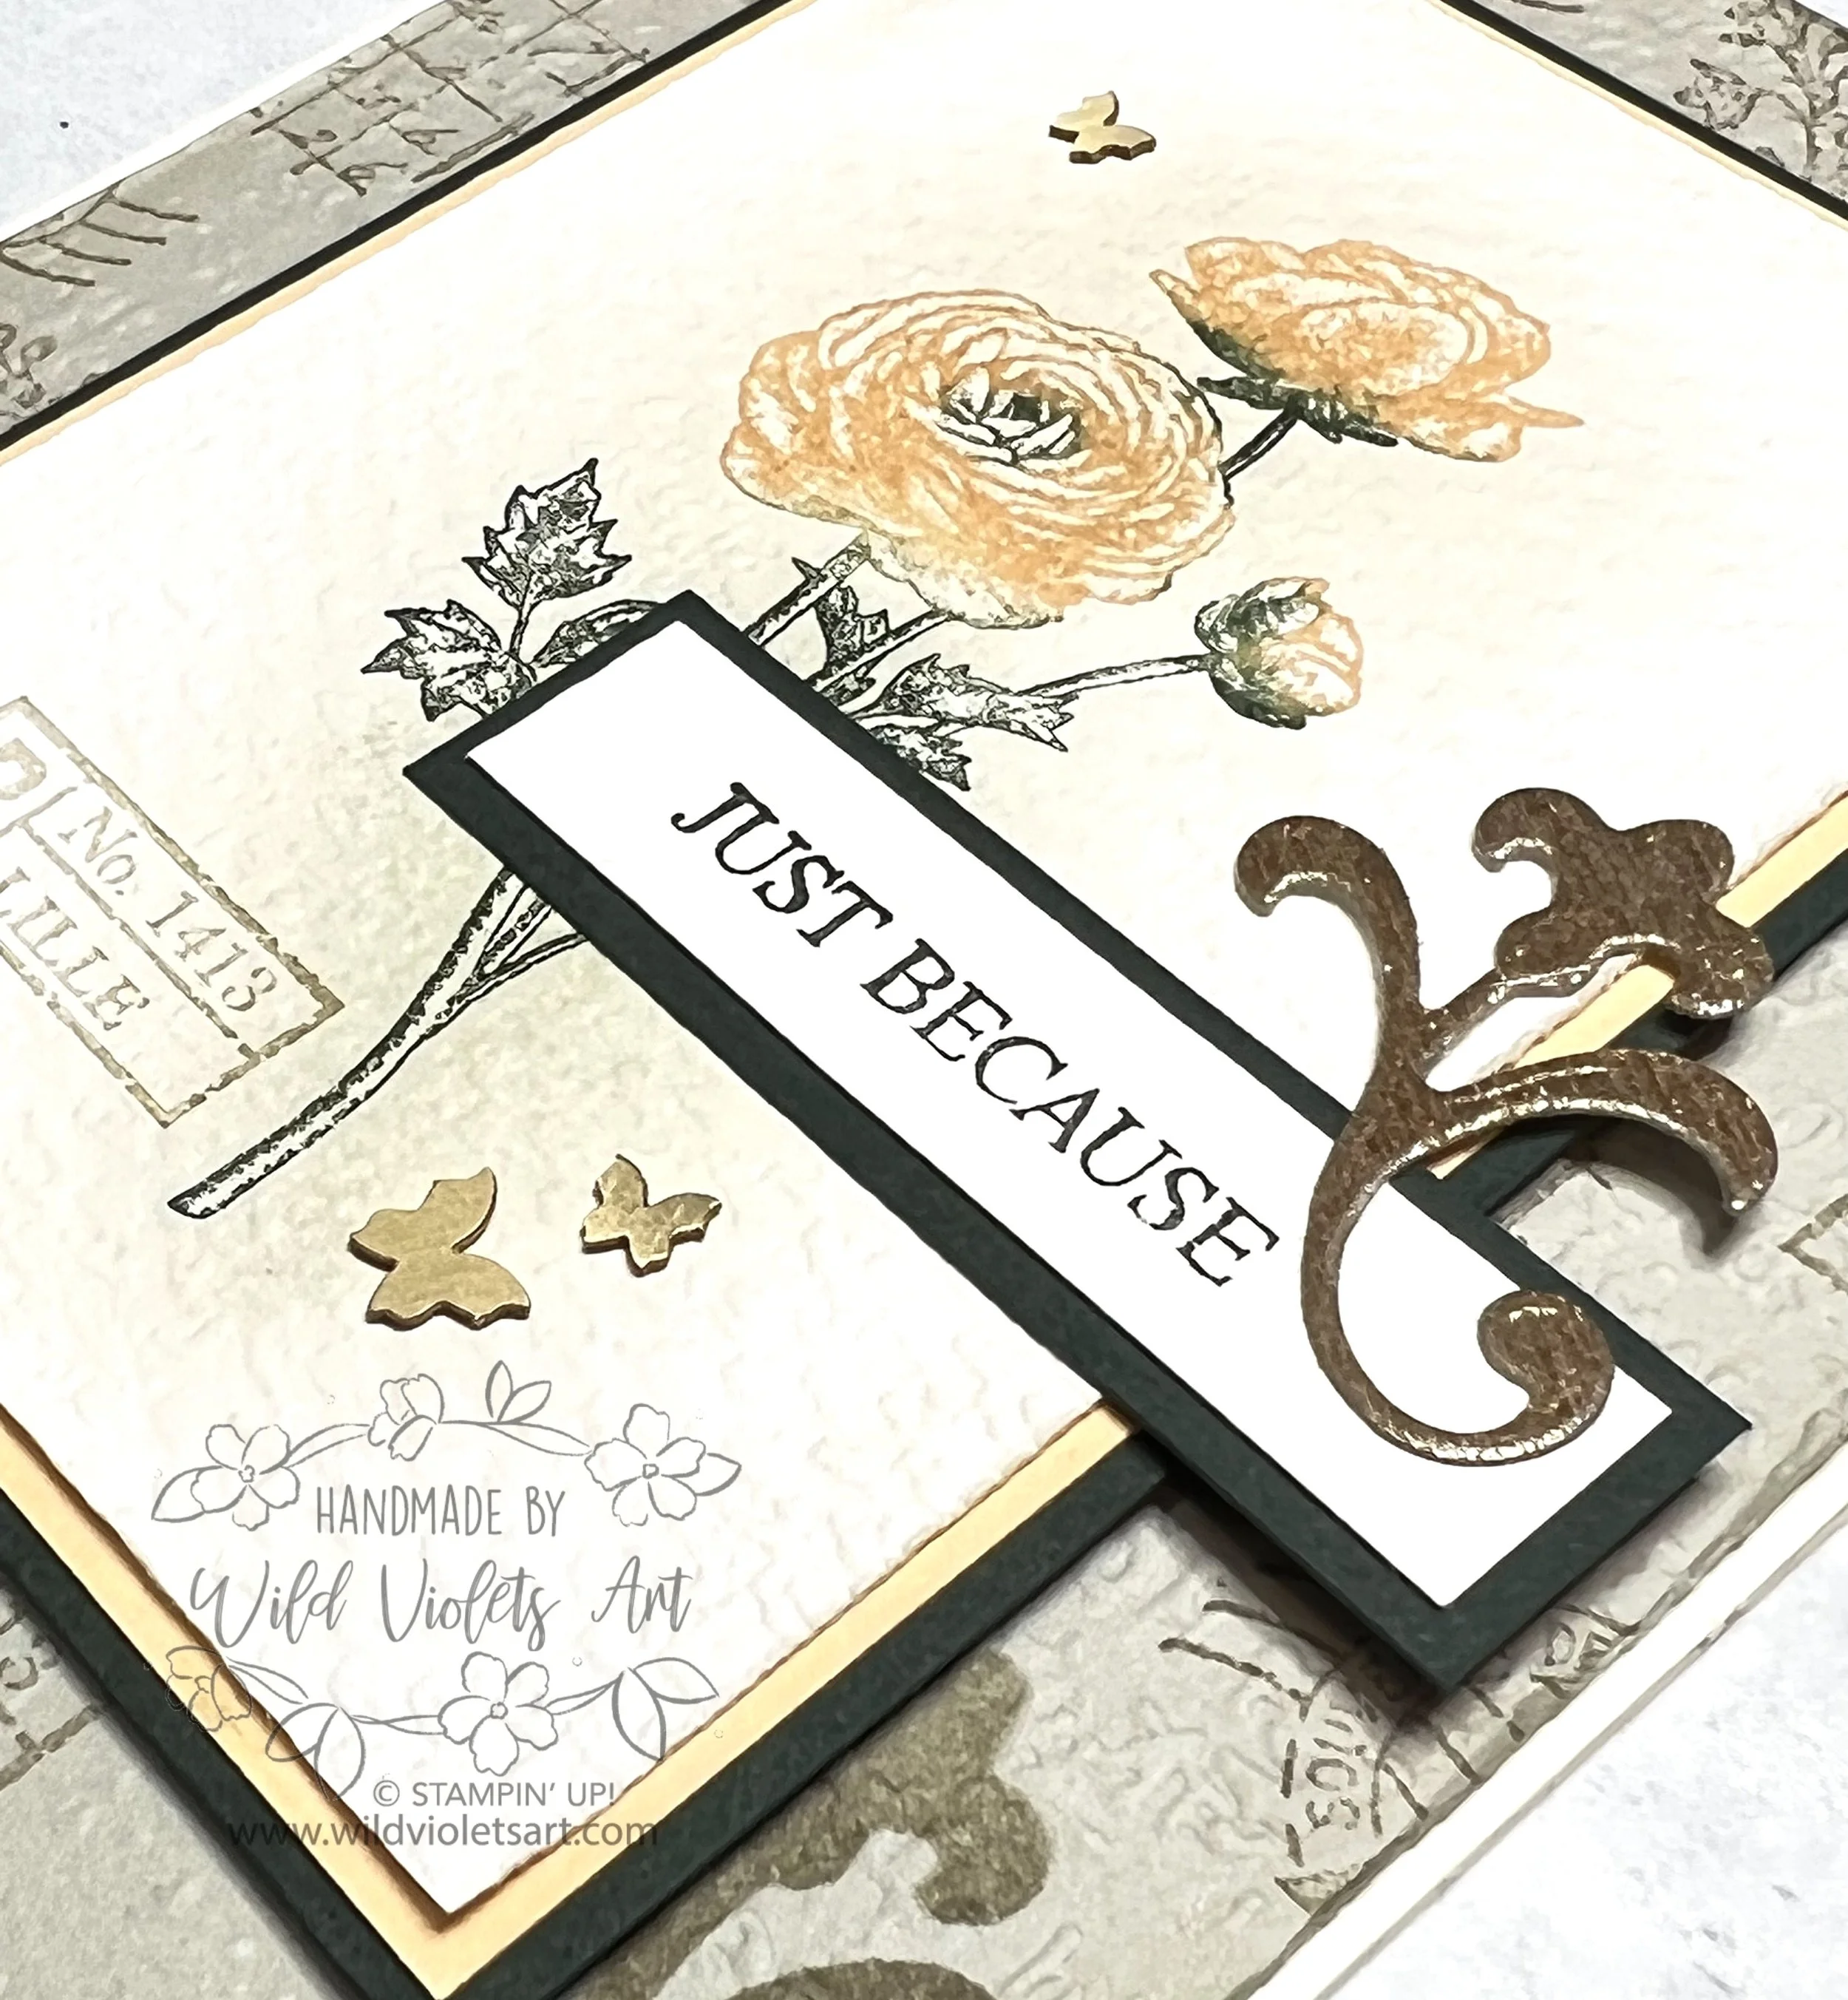
I love to use my Stamparatus when making multiples of one card, as I like my swaps to be consistent. I used my sponge daubers to obtain the two ink colors (Pale Papaya ink and Evening Evergreen ink). For the vintage control number, I used Sahara Sand ink, stamped off once before applying just to the left of the stem for a vintage botanical print look. I then brushed front with Sahara Sand ink with the Blending Brush, and ran the card front through with the Tasteful Textile EF for more of the vintage cardstock feel. My verse was stamped with Evening Evergreen ink over a 3/4” x 2-1/2” scrap of Shimmery White CS, over a 1”x2-3/8” scrap of Evening Evergreen CS.
My filigree die cut piece is from the Gold Metallic Specialty Paper in the Annual Catalog, and the Brushed Brass Butterflies are from the Jan-Jun 2022 Mini Catalog. Don’t forget to stamp your envelope. I used a mix of Pale Papaya Ink, Sahara Sand ink, and Evening Evergreen ink. The filigree on the envelope was inked using Evening Evergreen ink and applied with the Blending Brush.
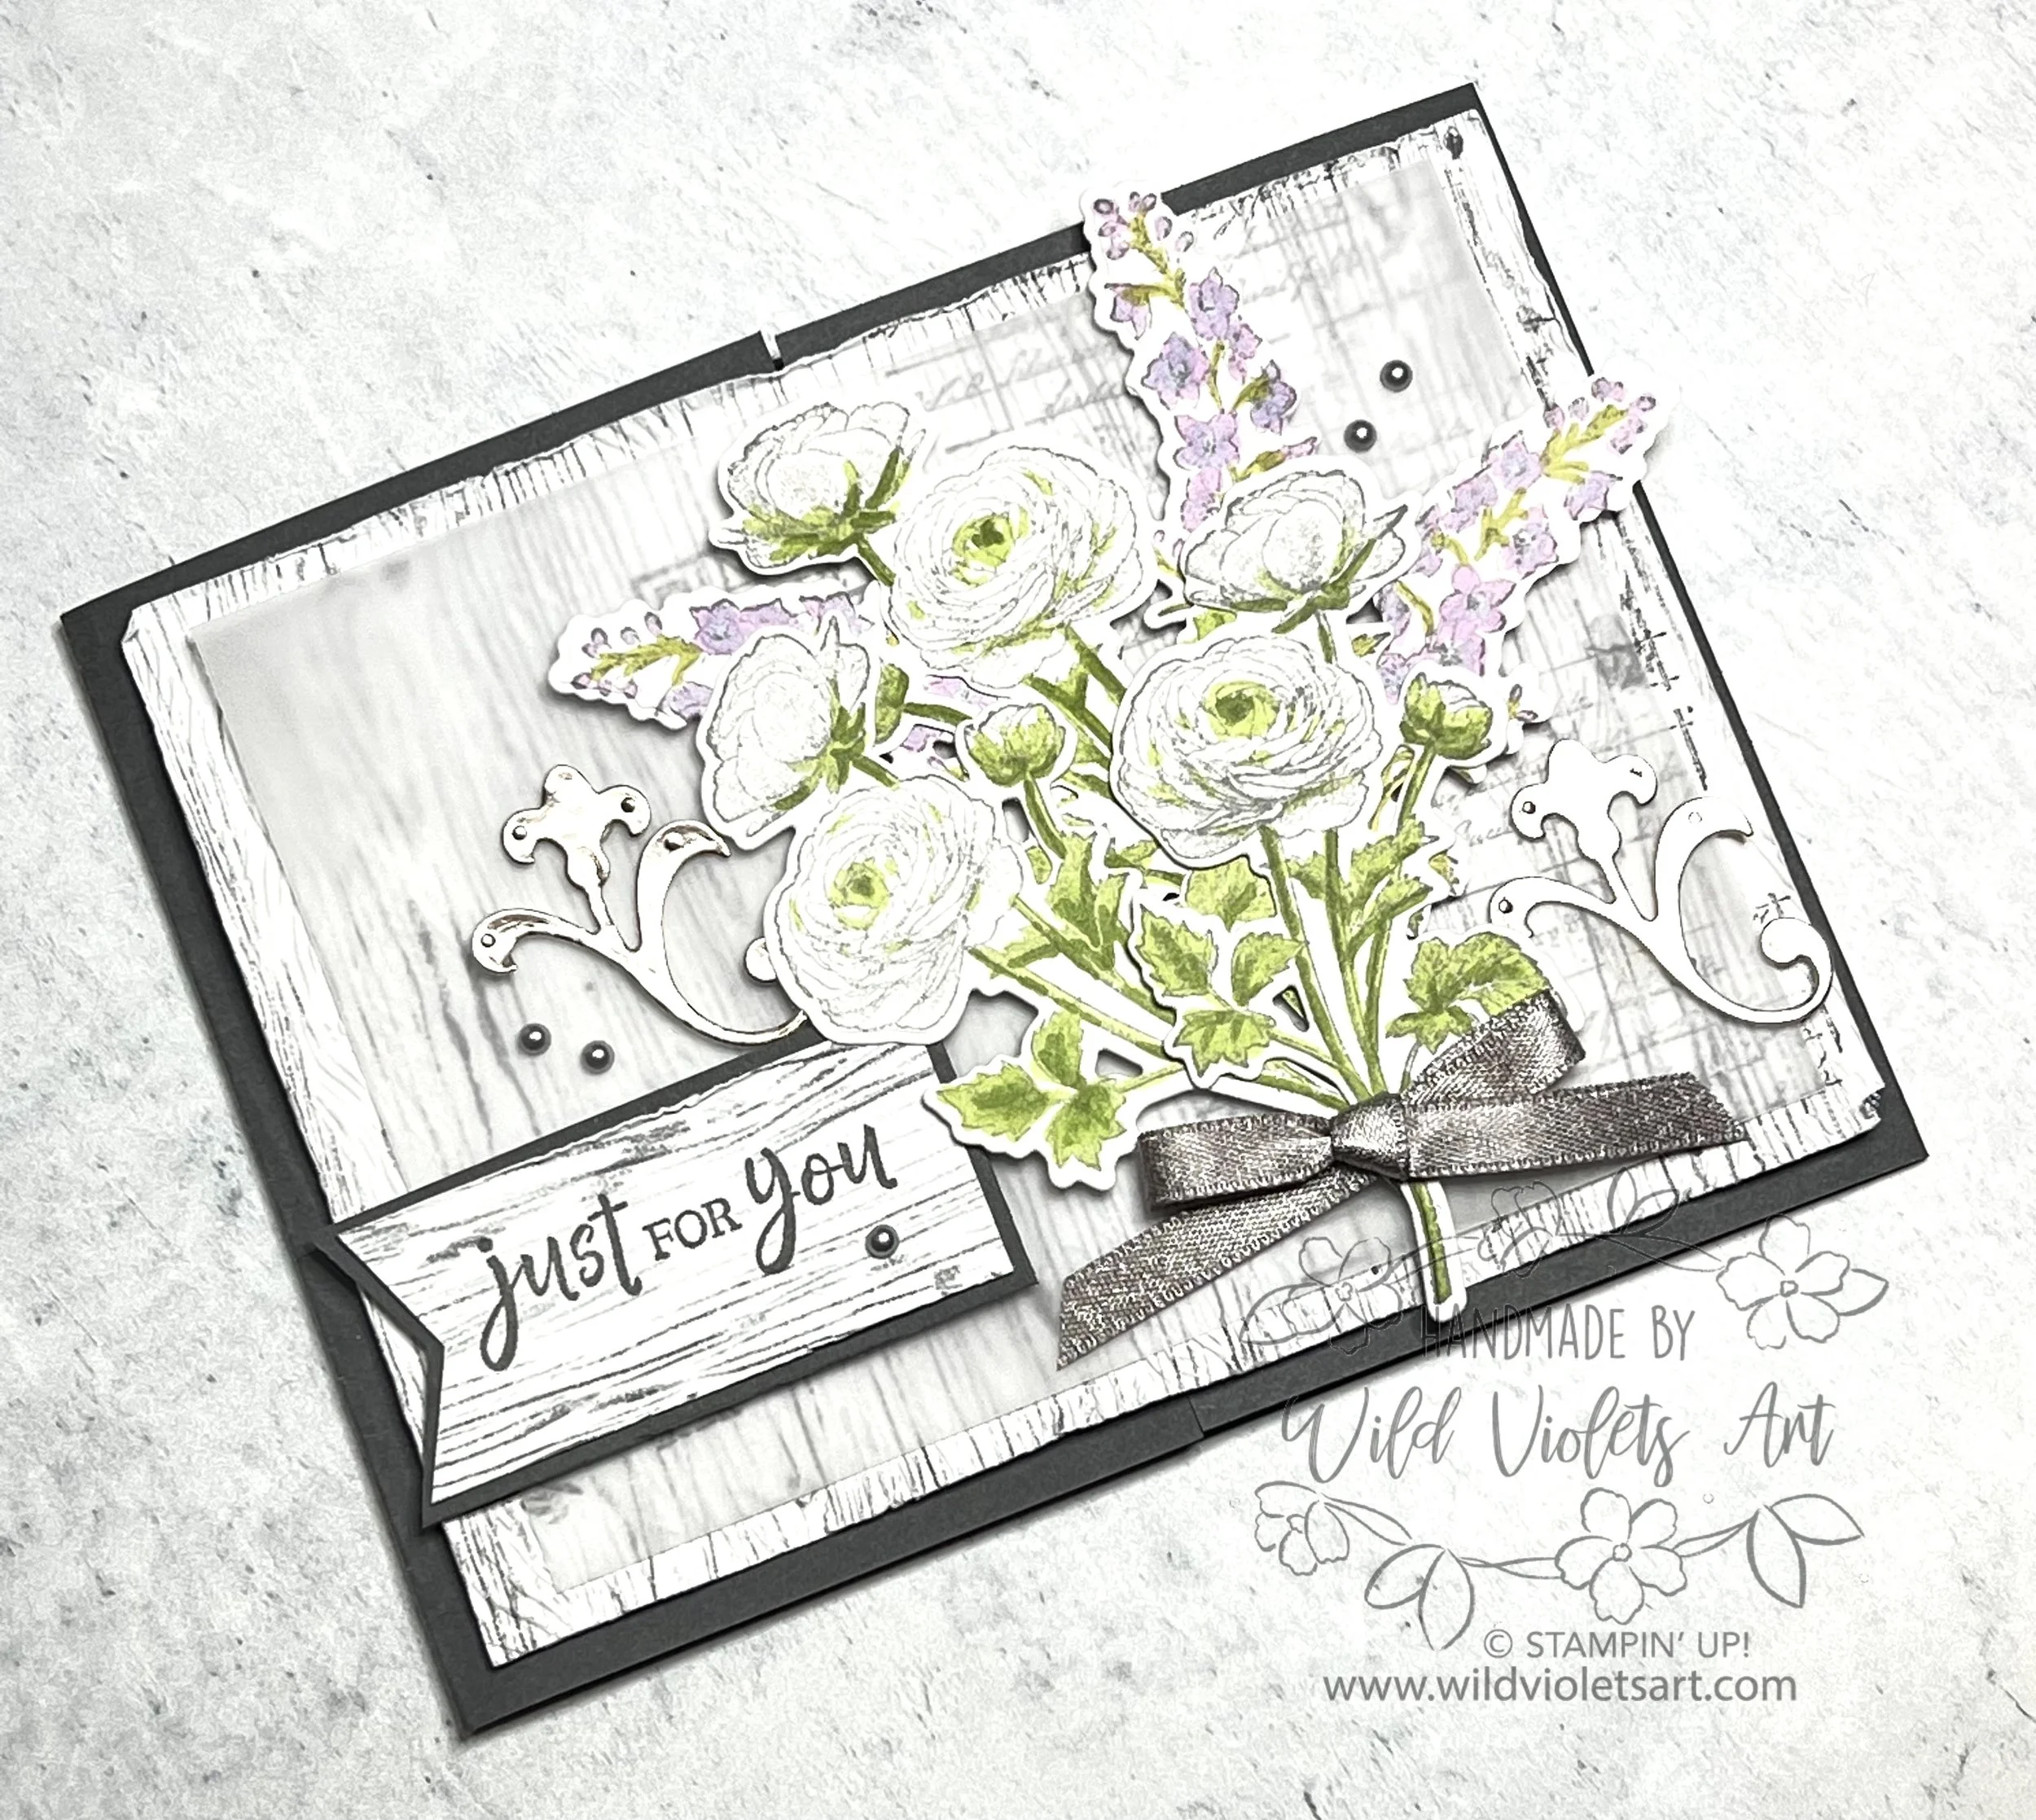
Just For You
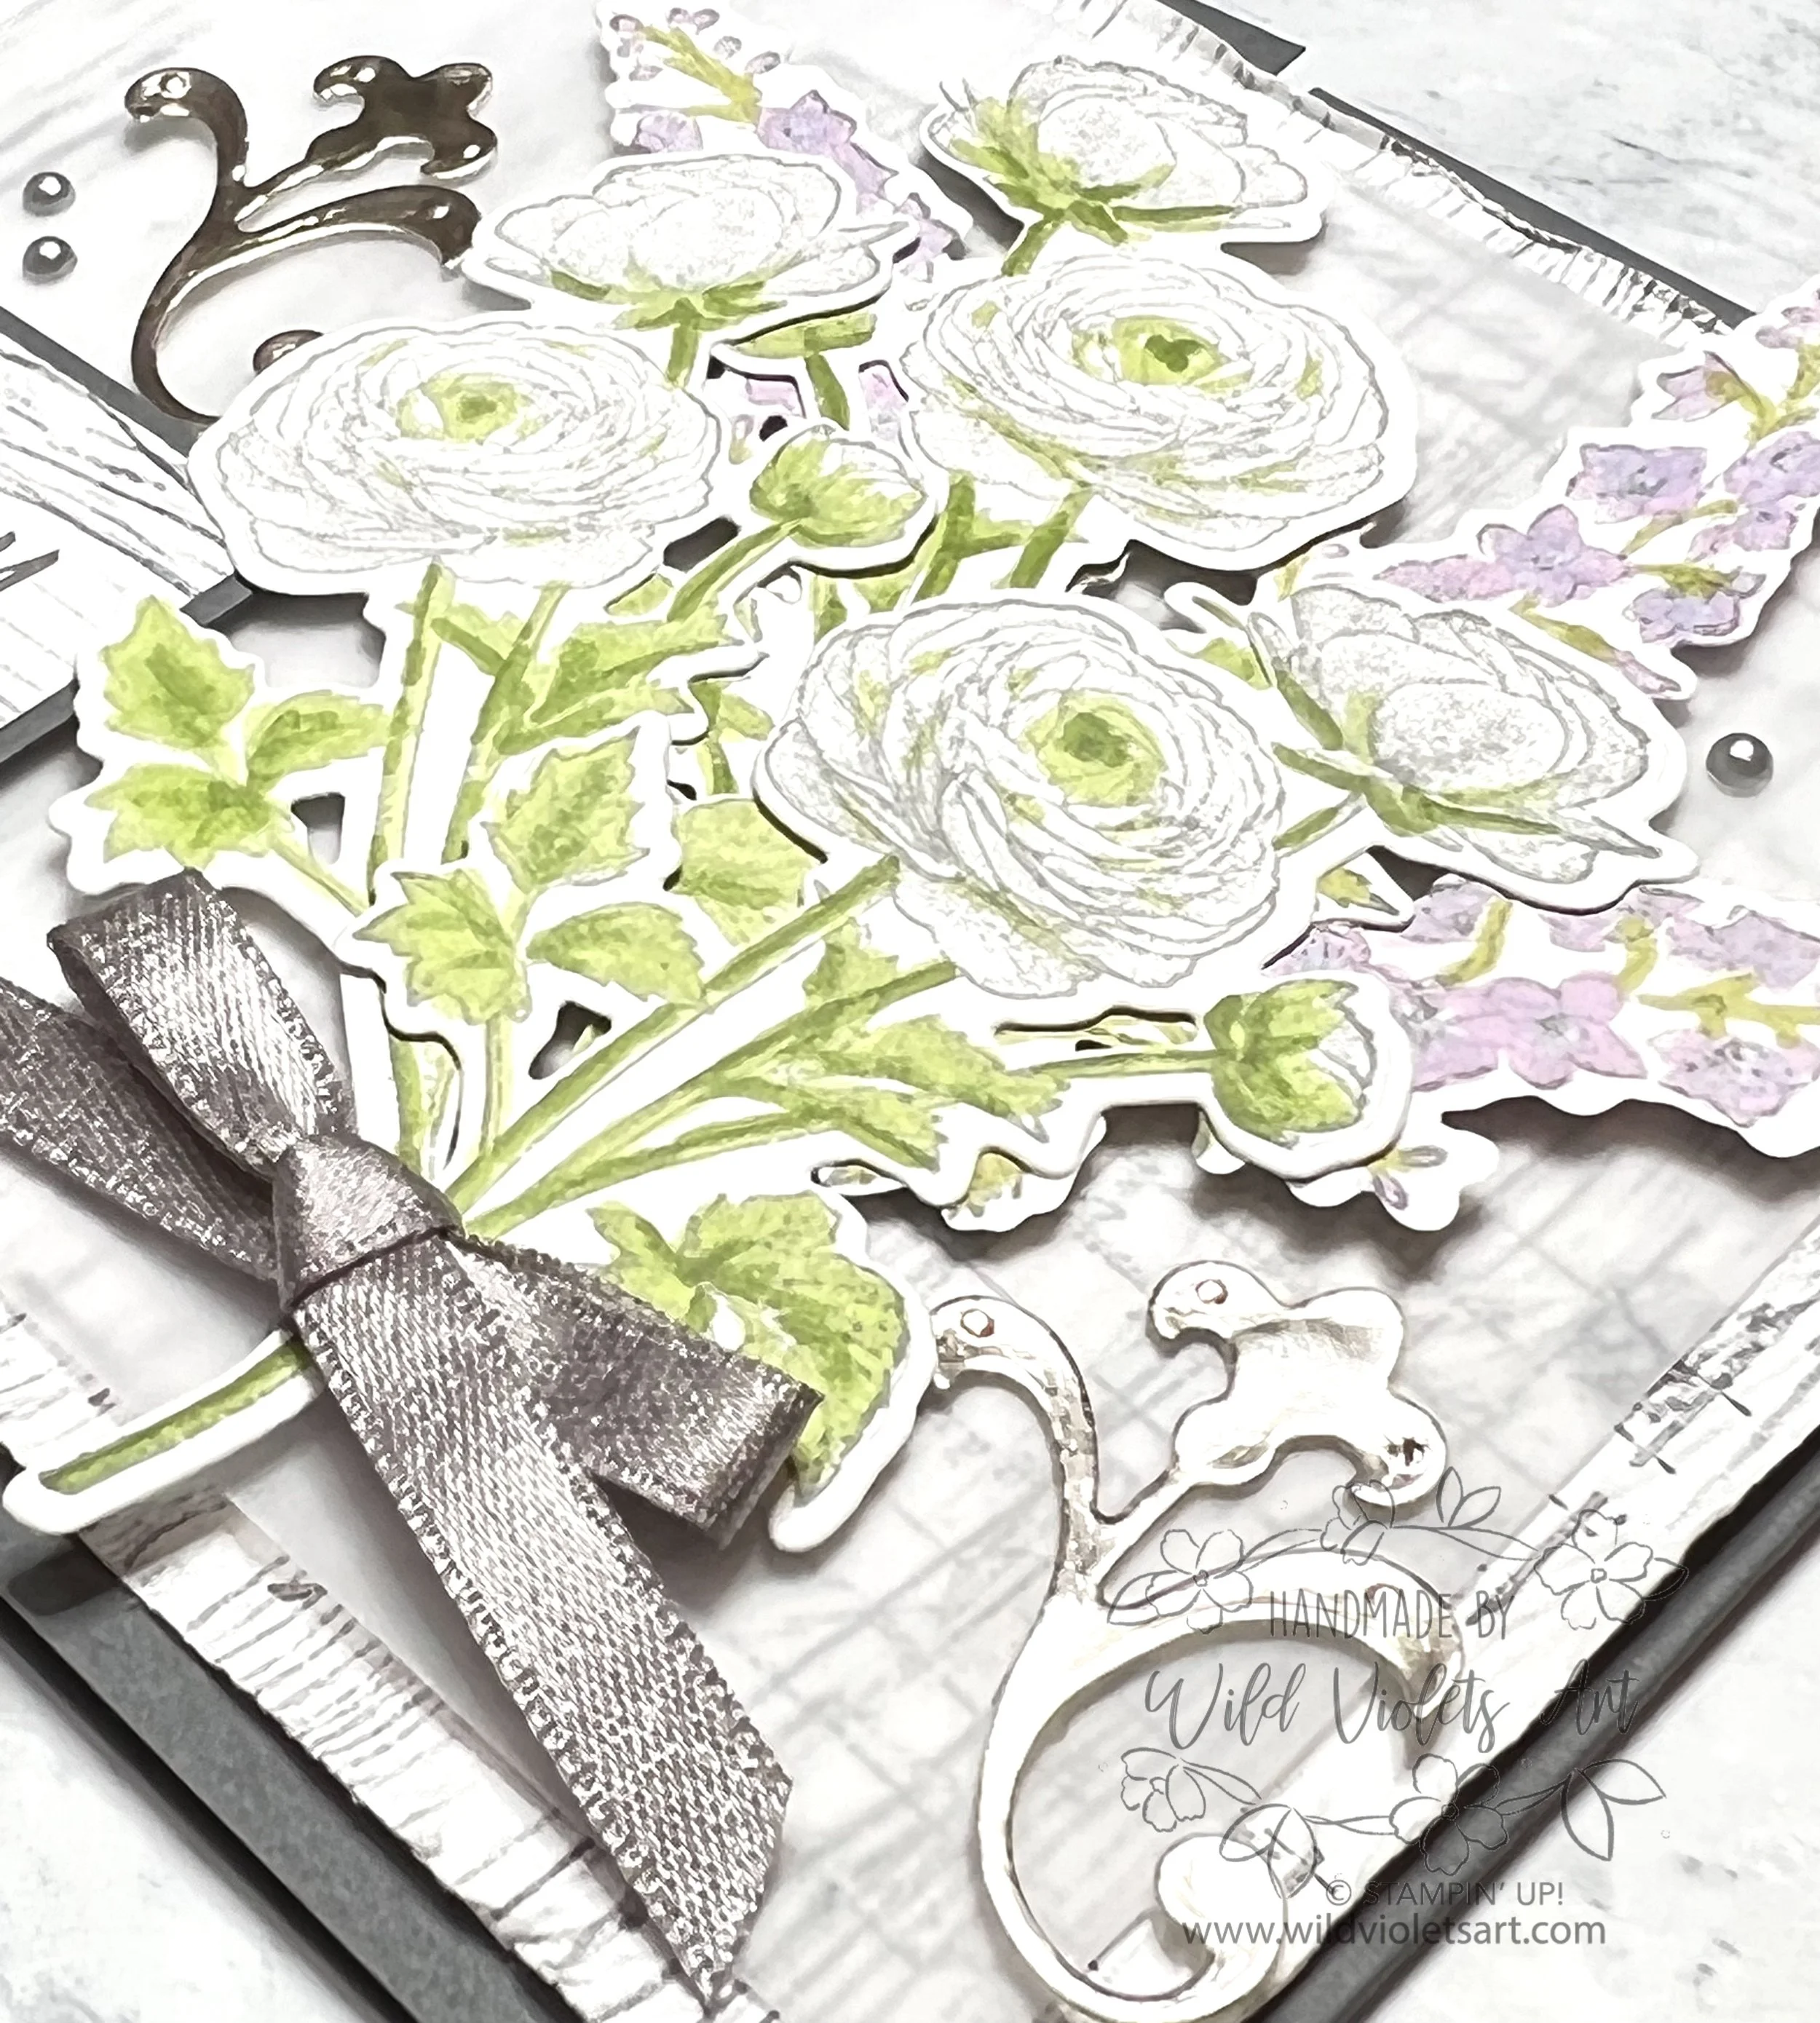
I love posies or bouquets of flowers, and to have pretty white ranunculus and pale periwinkle delphiniums with the silky ribbon makes this card using Ranunculus Romance Bundle, a big favorite! As you may note, some of my flowers are a mirror image of the original stamp. The way I get this effect is to use my trusty Silicone Mat. Ink up your stamp really well, stamp the Silicone Mat, then lay down the cardstock onto the mat and lift it. Voila - you get the mirror of the image!
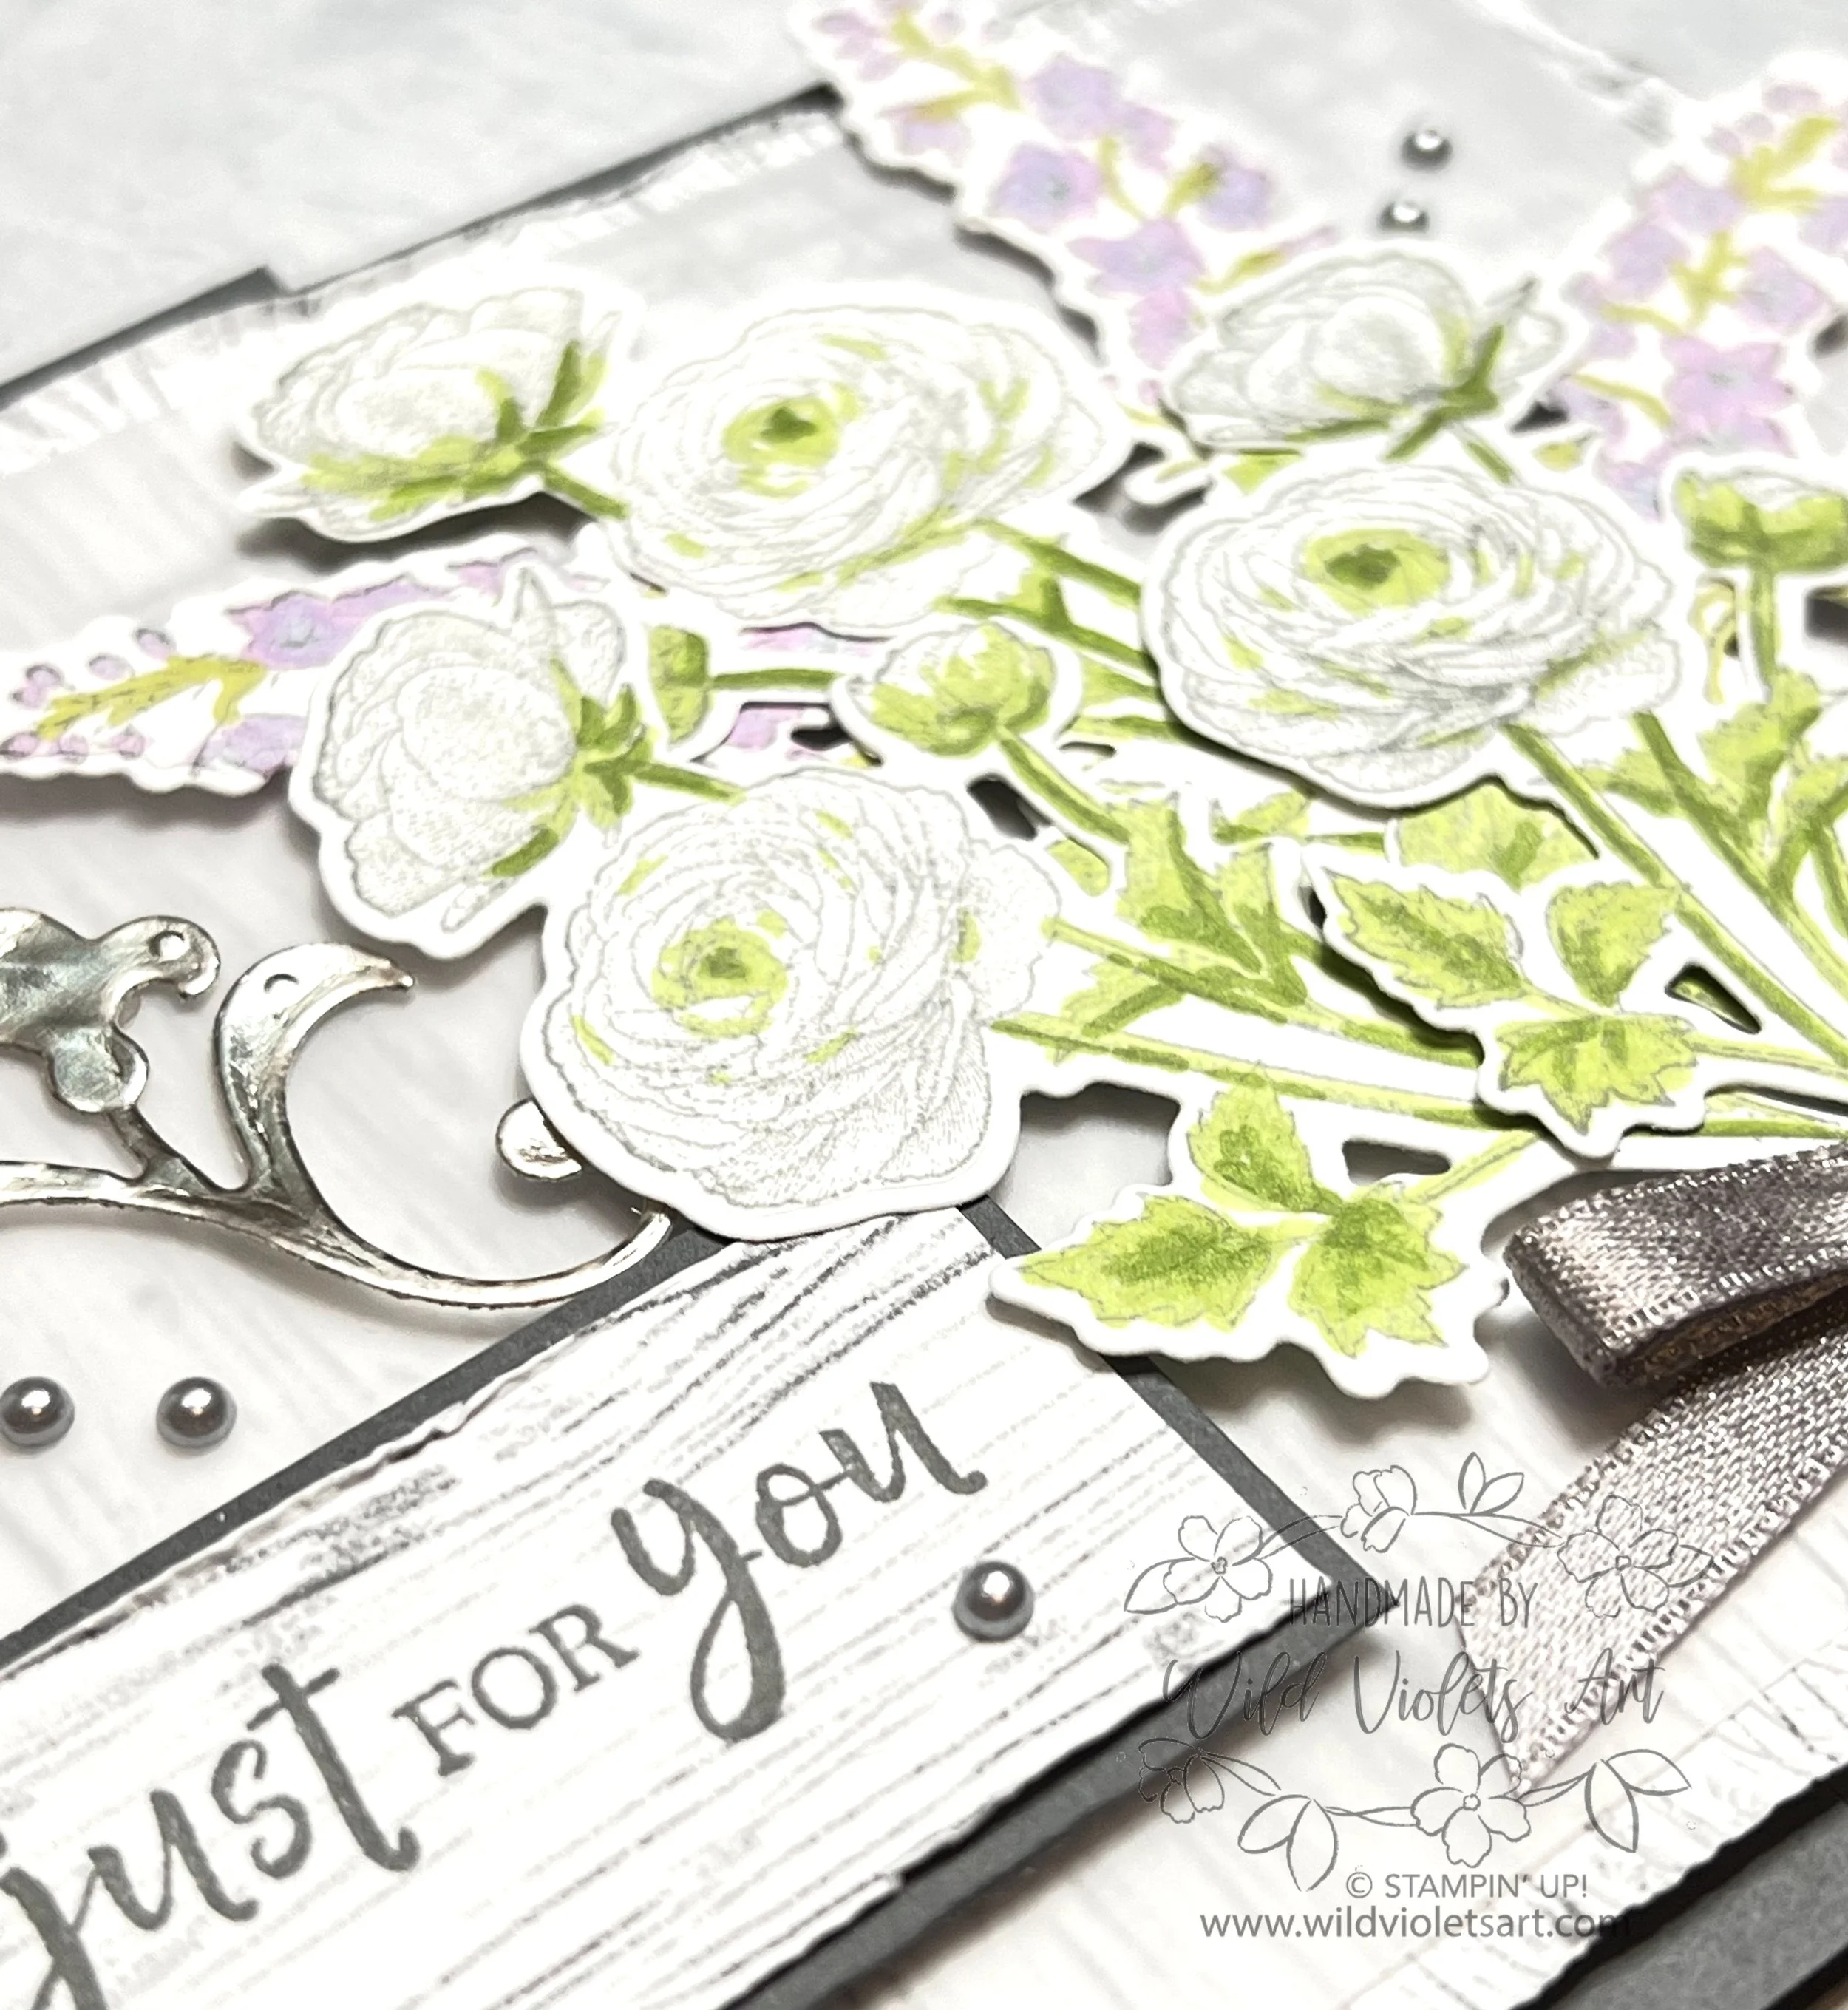
For this card, I used Smoky Slate for the images to try to get a subtle color to show the flowers as white. I stamped 3 images of each flowers, with one each reversed per the above. After stamping, I like to color before I die cut my pieces. I used Granny Apple Green Stampin’ Blends and Fresh Freesia Stampin’ Blends with a little touch of Sea Side Spray Blends (retired). Die cut the flowers and put aside (the two reverse images I held up to the light to die cut from the back).
For my card base, I used Basic Gray CS, 4-1/4”x8-1/2”, scored at 2-3/4” from both ends and folded, braised it with the Bone Folder to make a central opening.
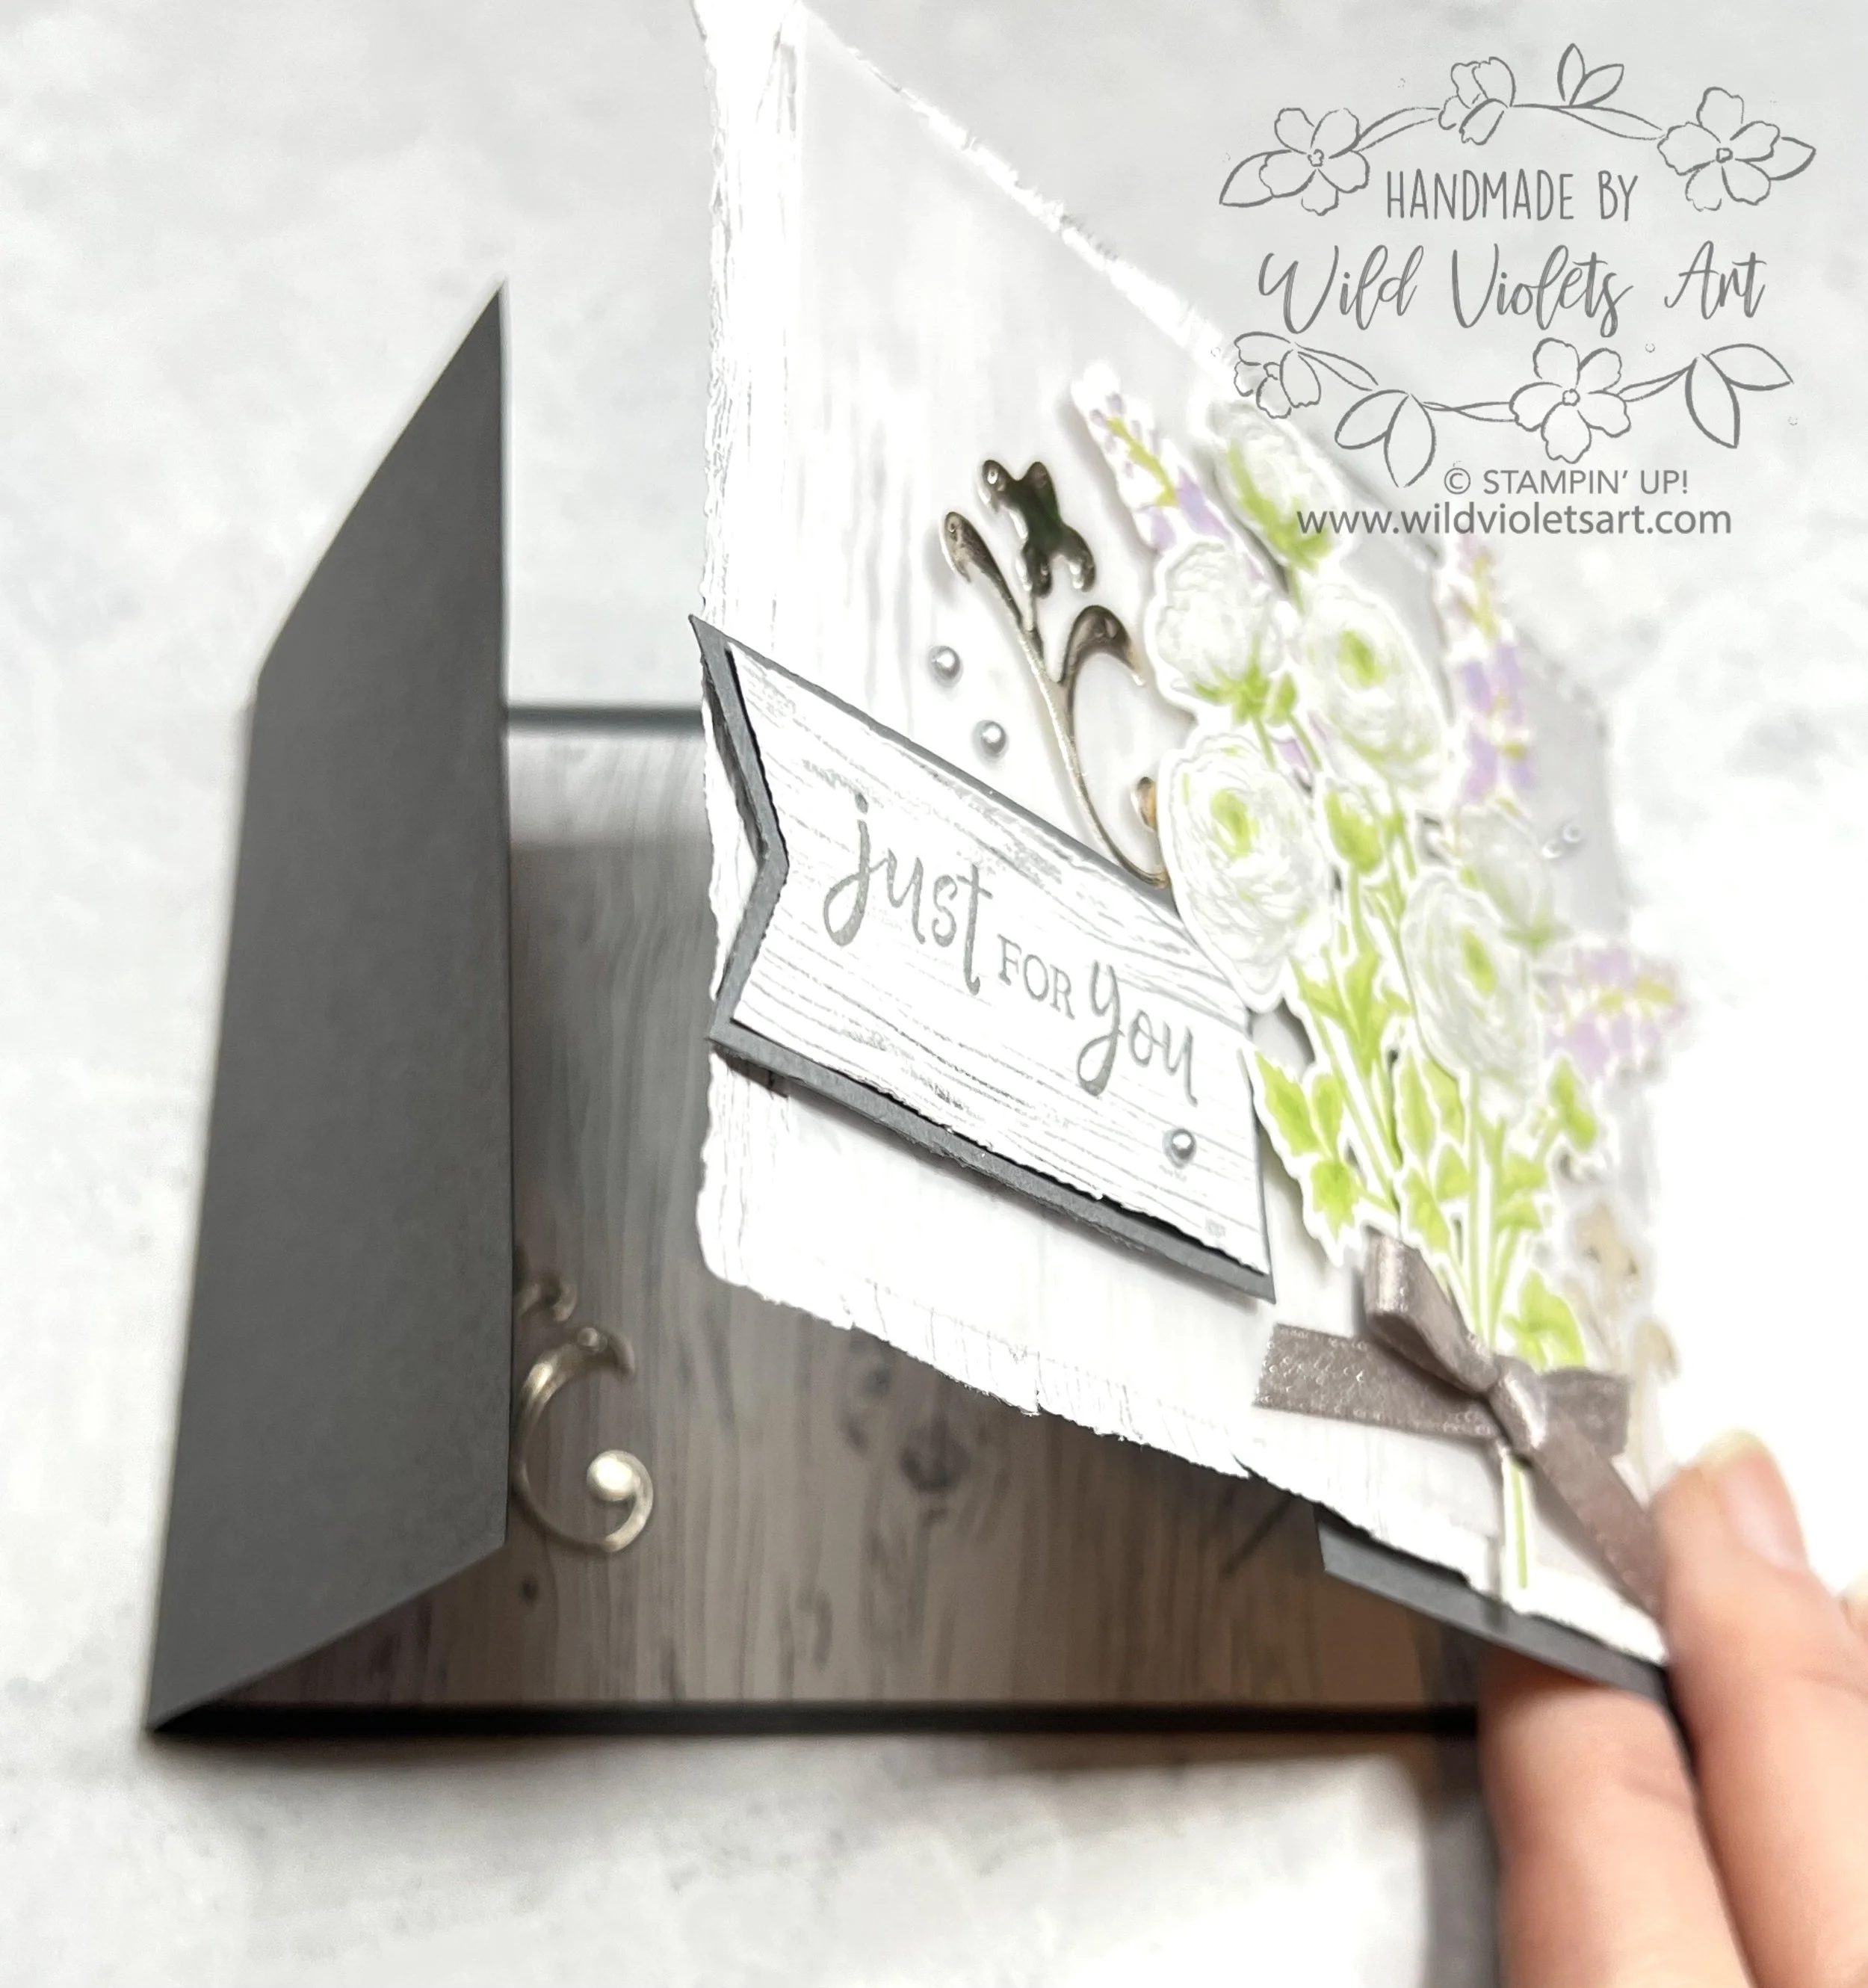
I used Heart and Home DSP for the card front (4”x5-1/4”) and sentiment (1”x2-1/4”), stamping it with the script stamp and verse. I ran the card front through my Stampin’ Cut & Emboss Machine with the Timber 3D EF (from the Jul-Dec 2021 Mini Catalog and still available for purchase). I then distressed the edges with my fingernail and curled the corners. I attached it to the right side of the card front with Stampin’ Dimensionals. I added a layer of Vellum CS (3-5/8”x4-3/4”), adhering with Glue Dots where I have something covering it. I used Silver Foil for the filigree embellishments (I cut 3), adhering them with Glue Dots rolled up.

I arranged the flowers, staggering them back in a pleasing manner, then added Stampin’ Dimensionals to the backside to keep them in position and then adding it to the front right side of my card. I added Gray Granite 1/4” Shimmer Ribbon for the little bow tied around the lowest stem. I layered the sentiment with a 1-1/8”x2-3/8” scrap of Basic Gray CS, and punched both the sentiment piece and layer with the Banners Pick A Punch, glued them together, then popping it up with Stampin Dimensionals on the left side. For the final touch of the card front, I added Metallic Pearls in silver.
For the inside of the card, I use another piece of Heart and Home DSP (4”x5-1/4”), stamping the sentiment and floral (stamped off) in Basic Gray ink. I added another Silver Foil filigree die cut image.


