Painted Christmas Suite

My favorite things I find have to do with gardens (flowers, foliage, and herbs), so it is no surprise that I could not wait to get a chance to dive into the Painted Christmas Suite from the July-December 2021 Mini Catalog. The suite includes two bundles, the Christmas Season Bundle #156801 and Christmas to Remember Bundle #156806. I used this suite for my October Stamp Class and for a upline team swap!
I was super sad about the Peaceful Boughs retirement, so even happier to see that this suite includes the Christmas Pinecone Dies and of course always happy to see more label dies included in the Seasonal Labels dies.

The above is a perfect example of stepping it up. A beautiful card can be simple or more added for a stunning card!

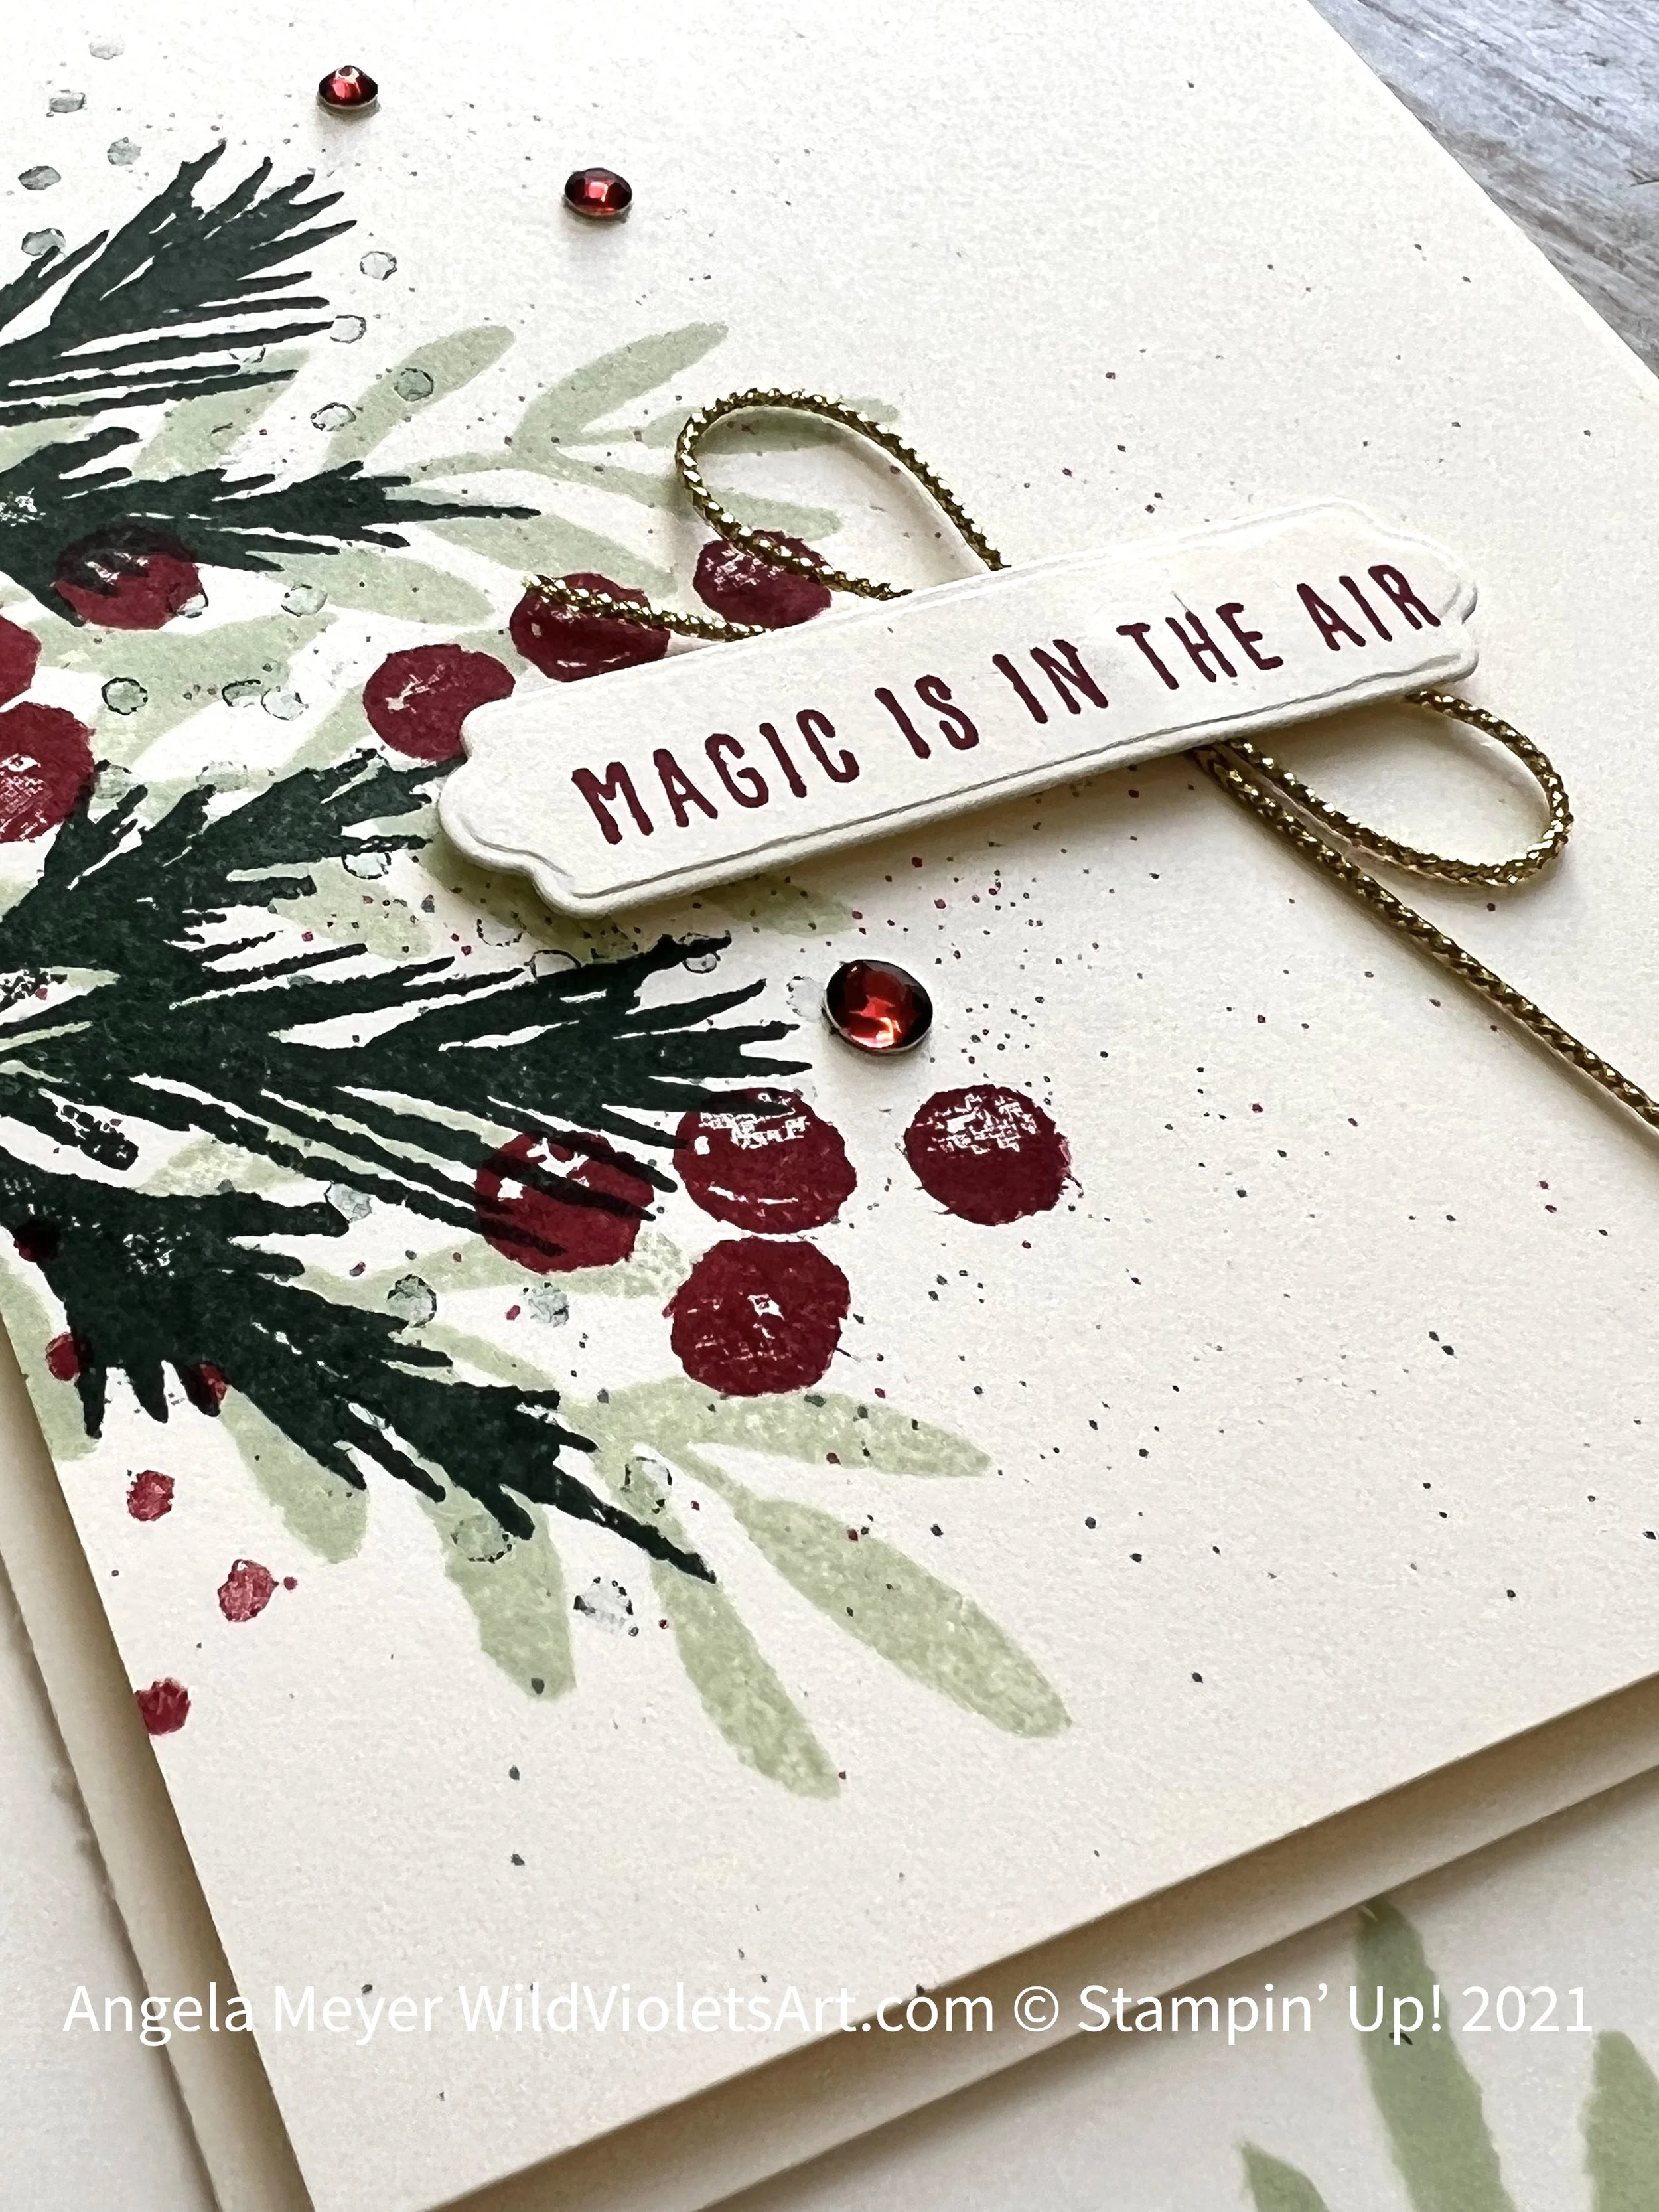
Magic Is In The Air
This is a fun yet simple card that is perfect for #simplestamping or stepping it up to stunning card. The above images shows that plain paper can become a beautiful card that anyone you love would appreciate! To make the card to the left, follow the below.
Items needed: Evening Evergreen Ink Pad #155576, Evening Evergreen Blend #155517, Soft Sea Foam Ink Pad #147102, Cherry Cobbler Ink Pad #147083, Cherry Cobbler Blend #154880, Tasteful Textile 3D EF #152718,Very Vanilla Thick CS #144237 4-1/4”x11” scored at 5-1/2”, Very Vanilla CS #101650 4”x5-1/4 for card front & scrap for verse, Very Vanilla Medium Envelope #107300, Holiday Rhinestone Basic Jewels #150457, Simply Elegant Trim (gold cord) #155766
Ink your images before embossing on the 4”x5-1/4” piece of Very Vanilla CS. I used the 2 (3) pine boughs, long mistletoe and berry stamps. I used a little of the polka dot stamps, but am not a fan, so sprinkled the image with flecks of the Light Evening Evergreen Blend and Light Cherry Cobbler Blend. Then run through Stampin’ Cut & Emboss Machine with Tasteful Textile 3D EF. Use Dimensionals to pop the card front up. The verse has been inked with Cherry Cobbler, then run through with one of the Seasonal Label Dies. I glued the bow in the gold cord with a glue dot, then popped up the verse with Dimensionals. Add Holiday Rhinestone Basic Jewels as desired. I stamped the corner of the envelope with the same as the card front (“never a naked envelope”)! More photos below…

Season’s Greetings
There are so many lovely colors of Christmas cards this year, and loved the color of this gorgeous paper. I had the beautiful Mint Macaron ½” Soft Velvet Ribbon, and have been anxious to use it!
Items Needed: Mint Macaron Ink Pad #147106, Polished Pink Ink Pad #155712, Shimmery Crystal Effects #150892k, Basic White Thick CS #159229, Shimmery White CS #101910 - 4-1/4” x 4-1/4” for foliage & scrap for verse, Painted Christmas 12”x12” DSP #156292 – 4”x5-3/4” card front, 2-1/4”x6-1/2” for envelope & 4”x5/8” for inside of card, Mint Macaron CS #138337 – 4-1/4” x 6” for card front base, Mint Macaron ½” Soft Velvet Ribbon – 8”, 2021-23 In Color Jewels #155571 (Polished Pink), Basic White Medium Envelopes #159236
Stamp 3 sets of berries 1st in Polished Pink, die cut, then add Shimmery Crystal Effects. Set aside to dry. Glue DSP to Mint Macaron CS and then use Tear & Tape (close to bottom) across front and wrapped to about 1” to each side of back of card front. Adhere velvet ribbon to chard front and wrap around back on both sides. Pop up with Dimensionals on card base. Stamp 3 sets of holly in Mint Macaron (you can stamp off if you want different colors), then die cut. Set aside. Stamp verse and die cut with Seasonal Label Dies (largest long die). I used Dimensionals and straddled the velvet ribbon with verse to the right side of card. I then used Glue Dots to adhere the smallest of the holly leaves after folding in half behind the verse on the left. Use more glue dots to adhere the bigger leaves behind the smaller ones, the use Dimensionals to adhere the tips to the card front. Once your berries are dry, add them to your holly leaves. Add jewels as desired. More cards below…

Have a holly jolly Christmas
I love mistletoe and all it means for the holidays. Who doesn’t love a sweet kiss whenever you can get one!
Items Needed: Pear Pizzaz Ink Pad #147104, Gray Granite Ink Pad #147118, Real Red Ink Pad #147084 or Cherry Cobbler Ink Pad #147083, Shimmery Crystal Effects #150892, Timeworn Type 3D EF #156505, Basic White Thick CS #159229 8-1/2”x5-1/2”, scored & folded at 4-1/4”, Basic White CS #159276 4”x5-1/4” card front & scrap for mistletoe & berries, Basic White Medium Envelopes #159236, Cherry Cobbler & Gold ½” Metallic Ribbon #156312 – 10”, Opal Rounds #154289
Ink your verse before embossing on the 4”x5-1/4” piece of Basic White CS. Be sure to place verse near the top of the card front. Run through Stampin’ Cut & Emboss Machine with the Timeworn Type 3D EF. On the scrap, ink the mistletoe and berries. I used Pear Pizzaz for the stem and Gray Granite for the berries, as mistletoe berries are typically white (holly berries are typically red). I stamped two long mistletoe stems and two short stems, and two berries with stems. I then die cut them using the dies. To place the stems. I used Glue Dots on the stem and popped up the leaves with Dimensionals. Same with the berries. After tying the bow, I will use two Glue Dots on each side of the bow knot, and it won’t go anywhere. Then place your Opal Rounds as desired. Once your card is complete, use the Shimmery Crystal Effects to make the berries shine (be generous with the Crystal Effects). Set is aside to dry where it will not get smudged. Takes about 10 min to dry. I like how the Opals match the berries when you are done. More photos below…

Merry Christmas
This is a fun fold I CASE’d (copy and selectively edited) and altered it to make it into a gift card holder from Rose Grunwald (she has a great video).
Items Needed Evening Evergreen Ink Pad #155576, Cherry Cobbler Ink Pad #147083, Soft Succulent Ink Pad #155778, Early Espresso Ink Pad #147114, Crumb Cake Ink Pad #147116, Evening Evergreen CS #155574 – 4-1/4”x5-1/2”, Basic White CS #159276 – 4”x5-1/4” (card base layer), 4-1/2”x4-1/4” (for inside scored)& 4-1/4”x5-1/4” for foliage, Basic White Medium Envelopes #159236, Painted Christmas 12”x12” DSP #156292 – 9-1/2”x3-1/2” (scored at 2-3/8”), & scrap for envelope, Soft Succulent CS ##155776 – 5”x6-1/2” die cut with Basic Borders (stitched envelope V-shaped die & scored at 3-3/4”), 3/8” Open Weave Ribbon in Evening Evergreen – 12”, Gold Holly Leaves #156311
Stamp foliage (1 lg pine cone, 1 sml pine cone, 1 pine bough, 1 large leaf & 1 berry with stem) and verse. I used the “Christmas” from one of the smaller verses and the stand alone “MERRY”. I fussy cut around the Christmas verse and then made angled cuts around the merry verse. Die cut the label (smallest of the bigger Seasonal Label Dies). Set aside. Glue the 4”x5-1/4” Basic White CS piece to the 4-1/4”x5-1/2” Evening Evergreen card base. Take the Soft Succulent CS and fold at score line, then glue to card base over Basic White layer. Leave flap open. Take Painted Christmas DSP, and fold at score line. Bring other end so they meet together perfectly in the middle. Glue to inside of Soft Succulent CS. Open DSP, and add the 4-1/2x4-1/4 once you have folded over the 1” strip for the gift card (glue carefully on each side to secure) so gift card can slide in & out. Stamp verse to inside above 1” pocket. Tie ribbon over front flap of card. Add foliage to label die and secure to flap. Add gold holly leaves as desired. More cards below…

May this be a Christmas…
I love vintage, and saw someone use the Merry Melody 3D Embossing Folder and antique it. So I combined my favorite elements of this suite to create a lovely antique looking card.
Items Needed: Early Espresso Ink Pad #147114, Crumb Cake Ink Pad #147116, Merry Melody 3D EF #156392, Cherry Cobbler CS #119685 – 8-1/2”x5-1/2”, scored at 4-1/4” & folded, Shimmery White CS #101910 - 4” x 5-1/4” for card front (embossed for you) & scrap for verse, Very Vanilla CS #101650 4”x5-1/4 for inside card, Very Vanilla Medium Envelope #107300, Gold Foil # 132622 – 4-1/8”x5-3/8” for card front & scraps for pine cones, Evening Evergreen CS #155574 – 4-1/4”x5-1/2” die cut with Christmas Pinecone Dies, Garden Green CS #102584 – 4-1/4”x5-1/2” die cut with Christmas Pinecones dies, Early Espresso CS #119686 – scraps for pine cone base, Brushed Metallic Adhesive-Backed Dots #156506, Cherry Cobbler & Gold ½” Metallic Ribbon #156312 – 10”
First item is to take your die cut foliage out of the card, and glue it together. Do not worry about taking out the pieces that make up the pine cones as they get covered in the Early Espresso CS. Set aside. Use a blending brush or a sponge and antique your Shimmery CS embossed with the Merry Melody EF, then distress the edges. Glue the Gold Foil CS to the Cherry Cobbler Base. Pop up the embossed card front with Dimensionals. Take your foliage and cut apart in sections that you can use on this card and remainder can go on another card or tag. Die cut the pine cone base with the Early Espresso CS and the upper layer with the Gold Foil, then glue together (you have only enough for 3 pine cones, though the sample shows 4). Stamp verse on Shimmery White scrap, then die cut with the Seasonal Die – next to largest scalloped die. Place foliage and verse as desired. Add ribbon to one side and metallic dots as desired. More pics below…