

Share A Milkshake - Step it up

Is there a sweeter treat than a Milkshake or a Sundae when shared with a friend? I know it’s cold outside, but ice cream is a year around treat… just bundle & snuggle up!
The new Share A Milkshake Bundle from the new Jan-Apr 2023 Mini Catalog is adorable and will be featured in my upcoming FREE WITH PURCHASE Stamp Class coming on January 14 & 15, 2023.
The sentiments for this adorable bundle can be used year around for birthdays, friends, and celebrations, but also for Valentines! If you want to be added to this class, either purchase my To-Go kit FOR $25.50, or buy $35 or more from my store using my Host Code JFFHMU3W before 1/8/23, I will send you the kit for FREE or reserve your spot for my In-Person class.

In October, I started a series of FB lives that are for the beginner stamper. In my 9th of 52, I featured this card, the two-step stamping technique for the milkshake and sundae dishes, and how easy it is to “step-it-up” from a casual crafter to an artfully avid crafter card. The video has been added to my YouTube channel, so if you know of a beginner stamper, point them to the video series below.

Life is Sweeter…
I used the Basic White Thick CS for this card, the typical A2 card (5-1/2”x8-1/2”, folded in half), and stamped directly on the cardstock using Balmy Blue and Polished Pink. The dishes work best if you stamp the darker part first at full strength ink (Balmy Blue), then stamp off on the blotter for the 2nd part of the dish, then line it up. It took me a few tries on my blotter first. To achieve the light pink ice cream, I stamped the ink, then stamped it off on my blotter, then added it to my card.
I stamped the cherry and heart at full strength ink, and added the heart stamps to the envelope lower left corner as well. For the embellishment, I used the 2022-24 In Color Opal Rounds in Polished Pink for that final touch.
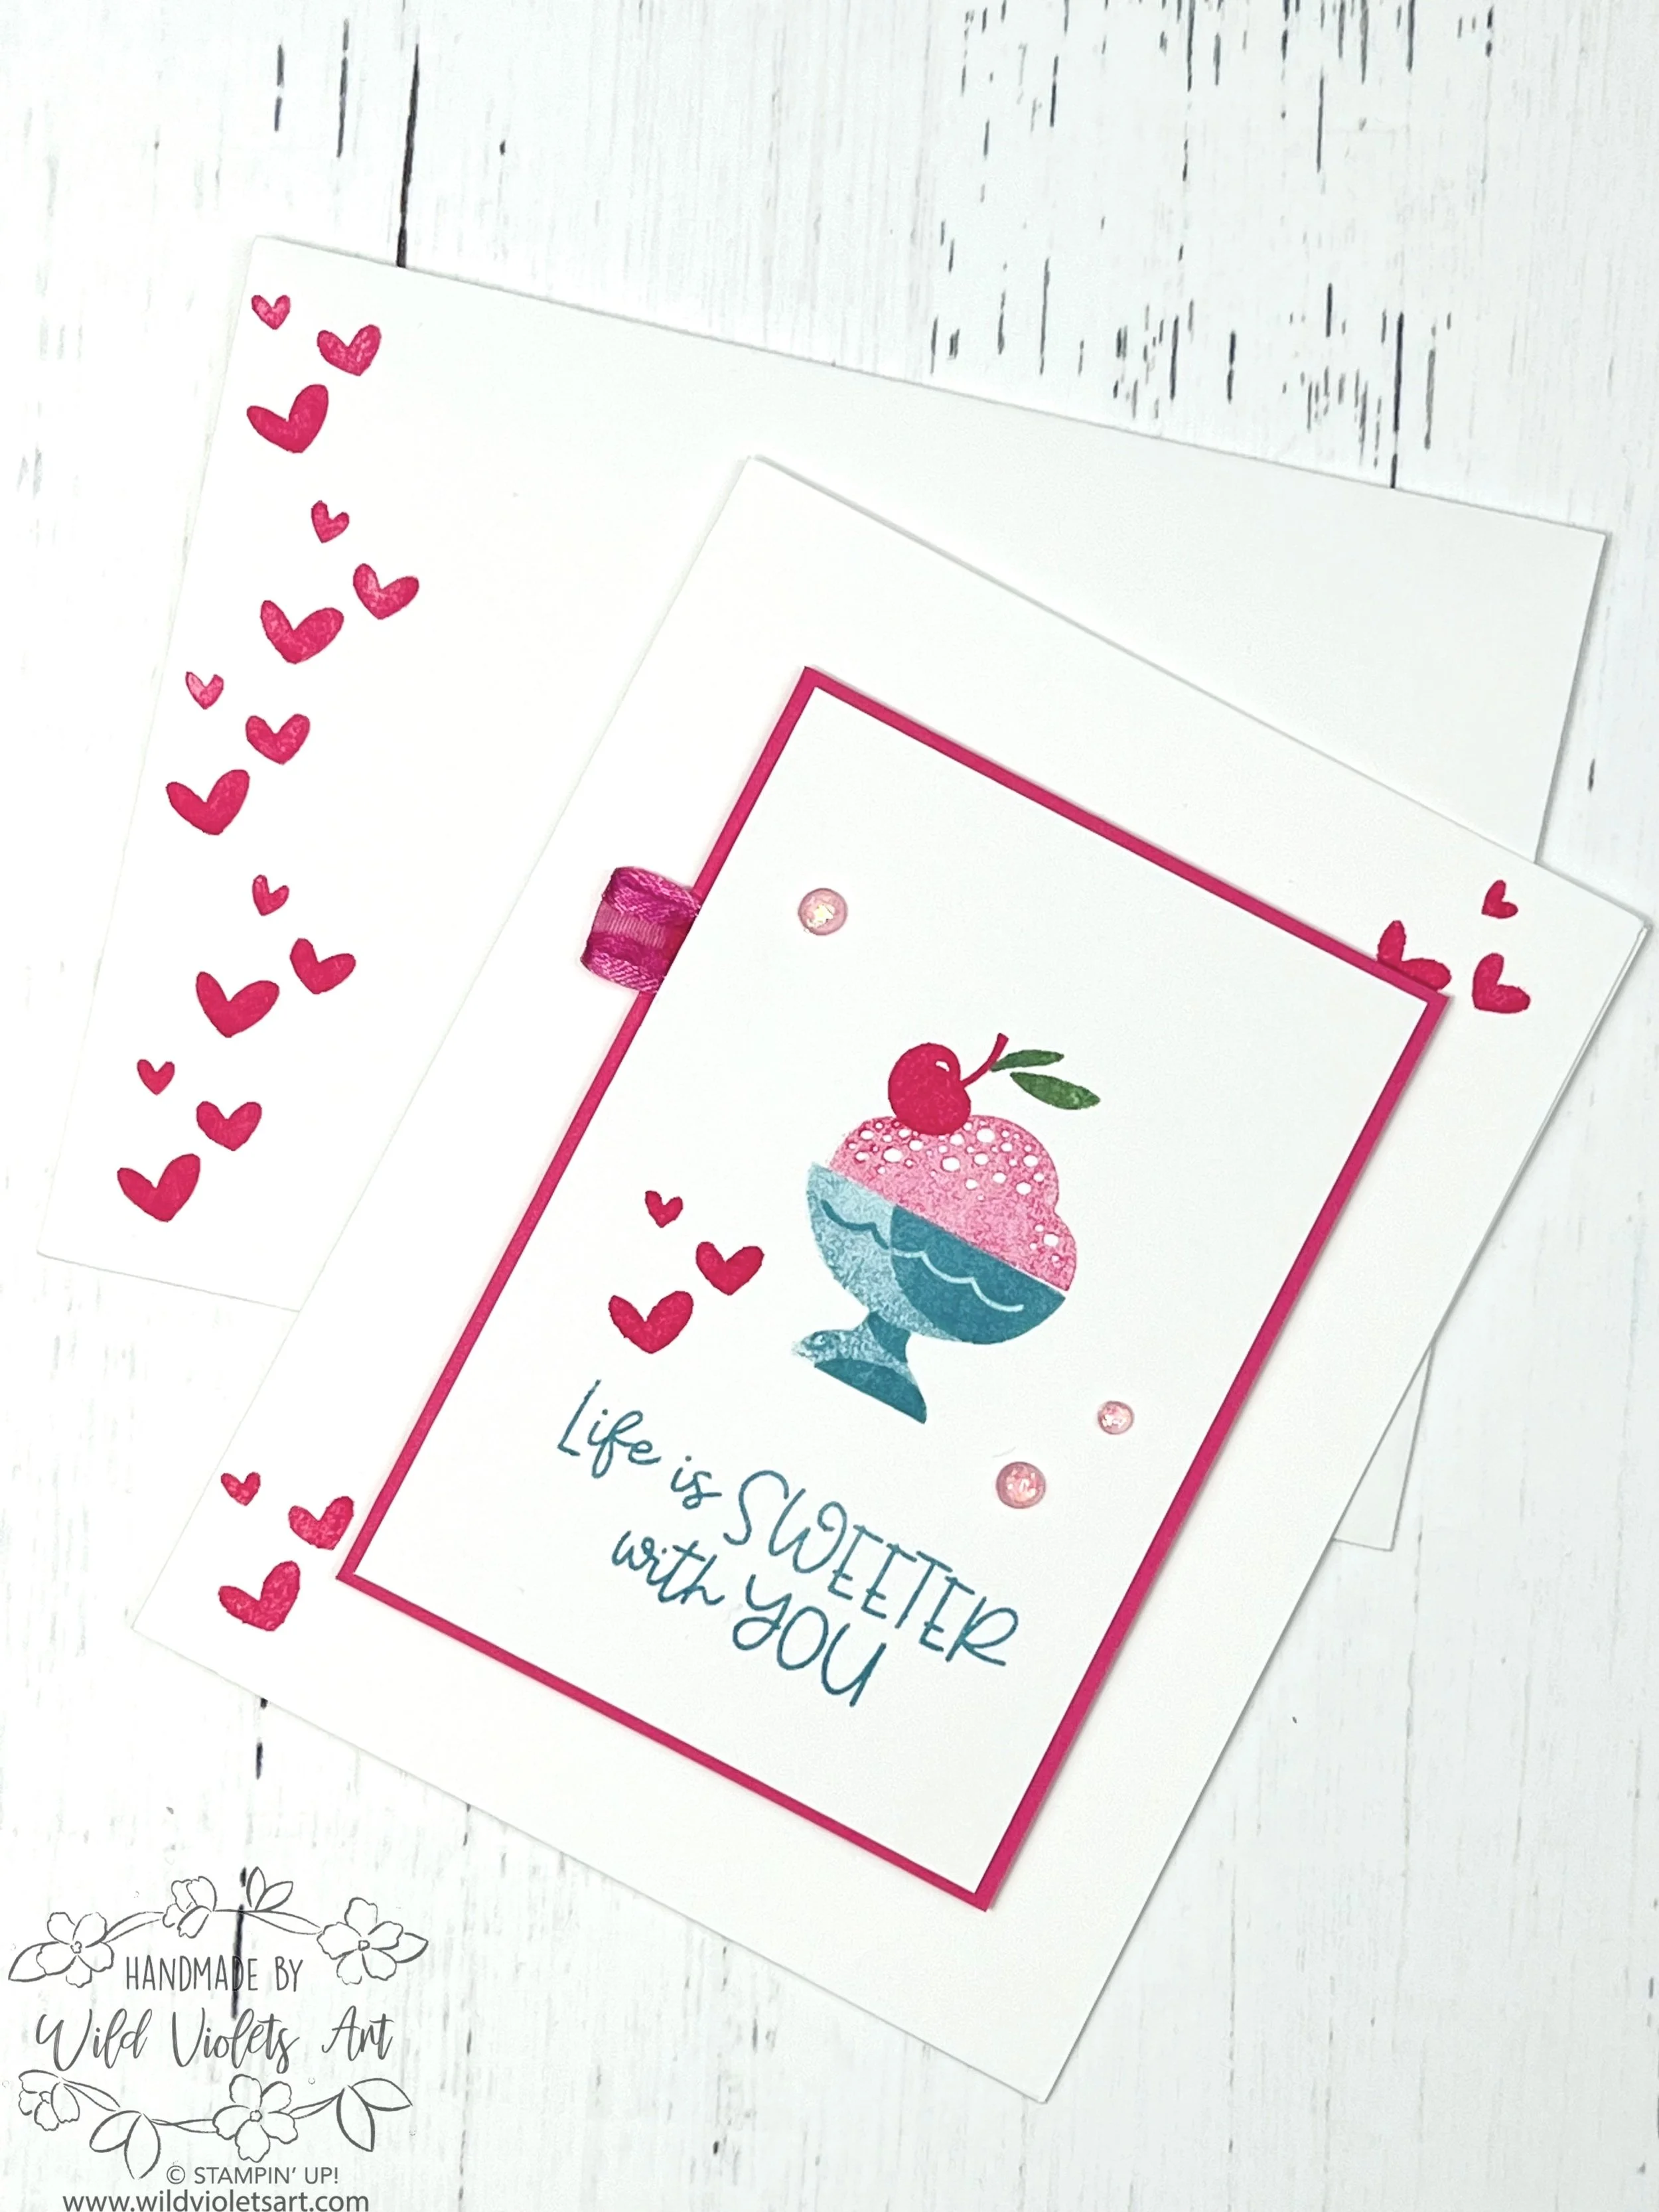
Using the same elements as above, I added a couple of extra layers by using a 2-7/8”x 4-1/8” piece of Basic White CS for my images, layered over a 3”x4-1/4” layer of Polished Pink CS. I used a 2” piece of Polished Pink 3/8” Open Weave Ribbon, tucked between the layers before gluing them together. For this image, I used Mint Macaron for the cherry leaf.
On the A2 card base, I used the heart stamp to stamp the lower left and upper right before popping up the layer using Stampin’ Dimensionals. For my envelop, I stamped the heart all the way up the left side, then added the embellishment to the card front.

This cute card I first stamped hearts all over the card base using the Polished Pink ink, then added a 3”x4-1/4” piece of the new Country Gingham 6”x6” DSP to the card base in the upper left hand corner, then moved my popped up layer to the lower right hand corner.
If I stagger my pieces like this, I try to make sure the two edge distances match in distance on the top left, then again on the right hand side. As you can see from my card, the top, left and right side all have the approximate same distance from the edge of the card base.

I again added a little ribbon flag to the top left of my layers, but added 5 little opal rounds. To make this card even more avid, I could have added an embossed layer, but I am trying to keep the cards simple and sweet for beginners to see how easy it is to take their cards to the next level.
The final touch is the envelope. When working with 6”x6” cardstock, I try to use smaller pieces on my card base so I have at least 6”x2-1/4” to cover my envelope flap, that way I can get 1 card completed with one 6”x6” piece.
