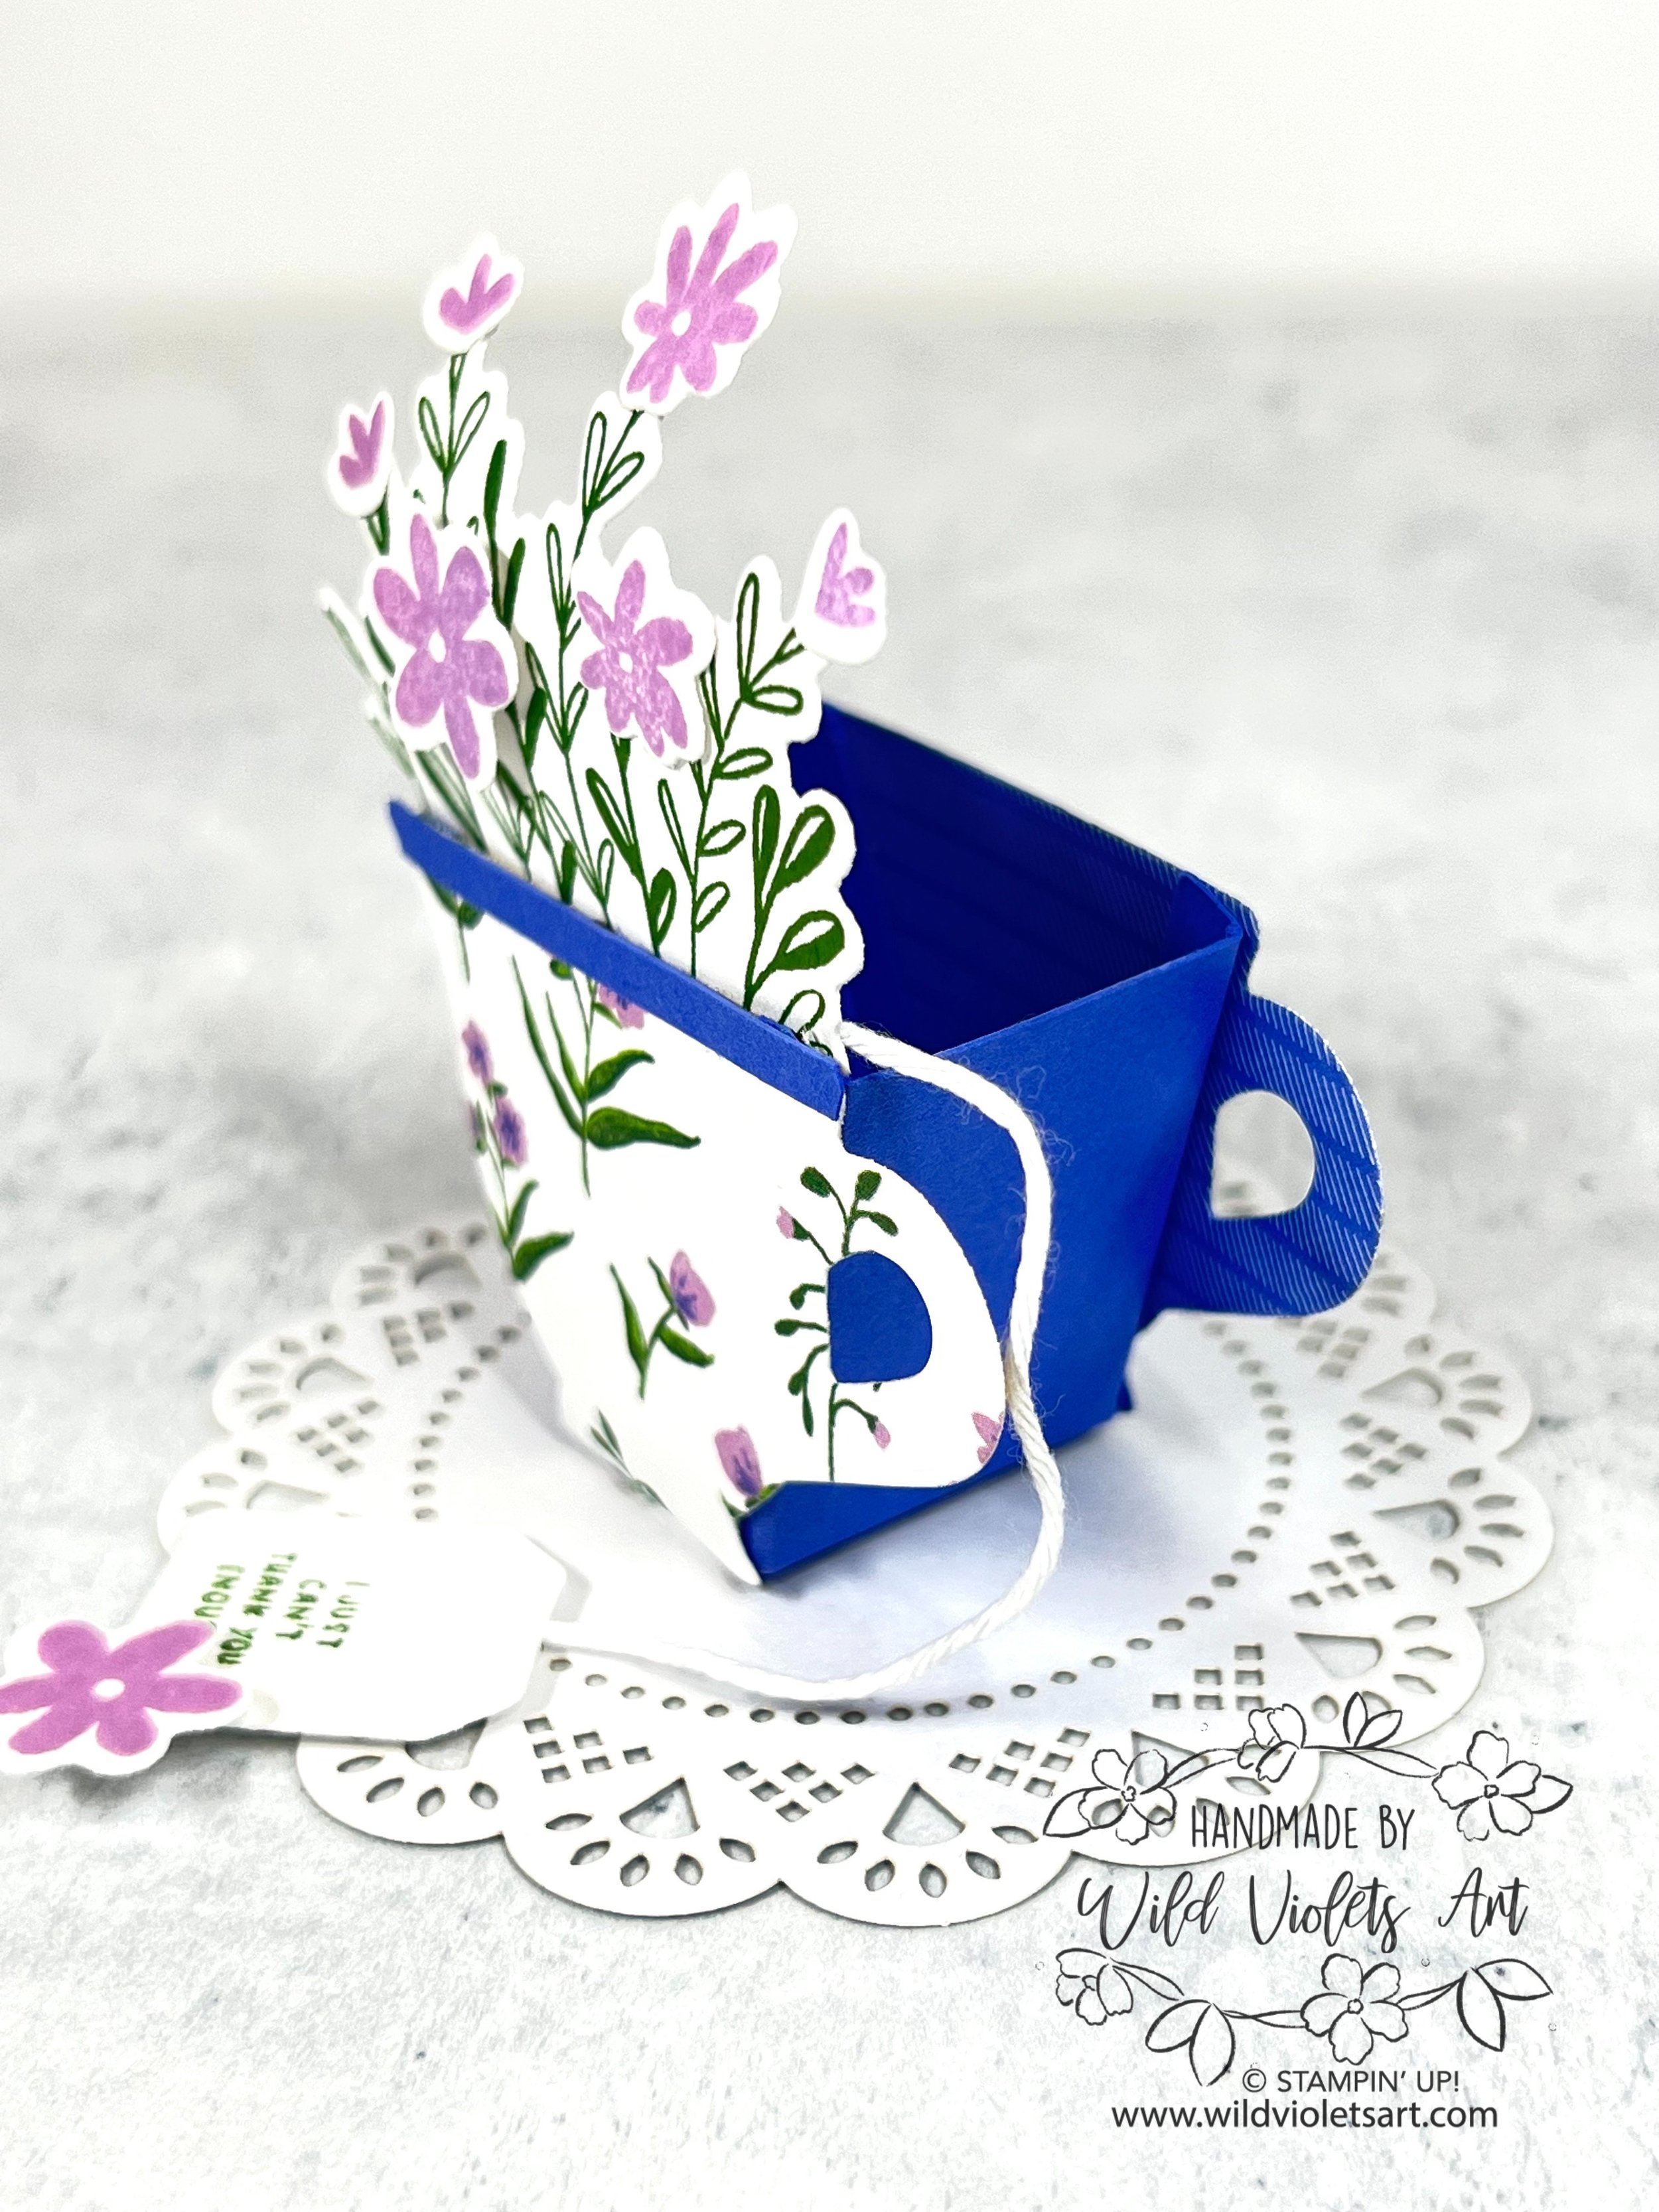
Tea Boutique Suite Collection

How sweet is this little cup I provided to my May stamp class attendees! I put a Lindt chocolate in each one and each cup was placed on the table at their work station.
Each month I come up with a little treat holder and this cup has got to be one of my all time favorites and I was able to share with my customers to versatility of the Tea Boutique Suite Collection!
I CASE’d this cute cup from Nat Eastop, then added my twist to it.

To make these tea cups, I used a 4”x1-1/2” piece of Orchid Oasis, scored at 1/4” along both long sides, and at 1-1/2” from each end. Use your Bone Folder to fold at each score line, then clip where shown on the image shown.

I used one of the Tea Boutique 6”x6” DSP sheets and one of the 2022-24 In Color 6”x6” Assorted DSP sheets, both with Orchid Oasis in them. One of the nice things about the DSP is that you can cut multiple sheets at a time, so I either fold it over or add separate layers, depending what I want my 2nd layer to be. I used the plain teacup die to cut out the two cups. One for the front and a different one for the back of the cup. You can make them all the same if that is the look you want.

To adhere the cups, I used a narrow tear & tape that I got from my local craft store. If you only have what Stampin’ Up! supplies, you will need to cut off excess as it is a little too wide for the fold. After placing the tape, I lined up my cups and placed them in the middle, making sure the cup’s rounded bottom goes past the fold line. The reason I do this is because I add two Stampin’ Dimentionals on the bottom of the cup to adhere it to the Heart & Home Doily (turned upside down so it is white). I then placed the cup in the middle of doily.


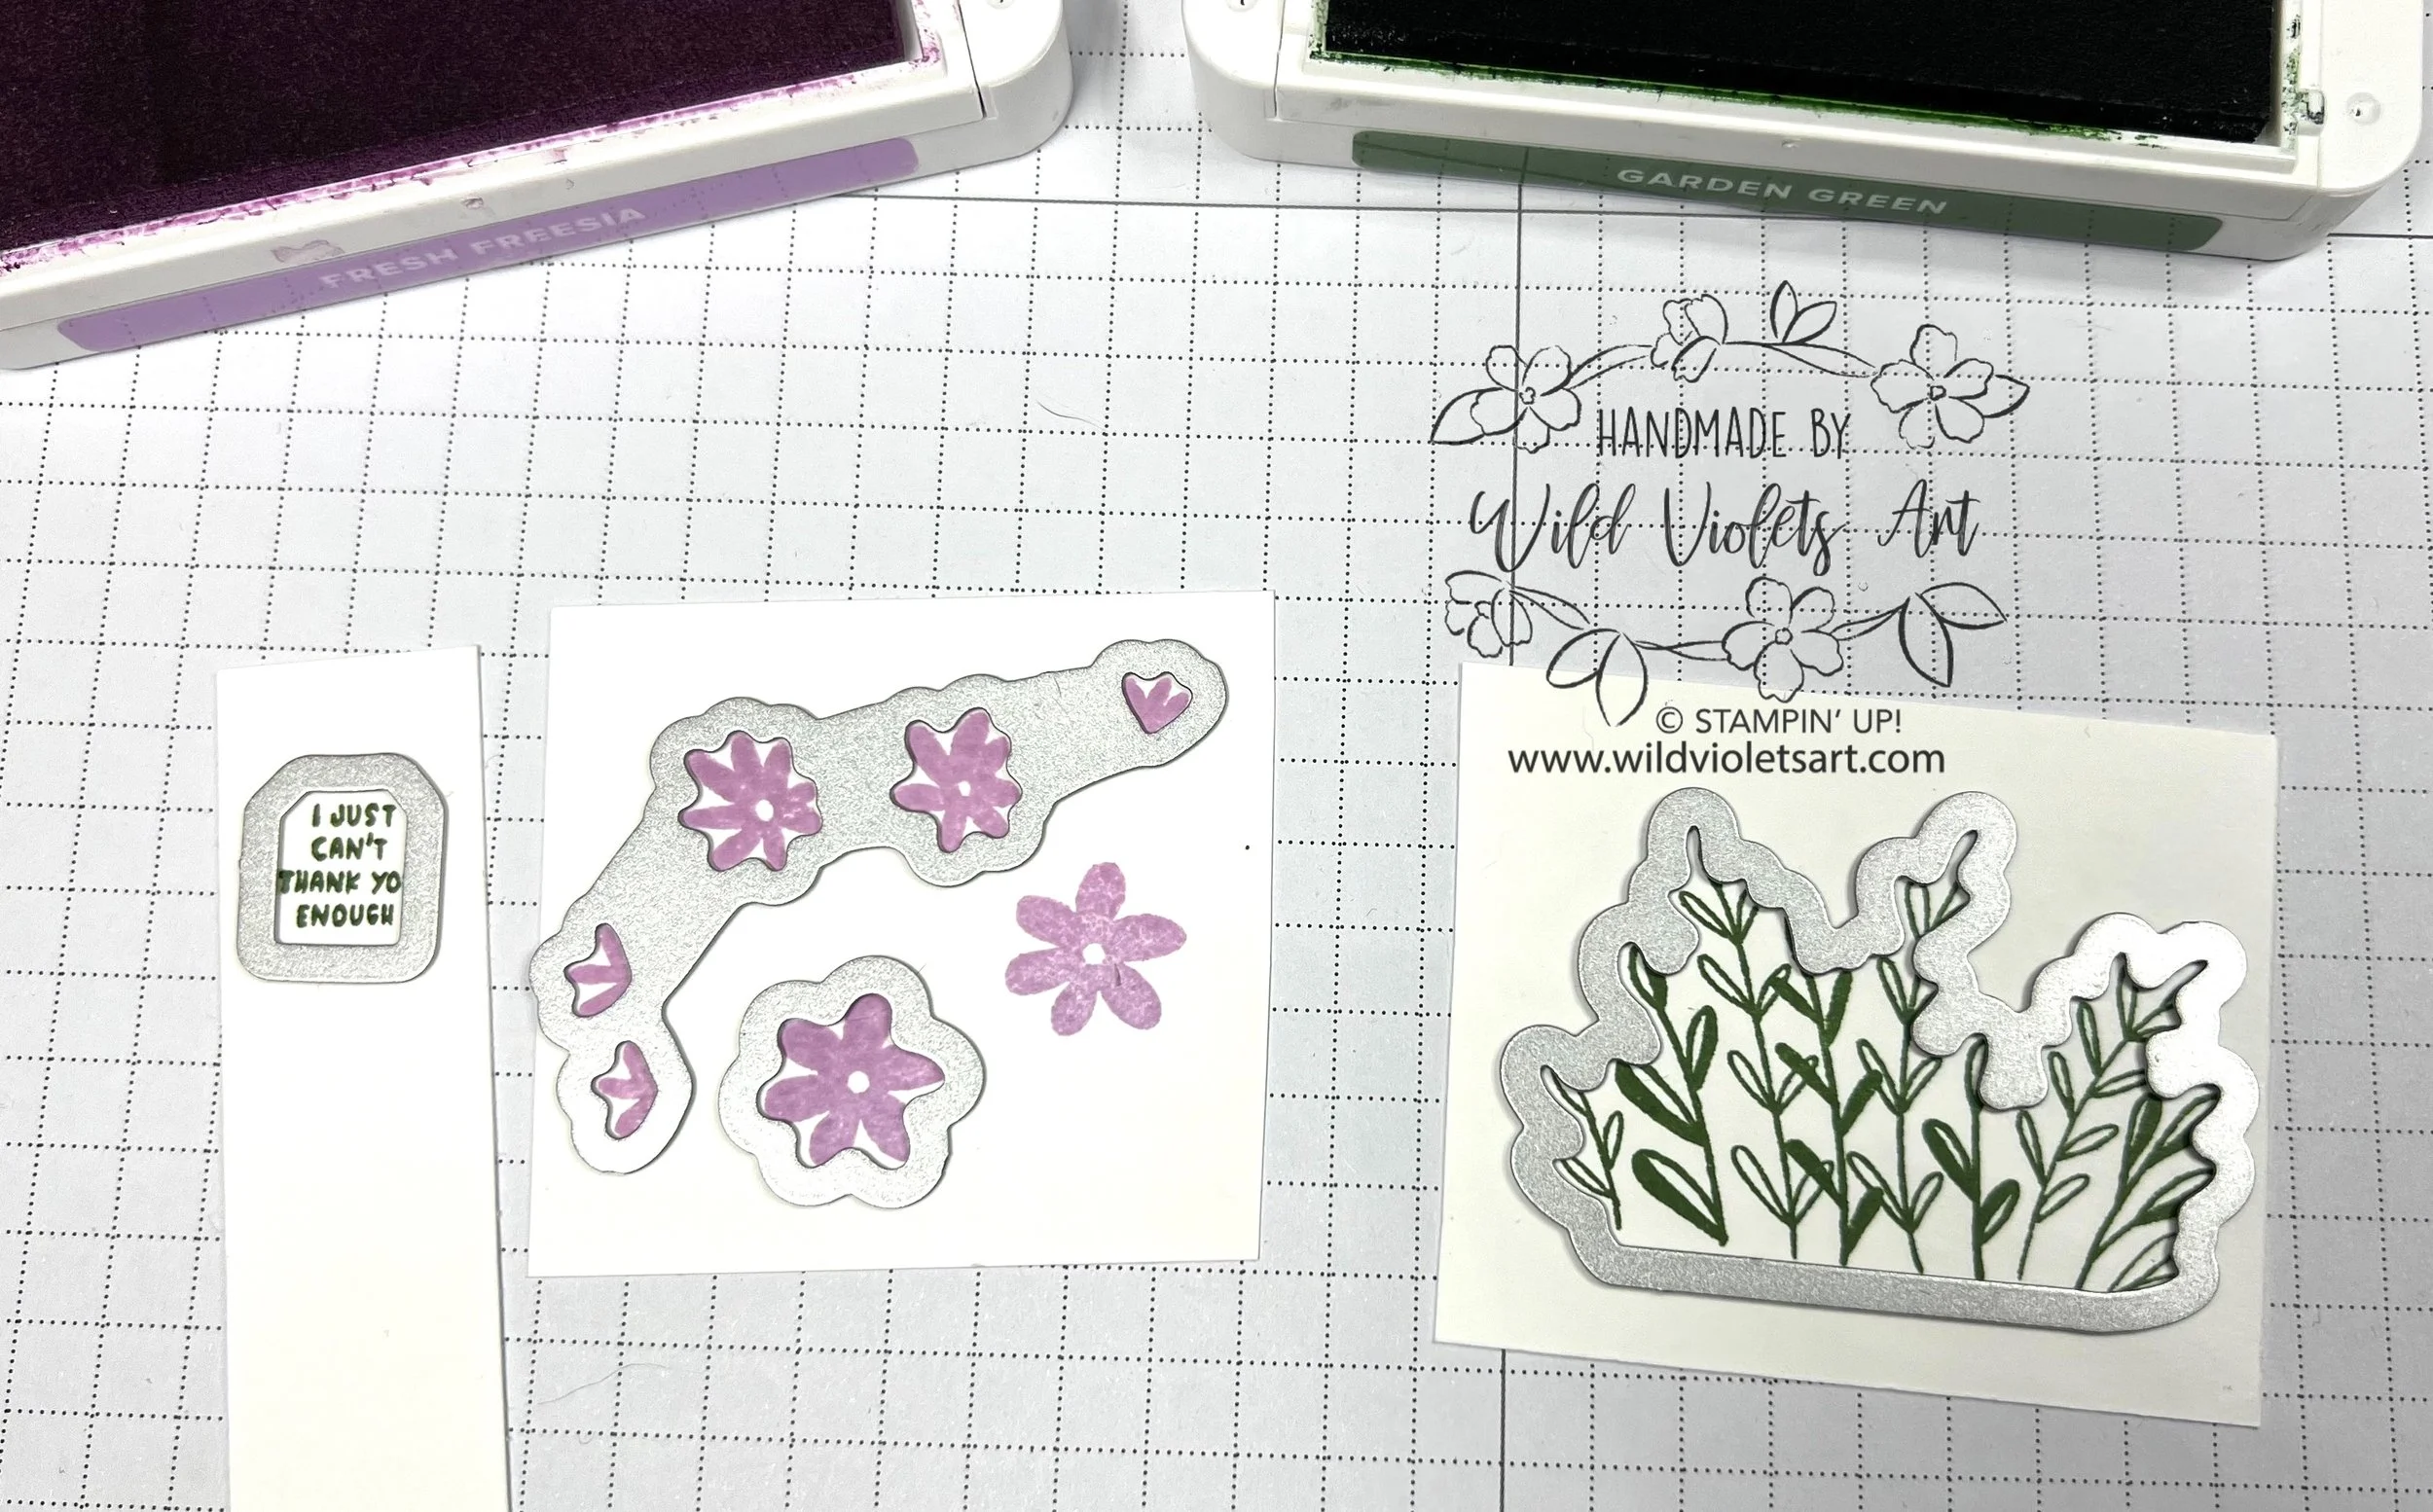
Once my teacup is assembled, I stamped the flowers (the spray and two bigger blooms) in Fresh Freesia ink and the sprigs in Garden Green ink on Basic White CS. I also stamped the sentiment on Basic White CS. You can die cut them all at the same time as Stampin’ Up! provides more than one larger bloom die (sweet folks)! I then added the blooms to the sprigs per the below image, using Glue Dots for the little blooms and the biggest bloom is popped up on Stampin’ Dimensionals. You can use the itty bitty tea tag or bigger tea tag for your sentiment.


I glued the foliage to the inside front teacup. I then used a scrap of Orchid Oasis CS to add more definition to the teacup rim. I adhered one end of the White Bakers Twine to the inside rim, and the other end to the tag. I popped up the tag on the doily so it all stays in place.
I hope you enjoy this sweet little cup of love and share it with your friends. Reach out if anything is not clear.